Confession time. I rarely make my own tomato sauce – or 'gravy' as us East Coast Italians call it – because it takes time to develop the deep, rich flavor that is its signature.
When I was a kid, my grandmothers made gravy nearly every Sunday, to go with the 'macaroni' we were having at that week's family gathering. When Amy asked for the Tortora tomato sauce recipe, I finally put it down on paper. In the process, I discovered many family variations: My brother adds grated carrot for sweetness. My Dad pours in some red wine. My mom tosses in a pinch of thyme and maybe a dash of sugar. My Grammy Marie always spiced it up with lots of red pepper.
The one component no one ever changes is what makes this gravy special. The tomato sauce simmers for hours with browned Italian sausage links and homemade meatballs. For special occasions such as Christmas, browned beef short ribs and brachiole (thin slices of beef rolled with parmesan cheese, parsley and basil, and tied with kitchen twine) are added.
Prefer chicken? Do what my Grandma Lucy sometimes did: Brown some chicken breasts and thighs and add them to the sauce instead of meatballs and sausage.
Vegetarian? Simply skip the meat.
If you happen to overdue it on one of the spices, as I may or may not have done recently with the red pepper flakes, fear not! Just toss in another can of tomatoes (crushed, diced or sauce) to dilute the strong flavor. You will be rewarded with extra gravy to use for making lasagna or another meal.
Finally, a warning: This recipe makes A LOT of tomato sauce. I use a 22 quart pot. This ensures plenty of room for the meatballs and sausage. If you don't have a pot this large, cut the recipe in half.
My recommendation? Buy or borrow a giant pot, invite your friends and family to dinner and make room in your freezer.
Mangia! Mangia!
Andrea
Sunday Gravy
1 or 2 tablespoons olive oil to cover the bottom of a large pot
About 2 cups diced yellow or white onion
3 to 5 minced garlic gloves
1 tablespoon dried oregano
1 tablespoon dried basil
1 tablespoon dried parsley
1/2 to 1 teaspoon red pepper flakes
1 to 2 teaspoons garlic powder
1 teaspoon salt
1 teaspoon pepper
2 (6 ounce) cans of tomato paste
3 (28 ounce) cans of crushed tomatoes
2 (14.5 ounce) cans of diced tomatoes
1 (14.5 ounce) can of unseasoned tomato sauce
1 (8 ounce) can of unseasoned tomato sauce
1 cup dry red wine, optional
12 or more large cooked meatballs, optional
1 or 2 pounds of browned or baked Italian sausage links, optional
Warm oil in bottom of pot. Add onion and garlic and cook until onion is translucent. Add in spices and salt and pepper and cook until golden, about 1 to 2 minutes. Add tomato paste and stir, cooking until mixture is caramelized. Taking the time to brown the aromatics gives the gravy a richer flavor.
Stir in all cans of tomatoes and tomato sauce. (Note: You can vary the types of tomatoes you use. For example, if you like a chunkier sauce, substitute diced tomatoes for the canned tomato sauce.) Add red wine, if using.
Bring gravy to a boil, stirring occasionally. Lower heat and let simmer for about 20 minutes, stirring a few times. Add meatballs, sausage, etc., and continue to simmer on lowest setting for at least 1 hour but preferably more (you can simmer it all day,) stirring occasionally to prevent sauce from burning in the bottom of the pot.
I recommend tasting the gravy here and there. It's OK to add in more spices as the sauce simmers to achieve the flavor you prefer.
Serve hot with your favorite pasta.
Showing posts sorted by relevance for query gravy. Sort by date Show all posts
Wednesday, April 15, 2015
Sunday Gravy (Tortora family tomato sauce)
Labels:
basil,
brachiole,
chicken,
crushed tomatoes,
diced tomatoes,
garlic,
Italian sausage,
meatballs,
onion,
oregano,
parsley,
red pepper flakes,
red wine,
short ribs,
Sunday gravy,
tomato paste,
tomato sauce,
vegetarian
Tuesday, November 9, 2010
The Bird
For the past few years, the husband has been in charge of deep-frying the turkey on Thanksgiving. He gets a kick out of doing it and, bonus, it's delicious. Last year, however, our trusty turkey fryer sprung a leak. So, for Thanksgiving 2010, I'll be roasting my bird in the oven.
Since I have a small kitchen, the oven gets pretty darn crowded on Thanksgiving. In attempts to move the turkey along more quickly, I'm going to roast a turkey breast instead of the whole darn thing. So, below you'll find my recipe for roast turkey breast. But it all starts with the brine.
Let's be honest, turkey tends to be dry. In order to add moisture, try brining it first. For me, turkey is just a vehicle for cranberry sauce, so I was dubious that a brine would really help. Well, you can call me a monkey's uncle, 'cause this brine was the business. It will turn your turkey into juicy, delcious awesomeness. Trust me. And you can use the Turkey Brine recipe wether you're roasting the whole bird or just the breast. (One additional note about brining: according to the good folks at America's Test Kitchen, "Do not brine kosher poultry, frozen injected turkeys (such as Butterball), or enhanced pork." These are already treated with salt, so brining will make them taste nasty.)
After you roast your turkey, it's gravy time. I must admit, I was terrified to make my own gravy. I'm not sure why it scared me so much, I knew the husband wouldn't leave me if there was a lump or two in my sauce, but I did NOT want to try it. Well, again, I was pleasantly surprised. First of all, it wasn't hard! Second of all, it tasted delicious! I'm still going to keep a packet of Knorr gravy mix on hand this Thanksgiving, but it will only be in case I run out of the real stuff.
Without further ado...
Turkey Brine
Adapted from epicurious.com
1/4 cup salt
1/4 cup honey
2 bay leaves
2 teaspoons peppercorns
2 teaspoons allspice berries
1 head garlic, halved (don't worry about removing the paper)
3 quarts water (approximately)
In a very large bowl or pot, combine salt, honey, bay leaves, peppercorns, allspice berries, and garlic. Add a few cups of water and stir the brine to start dissolving the salt and honey. (You want to stir the brine now because it will be difficult to stir once you add the turkey.)
Add the turkey and then add water to cover. Cover the bowl with plastic wrap and refrigerate for 4-6 hours.
Once the turkey has been in it's brine for 4-6 hours, remove it from the liquid and rinse it well under running water. Then, dry your turkey thoroughly with paper towels. Now you're ready for the roasting steps!
Roast Turkey Breast
Adapted from The America's Test Kitchen Family Cookbook
Serves: 8-10
1 whole turkey breast, about 5-6 pounds, preferably brined
4 tablespoons butter, softened
1/4 teaspoon salt
1/4 teaspoon pepper
2 teaspoons poultry seasoning (I use Penzeys Poultry Seasoning), plus extra for sprinkling
1 onion, peeled and cut into 1" chunks
1 carrot, peeled and cut into 1" chunks
1 rib celery, peeled and cut into 1" chunks
1 cup white wine
Preheat the oven to 425 degrees. Set a roasting rack inside a large roasting pan.
Mix 3 tablespoons softened butter with salt, pepper, and poultry seasoning. Using your fingers, separate the skin from the turkey breast, creating a sort of pocket between the skin and the breast. (I know this sounds gross, but it will help flavor your bird and crisp up the skin.) Rub the butter-seasoning mix all over the meat under the skin. Melt the remaining 1 tablespoon butter and brush it over the breast. Sprinkle with additional salt, pepper, and poultry seasoning.

Place the turkey on the roasting rack in the prepared pan. Place onion, carrot and celery in the bottom of the roasting pan. Pour 1/2 cup of the wine in the bottom of the pan as well. (This will help prevent the vegetables and turkey drippings from burning.) Place the pan in the oven and roast for 30 minutes.
Lower the heat to 325 degrees. Continue to roast the turkey until it registers 160 to 165 degrees on an instant-read thermometer, about 1 to 1 1/2 hours longer. ***Keep an eye on the turkey while it is roasting. If the vegetables on the bottom of the pan look like they're burning, add the extra 1/2 cup wine. If they STILL look like they're burning, add water, 1/4 cup at a time as needed, to prevent burning. Also, if the breast looks like it's getting too brown, tent it with aluminum foil.***
Transfer the turkey to a carving board and let rest for 15 minutes before carving. While the turkey is resting, move on to the gravy!
Quick Turkey Gravy
Adapted from Joy of Cooking
Serves: 8-10
1/2 cup white wine
4 cups chicken broth
1/4 cup water
3 tablespoons cornstarch
Salt and pepper to taste
Remove the onion, carrot, and celery from the roasting pan. Using a spoon, skim any fat from the pan drippings and discard it. Place the roasting pan over two burners turned to medium heat.
Add 1/2 cup wine to the pan and whisk about 1 minute to begin scraping up the browned bits from the bottom of the pan. Whisk in 4 cups chicken broth and bring to a simmer. Continue whisking until all the browned bits are incorporated into your gravy. Reduce heat and simmer slowly for about 5 minutes.
Meanwhile, whisk together 1/4 cup water and 3 tablespoons cornstarch to form a smooth paste. Whisking constantly, gradually pour the cornstarch mixture into the simmering broth. Cook for 1 more minute and season to taste with salt and pepper. Strain the gravy (if you're feeling ambitions), and serve along side the turkey, and the potatoes, and the stuffing, and the...well, you get my drift.
***Have a turkey conundrum? Leave a comment or e-mail me at hotdinnerhappyhome [at] gmail [dot] com. Even if I don't know the answer, I'll make up something that sounds good.
Since I have a small kitchen, the oven gets pretty darn crowded on Thanksgiving. In attempts to move the turkey along more quickly, I'm going to roast a turkey breast instead of the whole darn thing. So, below you'll find my recipe for roast turkey breast. But it all starts with the brine.
Let's be honest, turkey tends to be dry. In order to add moisture, try brining it first. For me, turkey is just a vehicle for cranberry sauce, so I was dubious that a brine would really help. Well, you can call me a monkey's uncle, 'cause this brine was the business. It will turn your turkey into juicy, delcious awesomeness. Trust me. And you can use the Turkey Brine recipe wether you're roasting the whole bird or just the breast. (One additional note about brining: according to the good folks at America's Test Kitchen, "Do not brine kosher poultry, frozen injected turkeys (such as Butterball), or enhanced pork." These are already treated with salt, so brining will make them taste nasty.)
After you roast your turkey, it's gravy time. I must admit, I was terrified to make my own gravy. I'm not sure why it scared me so much, I knew the husband wouldn't leave me if there was a lump or two in my sauce, but I did NOT want to try it. Well, again, I was pleasantly surprised. First of all, it wasn't hard! Second of all, it tasted delicious! I'm still going to keep a packet of Knorr gravy mix on hand this Thanksgiving, but it will only be in case I run out of the real stuff.
Without further ado...
Turkey Brine
Adapted from epicurious.com
1/4 cup salt
1/4 cup honey
2 bay leaves
2 teaspoons peppercorns
2 teaspoons allspice berries
1 head garlic, halved (don't worry about removing the paper)
3 quarts water (approximately)
In a very large bowl or pot, combine salt, honey, bay leaves, peppercorns, allspice berries, and garlic. Add a few cups of water and stir the brine to start dissolving the salt and honey. (You want to stir the brine now because it will be difficult to stir once you add the turkey.)
Add the turkey and then add water to cover. Cover the bowl with plastic wrap and refrigerate for 4-6 hours.
Once the turkey has been in it's brine for 4-6 hours, remove it from the liquid and rinse it well under running water. Then, dry your turkey thoroughly with paper towels. Now you're ready for the roasting steps!
Roast Turkey Breast
Adapted from The America's Test Kitchen Family Cookbook
Serves: 8-10
1 whole turkey breast, about 5-6 pounds, preferably brined
4 tablespoons butter, softened
1/4 teaspoon salt
1/4 teaspoon pepper
2 teaspoons poultry seasoning (I use Penzeys Poultry Seasoning), plus extra for sprinkling
1 onion, peeled and cut into 1" chunks
1 carrot, peeled and cut into 1" chunks
1 rib celery, peeled and cut into 1" chunks
1 cup white wine
Preheat the oven to 425 degrees. Set a roasting rack inside a large roasting pan.
Mix 3 tablespoons softened butter with salt, pepper, and poultry seasoning. Using your fingers, separate the skin from the turkey breast, creating a sort of pocket between the skin and the breast. (I know this sounds gross, but it will help flavor your bird and crisp up the skin.) Rub the butter-seasoning mix all over the meat under the skin. Melt the remaining 1 tablespoon butter and brush it over the breast. Sprinkle with additional salt, pepper, and poultry seasoning.
Place the turkey on the roasting rack in the prepared pan. Place onion, carrot and celery in the bottom of the roasting pan. Pour 1/2 cup of the wine in the bottom of the pan as well. (This will help prevent the vegetables and turkey drippings from burning.) Place the pan in the oven and roast for 30 minutes.
Transfer the turkey to a carving board and let rest for 15 minutes before carving. While the turkey is resting, move on to the gravy!
Quick Turkey Gravy
Adapted from Joy of Cooking
Serves: 8-10
1/2 cup white wine
4 cups chicken broth
1/4 cup water
3 tablespoons cornstarch
Salt and pepper to taste
Remove the onion, carrot, and celery from the roasting pan. Using a spoon, skim any fat from the pan drippings and discard it. Place the roasting pan over two burners turned to medium heat.
Add 1/2 cup wine to the pan and whisk about 1 minute to begin scraping up the browned bits from the bottom of the pan. Whisk in 4 cups chicken broth and bring to a simmer. Continue whisking until all the browned bits are incorporated into your gravy. Reduce heat and simmer slowly for about 5 minutes.
Meanwhile, whisk together 1/4 cup water and 3 tablespoons cornstarch to form a smooth paste. Whisking constantly, gradually pour the cornstarch mixture into the simmering broth. Cook for 1 more minute and season to taste with salt and pepper. Strain the gravy (if you're feeling ambitions), and serve along side the turkey, and the potatoes, and the stuffing, and the...well, you get my drift.
***Have a turkey conundrum? Leave a comment or e-mail me at hotdinnerhappyhome [at] gmail [dot] com. Even if I don't know the answer, I'll make up something that sounds good.
Friday, October 21, 2016
Pork Loin Roast with Apple Gravy
Pork and apples are a perfect pair. I mean, if there's a Brady Bunch episode about something, it must be good. But there are a couple aspects of today's recipe that take "pork chops and applesauce" to the next level.
First we brown the seasoned pork loin roast to create a tasty crust. Then we nestle the pork into sauteed vegetables and apples so all the flavors meld while they cook in a hot oven. Now—here's the key to juicy, tender pork—use your instant thermometer to check the temperature and pull that roast out of the oven when it reaches 135-140 degrees. It will continue to cook while the meat rests. Finally, we create a rich-but-simple apple pan sauce. You'll be going back for seconds. Probably thirds.
Pork Loin Roast with Apple Gravy is the kind of hot dinner that would make Peter Brady proud.
Let's get cooking!
Erin
Pork Loin Roast with Apple Gravy
Adapted from The Food Network
2 pounds pork loin roast
Salt and pepper
3/4 teaspoon Fines Herbes*, divided
2 tablespoons olive oil
5 carrots, cut into 1" chunks
3 ribs of celery, sliced 1/2" thick
1 onion, peeled and sliced 1/4" thick
2 apples, peeled, cored, and cut 1/2" thick
1 tablespoon apple cider vinegar
1 cup apple juice or cider
1 tablespoon Dijon mustard or grainy mustard
1 tablespoon butter
Preheat oven to 400 degrees.
Season pork generously on all sides with salt and pepper and half of the Fines Herbes. Heat oil in a large skillet over medium-high. Add pork and cook until browned on all sides, about 4 minutes per side. Remove pork to a plate and set aside.
Add carrots, celery, and onion to now-empty skillet. Season with salt and pepper and remaining Fines Herbes. Cook, stirring occasionally, until vegetables are beginning to soften, about 8 minutes. Stir in apples.
Move veggies and apples to the side and nestle pork in the center. Place skillet in the oven and cook until pork reaches an internal temperature of 135-140 degrees, about 45-50 minutes. Transfer pork, vegetables, and apples to a plate and tent with foil. Allow pork to rest until it reaches an internal temperature of 145-150 degrees.
Meanwhile, return skillet with cooking juices to high heat. (TIP: Put an oven mitt over the handle of the skillet so you don't accidentally grab the hot handle. I learned this the hard way, and it hurts.) Whisk in vinegar, scraping the bottom of the pan to incorporate any browned bits, and allow to cook until it's reduced by half, about 3 minutes. Whisk in apple juice and allow to cook until reduced by half again, another 7 minutes. Turn off the heat and whisk in mustard and butter.
Serve sliced pork with apples, vegetables, and apple gravy.
*Don't have Fines Herbes? I'm a big fan, and this might be a perfect excuse to try something new! But if you don't feel like it or if you've gotta get dinner on the table stat, just skip it or try substituting tarragon or thyme. Honestly, I often sniff around (literally) in my spice cupboard and see what smells good. Make it your own!
First we brown the seasoned pork loin roast to create a tasty crust. Then we nestle the pork into sauteed vegetables and apples so all the flavors meld while they cook in a hot oven. Now—here's the key to juicy, tender pork—use your instant thermometer to check the temperature and pull that roast out of the oven when it reaches 135-140 degrees. It will continue to cook while the meat rests. Finally, we create a rich-but-simple apple pan sauce. You'll be going back for seconds. Probably thirds.
Pork Loin Roast with Apple Gravy is the kind of hot dinner that would make Peter Brady proud.
Let's get cooking!
Erin
Pork Loin Roast with Apple Gravy
Adapted from The Food Network
2 pounds pork loin roast
Salt and pepper
3/4 teaspoon Fines Herbes*, divided
2 tablespoons olive oil
5 carrots, cut into 1" chunks
3 ribs of celery, sliced 1/2" thick
1 onion, peeled and sliced 1/4" thick
2 apples, peeled, cored, and cut 1/2" thick
1 tablespoon apple cider vinegar
1 cup apple juice or cider
1 tablespoon Dijon mustard or grainy mustard
1 tablespoon butter
Preheat oven to 400 degrees.
Season pork generously on all sides with salt and pepper and half of the Fines Herbes. Heat oil in a large skillet over medium-high. Add pork and cook until browned on all sides, about 4 minutes per side. Remove pork to a plate and set aside.
Add carrots, celery, and onion to now-empty skillet. Season with salt and pepper and remaining Fines Herbes. Cook, stirring occasionally, until vegetables are beginning to soften, about 8 minutes. Stir in apples.
Move veggies and apples to the side and nestle pork in the center. Place skillet in the oven and cook until pork reaches an internal temperature of 135-140 degrees, about 45-50 minutes. Transfer pork, vegetables, and apples to a plate and tent with foil. Allow pork to rest until it reaches an internal temperature of 145-150 degrees.
Meanwhile, return skillet with cooking juices to high heat. (TIP: Put an oven mitt over the handle of the skillet so you don't accidentally grab the hot handle. I learned this the hard way, and it hurts.) Whisk in vinegar, scraping the bottom of the pan to incorporate any browned bits, and allow to cook until it's reduced by half, about 3 minutes. Whisk in apple juice and allow to cook until reduced by half again, another 7 minutes. Turn off the heat and whisk in mustard and butter.
Serve sliced pork with apples, vegetables, and apple gravy.
*Don't have Fines Herbes? I'm a big fan, and this might be a perfect excuse to try something new! But if you don't feel like it or if you've gotta get dinner on the table stat, just skip it or try substituting tarragon or thyme. Honestly, I often sniff around (literally) in my spice cupboard and see what smells good. Make it your own!
Labels:
apple juice,
apples,
carrots,
dinner,
Fines Herbes,
main course,
pork,
pork loin roast
Friday, December 2, 2011
Pot Roast with Mushroom Gravy
Last year around this time I described an illness that had settled over my house: Christmas Disease. Recently, I started noticing the onset of the 2011 strain of Christmas Disease. It began when I was trying to sleep. Instead of counting sheep, I counted the shopping days left in December. I get nostalgic and misty-eyed when I see houses glowing with icicle lights and trees trimmed with tinsel. The butterflies in my belly can be attributed only to holiday excitement...or one too many Christmas cookies.
Since I'm practicallly bed-laden with my illness, tethered to the couch with re-runs of "A Christmas Story" on TBS, I can't be expected for much in the kitchen. So today I offer up another fabulously easy crockpot meal. This will bubble away on your counter while you deck the halls, croon carols, and cut-out cookies. And when you're ready for a piping hot dinner, it will nurish your soul as much as your body.
Enjoy...and happy holidays!
Pot Roast with Mushroom Gravy
Serves: 6-8
1 onion, peeled and cut into large wedges
3.5 pounds of your favorite "roast" cut of beef (May I suggest top loin roast or bottom round roast?)
8 ounces white mushrooms, halved
2 sprigs of rosemary
1 bay leaf
1 can cream of mushroom soup
Water
Salt and pepper to taste
In your crock pot, layer onions, roast, mushrooms, rosemary, and bay leaf. Pour cream of mushroom soup over everything. Fill the empty soup can with water and pour that over the top. Cook on low heat for 10-12 hours. Season to taste with salt and pepper.
Helpful tip: I place everything except the liquid ingredients in my crock pot before bed and store it in the fridge over night. Before work the next morning, all I had to do was dump the liquid ingredients in and turn on my slowcooker! That made it slightly less likely that I was late for work.
Side Dish Idea: Pot Roast with Mushroom Gravy pairs well with Thanksgiving Mashed Potatoes, another make-ahead wonder.
Friday, March 11, 2016
Happy Hot Dinner Anniversary, Amy and Andrea!
It has been one year since Amy and Andrea joined our virtual dinner party here at Hot Dinner Happy Home. I know I speak on behalf of all the HDHH readers when I say we've been thrilled to have these ladies at the table!
In celebration of their blog-iversary, I'm sharing my favorite recipes from both of these gals. Without further ado...
My favorite recipe from Amy has to be Spring on Toast. Crisp bread topped with tender asparagus, runny eggs, and creamy, tangy goat cheese. I might be a bit biased about this dish because I was lucky enough to share it with Amy when I lived in Charlotte last year. Spring in Charlotte is lovely, and I'm missing the southern sunshine as I sit here in the Seattle drizzle. I think it's time to add Spring on Toast to my menu!
My favorite recipe from Andrea is Homemade Tomato Sauce, a.k.a. Sunday Gravy. Here's a true confession: I'm a little bit jealous of Andrea's Italian heritage. Most of my ancestors hail from Sweden and Ireland. You don't often hear people hankering after lutefisk or boiled potatoes. I love that Andrea's grandmother made Sunday Gravy every week for family dinner and that her various family members each add a twist to the traditional recipe. It makes me want to create food memories with my kids. And this rich, hearty Sunday Gravy is the perfect place to start.
Thanks for cooking with me, ladies!
Erin
In celebration of their blog-iversary, I'm sharing my favorite recipes from both of these gals. Without further ado...
My favorite recipe from Amy has to be Spring on Toast. Crisp bread topped with tender asparagus, runny eggs, and creamy, tangy goat cheese. I might be a bit biased about this dish because I was lucky enough to share it with Amy when I lived in Charlotte last year. Spring in Charlotte is lovely, and I'm missing the southern sunshine as I sit here in the Seattle drizzle. I think it's time to add Spring on Toast to my menu!
My favorite recipe from Andrea is Homemade Tomato Sauce, a.k.a. Sunday Gravy. Here's a true confession: I'm a little bit jealous of Andrea's Italian heritage. Most of my ancestors hail from Sweden and Ireland. You don't often hear people hankering after lutefisk or boiled potatoes. I love that Andrea's grandmother made Sunday Gravy every week for family dinner and that her various family members each add a twist to the traditional recipe. It makes me want to create food memories with my kids. And this rich, hearty Sunday Gravy is the perfect place to start.
Thanks for cooking with me, ladies!
Erin
Labels:
Amy,
Andrea,
asparagus,
blog anniversary,
eggs,
homemade,
Italian,
spring,
Sunday gravy,
tomato sauce
Wednesday, May 13, 2015
Family Lasagna
If you've made our Sunday gravy and traditional Italian meatballs, then roll up your sleeves, because you are ready to tackle old-fashioned, Old World lasagna.
Fear not — if you mastered the tomato sauce and meatballs, you're practically Italian already!
I call this "family lasagna" for two reasons: It's more than enough to feed a crowd of relatives (or friends) and you can put everyone to work helping you make it. The process might seem a bit much, but I remember having lots of fun as a kid, sitting around the kitchen table with my parents, my siblings and sometimes my grandparents, chopping meatballs and sausage and mixing up the ricotta cheese filling before building the lasagna.
Yes, there are many short cuts, like using no-boil lasagna noodles or cooking ground beef with some Italian seasonings instead of making meatballs. But trust me. I've made lasagna the quick way numerous times. The final result just can't compare to the real thing.
Mangia! Mangia!
Andrea
Family Meat Lasagna
20 wavy lasagna noodles (usually 1 and 1/2 boxes)
1 tablespoon olive oil
2 (15 ounce) containers of ricotta cheese
5 cups shredded mozzarella cheese, divided
1 1/2 cups shredded parmesan cheese, divided
2 eggs
1 teaspoon salt
1 teaspoon pepper
6 cups or more of homemade tomato sauce
1 1/2 cups cooked meatballs, chopped
1 1/2 cups cooked Italian sausage links, chopped (mild, sweet or hot)
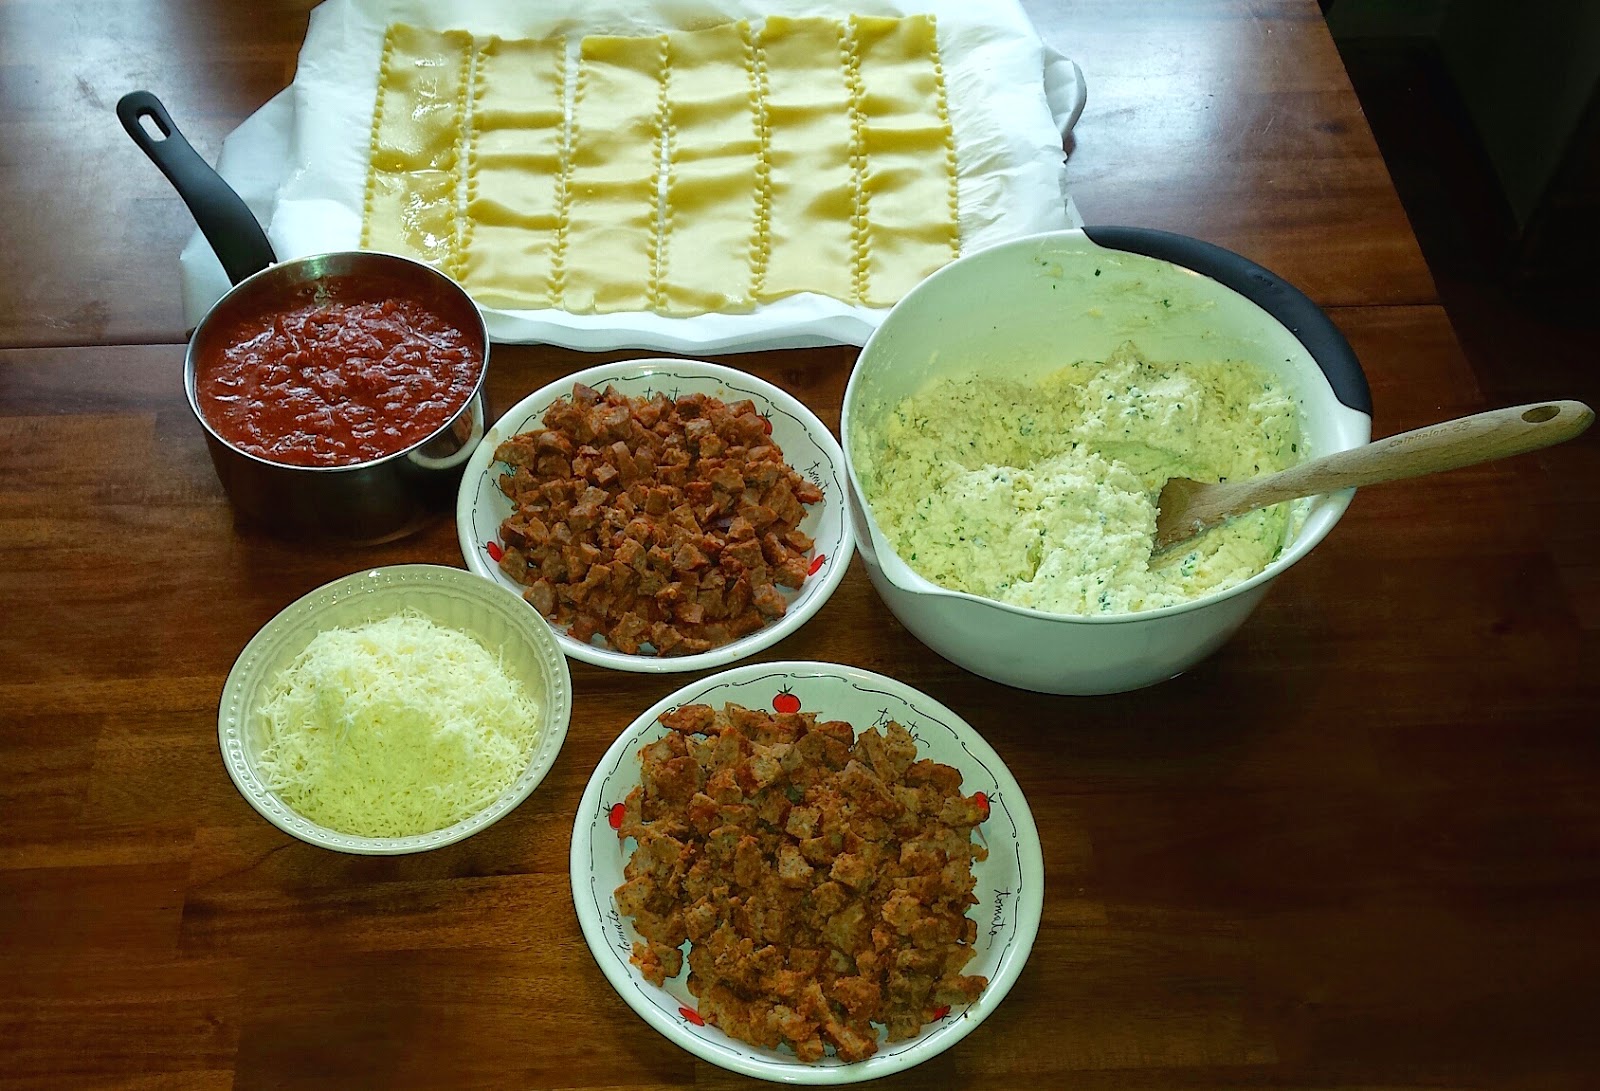
Preheat over to 375 degrees. Cook lasagna noodles according to package directions, adding 1 tablespoon olive oil to water to prevent sticking. After draining noodles, place them on parchment paper.
While lasagna noodles are cooking, mix together ricotta, parmesan cheese, eggs, salt and pepper.
Set up a lasagna prep station, with all ingredients in easy reach.
Cover bottom of a deep 13 x 9 inch casserole dish with 1 cup tomato sauce. Layer 5 lasagna noodles on top, slightly overlapping them.
Top noodles with 1 cup ricotta mixture, 1/2 cup chopped meatballs and 1/2 cup chopped sausage. Top with 1 cup shredded mozzarella and 1 scant cup tomato sauce.
Layer another 5 noodles on top of first meat and cheese layer. Repeat the cheese, meat, mozzarella and tomato sauce layering two more times. Top final noodle layer with tomato sauce, ensuring that corners are covered with sauce. Sprinkle remaining 1 cup of mozzarella cheese and 1/2 cup of parmesan cheese on top.
Cover lasagna with foil lightly sprayed with cooking spray. Bake in 375 degree oven for 45 minutes. Remove foil and cook for 15 minutes more. Lasagna is done when it is bubbly.
Depending on your oven, it can take as long as 90 minutes to cook. You can also bump up the temperature to 400 degrees — just check the lasagna more frequently.
Remove from oven and let lasagna sit for about 15 minutes. Then slice and serve.
**Note on make-ahead preparation: You can prepare the lasagna the night before. Just refrigerate and bake within 24 hours.
**Note on freezing lasagna: If you plan to freeze an entire lasagna, it's best to freeze before cooking. Thaw, then cook as directed above.
Fear not — if you mastered the tomato sauce and meatballs, you're practically Italian already!
I call this "family lasagna" for two reasons: It's more than enough to feed a crowd of relatives (or friends) and you can put everyone to work helping you make it. The process might seem a bit much, but I remember having lots of fun as a kid, sitting around the kitchen table with my parents, my siblings and sometimes my grandparents, chopping meatballs and sausage and mixing up the ricotta cheese filling before building the lasagna.
Yes, there are many short cuts, like using no-boil lasagna noodles or cooking ground beef with some Italian seasonings instead of making meatballs. But trust me. I've made lasagna the quick way numerous times. The final result just can't compare to the real thing.
Mangia! Mangia!
Andrea
Family Meat Lasagna
20 wavy lasagna noodles (usually 1 and 1/2 boxes)
1 tablespoon olive oil
2 (15 ounce) containers of ricotta cheese
5 cups shredded mozzarella cheese, divided
1 1/2 cups shredded parmesan cheese, divided
2 eggs
1 teaspoon salt
1 teaspoon pepper
6 cups or more of homemade tomato sauce
1 1/2 cups cooked meatballs, chopped
1 1/2 cups cooked Italian sausage links, chopped (mild, sweet or hot)
Preheat over to 375 degrees. Cook lasagna noodles according to package directions, adding 1 tablespoon olive oil to water to prevent sticking. After draining noodles, place them on parchment paper.
While lasagna noodles are cooking, mix together ricotta, parmesan cheese, eggs, salt and pepper.
Set up a lasagna prep station, with all ingredients in easy reach.
Cover bottom of a deep 13 x 9 inch casserole dish with 1 cup tomato sauce. Layer 5 lasagna noodles on top, slightly overlapping them.
Top noodles with 1 cup ricotta mixture, 1/2 cup chopped meatballs and 1/2 cup chopped sausage. Top with 1 cup shredded mozzarella and 1 scant cup tomato sauce.
Layer another 5 noodles on top of first meat and cheese layer. Repeat the cheese, meat, mozzarella and tomato sauce layering two more times. Top final noodle layer with tomato sauce, ensuring that corners are covered with sauce. Sprinkle remaining 1 cup of mozzarella cheese and 1/2 cup of parmesan cheese on top.
Cover lasagna with foil lightly sprayed with cooking spray. Bake in 375 degree oven for 45 minutes. Remove foil and cook for 15 minutes more. Lasagna is done when it is bubbly.
Depending on your oven, it can take as long as 90 minutes to cook. You can also bump up the temperature to 400 degrees — just check the lasagna more frequently.
Remove from oven and let lasagna sit for about 15 minutes. Then slice and serve.
**Note on make-ahead preparation: You can prepare the lasagna the night before. Just refrigerate and bake within 24 hours.
**Note on freezing lasagna: If you plan to freeze an entire lasagna, it's best to freeze before cooking. Thaw, then cook as directed above.
Labels:
dinner,
eggs,
Italian sausage,
lasagna,
meatballs,
mozzarella,
Parmesan cheese,
ricotta cheese,
tomato sauce
Monday, December 6, 2010
Christmas for the Cook
For many years I've suspected that I'm a bit of a nerd when it comes to cooking. But it was confirmed the year I received a chef's knife for Christmas...and was ecstatic. Forget asking Santa for cool-kid things like jeggings or a record player (yeah, I think they're in again.) Maybe someday I'll be a hipster.
Until then, here are a few gift ideas for your favorite foodie, tried and tested in my (nerdy) kitchen:
For the Budding Chef:
The America's Test Kitchen Family Cookbook. This is my cooking Bible. It tells you how to make everything, and how to make it well. The instructions are clear and easy to follow, perfect for someone who's still gaining kitchen confidence.
For the Carnivore:
Digital Thermometer. I was terrified to cook meat until I started using a digital thermometer. Based on a Cook's Illustrated recommendation, I use the CDN ProAccurate Quick-Read Thermometer. Pick one up at Amazon.com for $14.00
For the Person You Want to Impress:
5 1/2-Quart Le Creuset Dutch Oven. This sucker ain't cheap, but it will last you for infinity. It's perfect for making, well, everything. Plus it's beautiful. (There I go, showing my culinary dorkiness.) I got one from the husband for my birthday. It's red. I love it so much, I'm showing you a picture of how happy I was to receive it. Again with the dorkiness. Sigh.
For the Person Who Has It All...Or Who Makes a Mess Blending Soups:
KitchenAid Immersion Blender. In addition to pureeing soups, use this handy tool to chop or blend stuff. According to the little pamphlet that came with the blender, you can make guacamole, soup, salad dressing, baby food, dip, mousse, gravy, frosting, pancakes, and smothies. Phew! That's a lot of things. I also got this for my b-day (thanks, Kelly and Jill!!), because I do make a mess blending soups. A big mess.
This list should get you started. Want more gift ideas? Just let me know by leaving a comment, sending an e-mail, or posting a note on our Facebook page. If you guys want, there's plenty more where these came from!
Until then, here are a few gift ideas for your favorite foodie, tried and tested in my (nerdy) kitchen:
For the Hostess with the Mostess:
Fashion Apron. Yes, they exist. And there's something so chic about an apron over a cocktail dress. Check out Anthropologie, or pop over to your local consignment shop for some priceless vintage gems. My sister gave me the apron pictured here last Christmas, and I loooooove it. It makes cooking feel so glamorous.
For the Budding Chef:
The America's Test Kitchen Family Cookbook. This is my cooking Bible. It tells you how to make everything, and how to make it well. The instructions are clear and easy to follow, perfect for someone who's still gaining kitchen confidence.
For the Carnivore:
Digital Thermometer. I was terrified to cook meat until I started using a digital thermometer. Based on a Cook's Illustrated recommendation, I use the CDN ProAccurate Quick-Read Thermometer. Pick one up at Amazon.com for $14.00
For the Person You Want to Impress:
5 1/2-Quart Le Creuset Dutch Oven. This sucker ain't cheap, but it will last you for infinity. It's perfect for making, well, everything. Plus it's beautiful. (There I go, showing my culinary dorkiness.) I got one from the husband for my birthday. It's red. I love it so much, I'm showing you a picture of how happy I was to receive it. Again with the dorkiness. Sigh.
For the Person Who Has It All...Or Who Makes a Mess Blending Soups:
KitchenAid Immersion Blender. In addition to pureeing soups, use this handy tool to chop or blend stuff. According to the little pamphlet that came with the blender, you can make guacamole, soup, salad dressing, baby food, dip, mousse, gravy, frosting, pancakes, and smothies. Phew! That's a lot of things. I also got this for my b-day (thanks, Kelly and Jill!!), because I do make a mess blending soups. A big mess.
This list should get you started. Want more gift ideas? Just let me know by leaving a comment, sending an e-mail, or posting a note on our Facebook page. If you guys want, there's plenty more where these came from!
Thursday, March 17, 2016
Slow Cooker Corned Beef
Happy St. Patrick's Day!
We at Hot Dinner Happy Home have found a culinary pot of gold -- a Slow Cooker Corned Beef recipe by a college friend of mine and Andrea. Andrea and I haven't exactly had the luck of the Irish when it comes to corned beef. Quite frankly, ours stinks, so we were ecstatic last night when our friend Malissa Bodmann, of Cleveland, Ohio, told us how she prepares corned beef.
If you don't have time to get the corned beef going today, there's always this weekend. Or, keep this in mind for next year!
Here's the lowdown from Malissa. XOXO -- Amy
Here in Cleveland, we take St. Patrick’s Day very
seriously. The parade attracts 10,000 participants and tens of thousands more flood the streets downtown to watch the parade. I’m not Irish, but
that doesn’t keep me from craving a good Reuben sandwich on St. Patrick’s Day.
I’m the only one in my household who likes corned beef, but that doesn’t stop
me from making a whole corned beef brisket all for myself. (Editor's note: Malissa, we like how you operate!)
In years past, I cooked the corned beef in a Dutch oven on
the stove top. The results were mediocre -- a little dry, but it didn’t matter
too much because I just slapped those leathery pieces in between some
pumpernickel/rye swirled bread, slathered on some Thousand Island dressing, and
topped it with Swiss cheese and sauerkraut. But this year, I vowed to do
better. And I did.
The key to cooking corned beef is treating it like the
brisket it is. The key to a good brisket is to braise it low and slow with some
flavorful liquid to break down the connective tissue. The only skill required
for this recipe is patience. You will be rewarded with juicy, fall-apart corned
beef.
Cheers and Happy St. Paddy's from Cleveland!
Slow Cooker Corned Beef
2-3 pound flat cut corned beef brisket
Pickling spice (usually included in the brisket)
12 oz. beer, such as Guinness or Sierra Nevada Coffee Stout
Potatoes, small such as baby Yukon golds or red potatoes. If
all you have are larger potatoes, cut them in quarters
1 head of cabbage
Aromatic vegetables, such as carrots, onions, celery, rough
cut into big chunks
Remove your corned beef brisket from the package and rinse
it. Reserve the pickling spices.
Layer the bottom of your slow cooker with your
potatoes, carrots, onions and celery. Place your corned beef on top of the
vegetables with the fat layer on top so it will keep the meat moist.
Sprinkle
on pickling spice packet. Add one 12 oz. bottle of stout. Add enough water to
barely cover the brisket.
Put on the lid and set your slow cooker to high. Cook
for two hours and turn the slow cooker down to low. Cook for two more hours.
Remove potatoes if they are becoming too soft.
Cut a head of cabbage into wedges, place on top of the meat and cook on low for another 1.5 hours.
Remove corned beef from the slow cooker and
allow to cool until you can handle it. Trim off the fat cap. Cut against the
grain or shred. You will have a lot of braising liquid left over; you can serve
this as a jus, or thicken it for a delicious beefy stout gravy.
Serve with the
potatoes and carrots, turn into a delicious hash, or make a Reuben sandwich.
Labels:
beef,
Cleveland,
corned beef,
crockpot,
Irish,
slow cooker,
St. Patrick's
Friday, April 8, 2011
Slow Cooker Pot Roast
Yesterday, I (very cruelly) left you hanging. I know you were waiting with bated breath to hear the results of my adventures in slow cooking.
Well, my friends, it was an incredible success!! Fall-apart juicy and delicious, my pot roast was everything I hoped for. And the leftovers? You guessed it. Even better.
Lucky for you, I documented my crock pot journey for your viewing pleasure. It all began on Monday evening...
First, I lined my crock pot with a slow cooker liner. (Genius invention, by the way.)
Then, I chopped stuff up and dumped it into my slow cooker. First onions, then celery.
Then, I slapped a bunch of Montreal steak seasoning all over my roast. And I tossed that in the crock pot, too.
Next came the potatoes. (Doesn't that roast look cozy nestled in there?)
And the carrots and bay leaves.
Then I put the lid on and shoved the crock in my messy fridge until the next morning.
After a lovely night's sleep, I woke up and put on my ratty-yet-comfortable slippers. (Yes, this is important in the making of my pot roast!)
Then I pulled out my crock out of the fridge and dumped a packet of onion soup mix on top of everything else. (Sure, it's full of preservatives, but it tastes so onion-y and good. Don't be a hater.)
And some liquid: Worcestershire sauce, beef broth, and one delicious beer. Then I put the lid on, and set that sucker to cook on low for 10 hours.
Then I took a picture of the clock to prove that it was morning.
And I got ready for work. I wore purple shoes on Monday.
Fast forward through lots of e-mails, conference calls, blah, blah, blah. This is what greeted me when I walked in the door:
Hear that? It's angels singing.
Crock Pot + Erin = Best Friends 4 Ever
Slow Cooker Pot Roast
Serves: 8
1 large onion, sliced
3 ribs celery, cut into large pieces
3.5 pound beef roast (I used top round roast)
2 teaspoons Montreal steak seasoning
2 pounds potatoes, cut in half (or in quarters, if they're large)
10 carrots peeled and sliced in half or thirds
2 bay leaves
1 packet onion soup mix
1 tablespoon Worcestershire sauce
2 cups beef broth
1 bottle beer
1 tablespoon corn starch
Pat the Montreal steak seasoning on the roast, and dump everything except the corn starch into your crock pot. Cook on low for 10 hours. Place two cups of cooking liquid in a small sauce pan over medium-high heat. Whisk in the corn starch. Allow mixture to simmer for 5 minutes, whisking often, until thickened. Serve the gravy with the pot roast.
Well, my friends, it was an incredible success!! Fall-apart juicy and delicious, my pot roast was everything I hoped for. And the leftovers? You guessed it. Even better.
Lucky for you, I documented my crock pot journey for your viewing pleasure. It all began on Monday evening...
First, I lined my crock pot with a slow cooker liner. (Genius invention, by the way.)
Then, I chopped stuff up and dumped it into my slow cooker. First onions, then celery.
Then, I slapped a bunch of Montreal steak seasoning all over my roast. And I tossed that in the crock pot, too.
Next came the potatoes. (Doesn't that roast look cozy nestled in there?)
And the carrots and bay leaves.
Then I put the lid on and shoved the crock in my messy fridge until the next morning.
After a lovely night's sleep, I woke up and put on my ratty-yet-comfortable slippers. (Yes, this is important in the making of my pot roast!)
Then I pulled out my crock out of the fridge and dumped a packet of onion soup mix on top of everything else. (Sure, it's full of preservatives, but it tastes so onion-y and good. Don't be a hater.)
And some liquid: Worcestershire sauce, beef broth, and one delicious beer. Then I put the lid on, and set that sucker to cook on low for 10 hours.
Then I took a picture of the clock to prove that it was morning.
And I got ready for work. I wore purple shoes on Monday.
Fast forward through lots of e-mails, conference calls, blah, blah, blah. This is what greeted me when I walked in the door:
Hear that? It's angels singing.
Crock Pot + Erin = Best Friends 4 Ever
Slow Cooker Pot Roast
Serves: 8
1 large onion, sliced
3 ribs celery, cut into large pieces
3.5 pound beef roast (I used top round roast)
2 teaspoons Montreal steak seasoning
2 pounds potatoes, cut in half (or in quarters, if they're large)
10 carrots peeled and sliced in half or thirds
2 bay leaves
1 packet onion soup mix
1 tablespoon Worcestershire sauce
2 cups beef broth
1 bottle beer
1 tablespoon corn starch
Pat the Montreal steak seasoning on the roast, and dump everything except the corn starch into your crock pot. Cook on low for 10 hours. Place two cups of cooking liquid in a small sauce pan over medium-high heat. Whisk in the corn starch. Allow mixture to simmer for 5 minutes, whisking often, until thickened. Serve the gravy with the pot roast.
Wednesday, February 23, 2011
Fine and Dandy by Lady of the House

I registered for China when I was engaged, high on the fantasy of chic dinner parties as I zapped tea cups and gravy boats at Bloomingdale's. I am sad to report that the dear old Royal Doulton has never seen the light of day. In fact, it all sits snugly zipped in compartmentalized bags way up high in the kitchen cupboard I never open. I didn't even haul it out for Thanksgiving last year.
Which begs the question...do we really need this stuff? Lately I've been thinking, yes, absolutely--it's the "everyday" category I'm ready to do away with. What if the fine china was practical, usable, dishwasher safe? So I set out to find a few options that make sense now that I don't have one of those bar code guns at the ready and the ring on my finger isn't the first thing on my mind.
If I had it to do over again...
--The creamy hand-worked creations of Heath Ceramics would cradle both pasta and dinner for the in-laws with understated grace that'll have 'em flipping the saucers for the company name. ( I so do that!)
--I fell in love with this pattern by Burleigh when I visited Liberty of London for the first time. It's like a fairytale painted in blue, a very sensible fairytale. (We'll talk about Liberty's some other time. Swoon.)
--This Deshoulieres design is so detailed and giving, I could foresee a sip of tea from one of these other-worldly cups may be as helpful as a savasana or two.
So is the band of gold, the faint flower, the hand-painted feather really best kept tucked away, or would your toast be that much better on bone china? What are we waiting for?
xoxo
Lady of the House
Friday, November 20, 2015
Thanksgiving Round-Up
The Thanksgiving countdown is on. Today I'm sharing my perfect Thanksgiving menu.
Let's get cooking!
Erin
Spiked Cider: Get the party started right with a holiday cocktail. Make a giant batch of Spiked Cider and keep it warm in your slow cooker so guests can help themselves.
Roast Turkey Breast with Gravy: I like to brine the bird to ensure it's moist and delicious. Roasting just the breast is easier and faster than roasting the whole, plus it takes up less room in your fridge and oven.
Mashed Potatoes: Prepare these babies the day before Thanksgiving and then bake them just before dinner.
Stuffing with Sausage & Cranberries: Stuffing is totally my favorite part of Thanksgiving. Salty sausage, crunchy pecans, sweet cranberries...this recipe has it all.
Maple-Glazed Brussels Sprouts with Bacon: Maple syrup! Bacon!! I think that's all I need to say about this one.
Cranberry Sauce: I put this Cranberry Sauce on everything. And it's the perfect condiment for a leftover turkey sandwich the day after Thanksgiving.
Apple Pie: C'mon now. It's a classic.
Gooey Pumpkin Bars: Because one dessert is never enough on Thanksgiving.
Let's get cooking!
Erin
Spiked Cider: Get the party started right with a holiday cocktail. Make a giant batch of Spiked Cider and keep it warm in your slow cooker so guests can help themselves.
Roast Turkey Breast with Gravy: I like to brine the bird to ensure it's moist and delicious. Roasting just the breast is easier and faster than roasting the whole, plus it takes up less room in your fridge and oven.
Mashed Potatoes: Prepare these babies the day before Thanksgiving and then bake them just before dinner.
Stuffing with Sausage & Cranberries: Stuffing is totally my favorite part of Thanksgiving. Salty sausage, crunchy pecans, sweet cranberries...this recipe has it all.
Maple-Glazed Brussels Sprouts with Bacon: Maple syrup! Bacon!! I think that's all I need to say about this one.
Cranberry Sauce: I put this Cranberry Sauce on everything. And it's the perfect condiment for a leftover turkey sandwich the day after Thanksgiving.
Apple Pie: C'mon now. It's a classic.
Gooey Pumpkin Bars: Because one dessert is never enough on Thanksgiving.
Monday, March 14, 2016
Amy's Yummy Year
This time last year, my friend Erin invited my friend Andrea and I join her on this delicious blog she created. Andrea and I bellied right up. Thank you, Erin for the creative culinary outlet. It's been a sweet year blogging with two awesome foodie friends who share the goal of putting food on the table and keeping the tradition of family dinner alive.
Here are some of my happiest Hot Dinner Happy Home moments from the past year as well as some of my favorite dishes by Andrea and Erin.
Enjoy!
XOXO,
Amy
Happiest Moments
Favorite dishes by Andrea
Favorite dishes by Erin
Here are some of my happiest Hot Dinner Happy Home moments from the past year as well as some of my favorite dishes by Andrea and Erin.
Enjoy!
XOXO,
Amy
Happiest Moments
- Cooking with my kids, including "baking" sugar cookies with them on live TV. Check out these posts:
- Creating Spring on Toast with Erin while my Lucy and Penny "babysat" her Danny-boy. (Love that Erin shared this memory in her Friday post.)
- Conquering the pressure cooker. See these posts:
Favorite dishes by Andrea
- Having an Italian BFF means access to recipes for classic, authentic dishes. It also means I get to know how each member of her family tweaks their own interpretations of the classics. Check out:
- My favorite of Andrea's non-Italian dishes and a fantastic lighter dinner paired with a green salad: Buttermilk Spoonbread.
Favorite dishes by Erin
- Erin's Slow Cooker Thai Peanut Pork is the first HDHH dish I ever made and I chatted it up A LOT on my Facebook page. I couldn't even tell you how many friends have made that dish. Suffice to say it's a hit from coast to coast and all points in between.
- Parmesan and Yogurt Crusted Chicken is a George family go-to dinner. My younger daughter Penny requested it for her birthday dinner last month.
- I see Spiced Pecans becoming my go-to holiday party nosh. I didn't make them last year like I intended. But in 2014 my friends walked off with the few remaining nuts after the Thanksgiving feast Chez George. I don't blame them, because, after all, we call these crack nuts.
Labels:
appetizer,
appetizers,
baked goods,
beef,
cookies,
dessert,
desserts,
dinner,
eggs,
Italian,
pasta,
pork,
spaghetti
Friday, October 25, 2013
Slow Cooker Pork Chops with Apples and Sweet Potatoes
I'm not a big risk taker. Roller coasters scare the bejeebers out of me. I don't run with scissors. The idea of skydiving gives me a conniption.
For some reason, whenever I use my slow cooker, I feel like I'm taking a risk. Maybe it's because I biffed a few meals in my slow cooker shortly after the husband and I got hitched. One rock-hard pot roast in particular haunts my dinner dreams.
So as my fork hovered over a plate piled with pork chops, I had a twinge of nerves. The autumnal aroma of sweet potatoes and apples hinted at deliciousness, but would the chops be tasty? Or would they be dry and bland? Bravely, I dove in.
And I devoured every bite.
The brine infused flavor and ensured the pork stayed moist. Layered with the sweetness of apples and onions, plus the savory creaminess of sweet potatoes...Good gravy.
If its deliciousness isn't enough, something else to consider about Slow Cooker Pork Chops with Apples and Sweet Potatoes is the leftover potential. I've mentioned before that I like to disguise leftovers. Here are a couple ways to re-purpose this meal:
Slow Cooker Pork Chops with Apples and Sweet Potatoes
Adapted from Cheap Healthy Good
Serves: 6
3 tablespoons Kosher salt
6 tablespoons brown sugar, divided
2 teaspoons black peppercorns, lightly crushed
Water
6 boneless pork loin chops
2 tablespoons olive oil
3 tablespoons brown sugar
3 apples*, cored and sliced into thick wedges
2-3 sweet potatoes, peeled and cut into 1/2" cubes
Salt and pepper
1 large sweet onion, peeled and thinly sliced
First we're going to brine the pork chops. In a large bowl combine salt, 3 tablespoons brown sugar, peppercorns, and a few cups of water. Stir until the salt and sugar dissolve. Add pork chops then add more water until the chops are covered. Refrigerate for 1-1.5 hours.
Remove the pork chops from the brine. Discard brine. Rinse the pork chops and pat dry.
Heat oil in a very large skillet over medium high. Add the chops and cook until they're browned and release easily from the pan, about 5-6 minutes. Repeat on the second side. Remove chops from the skillet and set aside. (Brown the chops in two batches if you don't have a big enough skillet to fit all 6 chops without crowding the pan.)
Add 1/2 cup water to the skillet and boil, scraping the browned bits from the bottom of the pan, until the water is reduced by half, about 2 minutes. Turn off the heat and set aside.
Meanwhile toss apple slices with the remaining 3 tablespoons brown sugar. Place sweet potatoes in the bottom of the slow cooker and season generously with salt and pepper. Top with half the onion and half the apples. Add the pork chops and top with the remaining onion and apples. Pour the liquid that you used to deglaze the pan on top of everything. Cook on high for 3-4 hours. Serve the pork chops and sweet potatoes topped with onions and apples.
*I think you can use whatever apples you have on hand, but each variety of apple will cook a little differently. I used McIntosh apples, and they broke down quite a bit. That was fine by me, but if you want your apples to stay more firm, consider a sturdier variety. Also, if you leave the peel on your apples, they will hold their shape more.
For some reason, whenever I use my slow cooker, I feel like I'm taking a risk. Maybe it's because I biffed a few meals in my slow cooker shortly after the husband and I got hitched. One rock-hard pot roast in particular haunts my dinner dreams.
So as my fork hovered over a plate piled with pork chops, I had a twinge of nerves. The autumnal aroma of sweet potatoes and apples hinted at deliciousness, but would the chops be tasty? Or would they be dry and bland? Bravely, I dove in.
And I devoured every bite.
The brine infused flavor and ensured the pork stayed moist. Layered with the sweetness of apples and onions, plus the savory creaminess of sweet potatoes...Good gravy.
If its deliciousness isn't enough, something else to consider about Slow Cooker Pork Chops with Apples and Sweet Potatoes is the leftover potential. I've mentioned before that I like to disguise leftovers. Here are a couple ways to re-purpose this meal:
- BBQ Pork Sandwiches: Cut leftover chops into bite-sized pieces. Warm it up in the microwave with a few spoonfuls of the cooking liquid and some barbecue sauce. Serve the pork on rolls with a pile of coleslaw on top.
- Sweet Potato Soup: Puree leftover sweet potatoes, apples, and onions with a little bit of chicken or vegetable broth. Serve hot with a big salad and a hunk of crusty bread.
Slow Cooker Pork Chops with Apples and Sweet Potatoes
Adapted from Cheap Healthy Good
Serves: 6
3 tablespoons Kosher salt
6 tablespoons brown sugar, divided
2 teaspoons black peppercorns, lightly crushed
Water
6 boneless pork loin chops
2 tablespoons olive oil
3 tablespoons brown sugar
3 apples*, cored and sliced into thick wedges
2-3 sweet potatoes, peeled and cut into 1/2" cubes
Salt and pepper
1 large sweet onion, peeled and thinly sliced
First we're going to brine the pork chops. In a large bowl combine salt, 3 tablespoons brown sugar, peppercorns, and a few cups of water. Stir until the salt and sugar dissolve. Add pork chops then add more water until the chops are covered. Refrigerate for 1-1.5 hours.
Remove the pork chops from the brine. Discard brine. Rinse the pork chops and pat dry.
Heat oil in a very large skillet over medium high. Add the chops and cook until they're browned and release easily from the pan, about 5-6 minutes. Repeat on the second side. Remove chops from the skillet and set aside. (Brown the chops in two batches if you don't have a big enough skillet to fit all 6 chops without crowding the pan.)
Add 1/2 cup water to the skillet and boil, scraping the browned bits from the bottom of the pan, until the water is reduced by half, about 2 minutes. Turn off the heat and set aside.
Meanwhile toss apple slices with the remaining 3 tablespoons brown sugar. Place sweet potatoes in the bottom of the slow cooker and season generously with salt and pepper. Top with half the onion and half the apples. Add the pork chops and top with the remaining onion and apples. Pour the liquid that you used to deglaze the pan on top of everything. Cook on high for 3-4 hours. Serve the pork chops and sweet potatoes topped with onions and apples.
*I think you can use whatever apples you have on hand, but each variety of apple will cook a little differently. I used McIntosh apples, and they broke down quite a bit. That was fine by me, but if you want your apples to stay more firm, consider a sturdier variety. Also, if you leave the peel on your apples, they will hold their shape more.
Thursday, April 7, 2011
Crock Pot: Friend or Foe?
I'm a workin' girl. So, if what they say is true, I should be BFF with my slow cooker. Well, to put it mildly, I'm not. Every time I use it, I feel like something goes wrong. (Remember this post?)
One of my goals is to conquer kitchen fears. And since Sarah suggested on HDHH's Facebook wall that I bust out my crock pot, I decided to give it a whirl. Although Sarah specifically asked for something besides pot roast, I had a mean hankerin' for a fall-apart chunk of beef with potatoes and carrots and some sort of meaty gravy. So, sorry, Sarah, but I made a pot roast.
On to my adventure in slow cooking...
I was determined to take full advantage of this appliance. I wanted to stick the stuff in there, set it, and forget it. I knew my pot roast would taste better if I browned the meat first, but I just didn't wanna. Was I being stubborn? Lazy? Probably so, but no matter. I refused to do anything but dump stuff into the slow cooker.
So, that's what I did. Chopped stuff up, dumped it in, and turned the thing on. After about 10 hours of commuting, working, and dilly-dallying, I arrived home to find...
Well, I can't let you off that easily! This is a bonus Thursday post. You have to come back tomorrow to find out how it went. (Insert sneaky cackle.)
One of my goals is to conquer kitchen fears. And since Sarah suggested on HDHH's Facebook wall that I bust out my crock pot, I decided to give it a whirl. Although Sarah specifically asked for something besides pot roast, I had a mean hankerin' for a fall-apart chunk of beef with potatoes and carrots and some sort of meaty gravy. So, sorry, Sarah, but I made a pot roast.
On to my adventure in slow cooking...
I was determined to take full advantage of this appliance. I wanted to stick the stuff in there, set it, and forget it. I knew my pot roast would taste better if I browned the meat first, but I just didn't wanna. Was I being stubborn? Lazy? Probably so, but no matter. I refused to do anything but dump stuff into the slow cooker.
So, that's what I did. Chopped stuff up, dumped it in, and turned the thing on. After about 10 hours of commuting, working, and dilly-dallying, I arrived home to find...
Well, I can't let you off that easily! This is a bonus Thursday post. You have to come back tomorrow to find out how it went. (Insert sneaky cackle.)
Friday, June 7, 2013
Six genius ways to use leftovers...so they don't seem leftover!
Leftovers.
When I hear that word, I have a flashback to childhood. I would holler when the poor, sainted soul would walk in the door after a long day at the office. "Moooooo-ooooooom! What's for diiiiiiiinner?!" I was hoping for an answer like pizza or spaghetti or Poppy Seed Chicken. But her tired reply? "Leftovers." Ick.
Now that I'm in charge of meals, I love leftovers. It means you have a hot, homemade dinner without any work at all. Best. Dinner. Ever. But that begs the question, why did I hate leftovers so much as a kid?
I suppose leftovers can get a little boring if you just heat the exact same meal up again night after night. Now, don't get me wrong, I definitely do my fair share of re-heating. Some things are just better the next night. Pot Roast with Bacon, for example, gets more magically delicious after a night in the fridge. (Can I get an "amen!"??) But if you put a little twist on the original meal, it's more exciting for its encore performance. In fact, sometimes the husband doesn't even know we're having leftovers. I love getting sneaky in the kitchen.
Here are some of my favorite tricks for using up those pesky leftovers. And if you don't tell your family it's not a brand new meal, your secret's safe with me.
Make Mexican food.
I disguise leftover meat as a topping for nachos or a filling for burritos. Rotisserie chicken, pot roast, pork, whatever. I shred it up and stir in some chili powder. Pile it on chips or a tortilla, top with cheese, and bake until melty. Who doesn't like nachos for dinner?
Use your freezer.
I don't have a big chest freezer (someday....oh, someday!), just the standard unit that came with our fridge. But I pack that sucker full with leftovers. Making Lazy Beef Enchiladas? Double the filling. Put the second half in a baggie, squeeze out the air, and freeze it until later. Then you can just take 5 minutes to thaw it out and layer with tortillas when you're ready for a fast meal.
Toss a salad.
Shoot. I throw anything in a salad. It's a perfect meal for the summertime when you don't feel like cranking up the oven. Just the other day, for example, I sliced up the remnants of Ginger-Soy Marinated Steak and tossed it with lettuce, mandarin oranges, red pepper, and edamame. I drizzled on some balsamic vinegar and olive oil, and I had the perfect (healthy!) dinner. (Then I ate a giant ice cream cone. The end.) Now that corn on the cob is starting to show up in the produce section, there's all kinds of salad ideas. Make a few extra ears when you're serving corn on the cob. The next night, slice the kernels off and make Corn and Black Bean Salad or Therese's Corn and Tomato Salad.
Always buy a rotisserie chicken.
I know you're raising your eyebrow as you read this. "Uh, Erin? This is about leftovers, not buying new stuff." Well just hear me out. Every time I go to Costco, I buy a rotisserie chicken. Sometimes we eat it for dinner with mashed potatoes from a box. (Yes...from a box. I never said I was fancy.) Or I slice it up for sandwiches for lunch. Whatever we don't eat in a couple days, I chop up. Then I put one or two cup portions in baggies and put them in the freezer. Do you know how many recipes call for cut-up cooked chicken? Oh, about a googolplex. Curried Chicken Salad, Baked Chicken Chimichangas, Cheesy Chicken Quesadilla Bake, Cheesy Chicken Packets (made with crescent rolls...good gravy), Couscous with Chicken, Chevre, and Cranberries, Green Chile Chicken Enchiladas, Enchiladas with Pumpkin Sauce... I could go on, but you get my point.
Make Asian food.
No need to call for Chinese take-out when you have leftovers to use up. Pull the Tupperware of rice from the bowels of your fridge. Chop up that half-a-chicken-breast or the nub of pork tenderloin from yesterday's dinner. Now make Healthier Fried Rice. You can thank me later. And let's talk for a second about Lettuce Wraps. Thai Peanut Pork in the slow cooker is delicious on its own, but the leftover potential takes it to stratospheric heights of awesomeness. Thai Peanut Pork Lettuce Wraps. Just do it.
Bake fresh cookies...Yes, I said fresh.
What tastes better than cookies straight from the oven? Uh, nothing. Some next time you're making Neiman Marcus Chocolate Chip Cookies, roll the extra dough into balls, place them on a baking sheet, and pop it in the freezer until the dough is frozen solid. Then toss the frozen dough balls in a baggie and bake as many as you want when the cookie craving strikes. Just add a minute or two to the baking time.
When I hear that word, I have a flashback to childhood. I would holler when the poor, sainted soul would walk in the door after a long day at the office. "Moooooo-ooooooom! What's for diiiiiiiinner?!" I was hoping for an answer like pizza or spaghetti or Poppy Seed Chicken. But her tired reply? "Leftovers." Ick.
Now that I'm in charge of meals, I love leftovers. It means you have a hot, homemade dinner without any work at all. Best. Dinner. Ever. But that begs the question, why did I hate leftovers so much as a kid?
I suppose leftovers can get a little boring if you just heat the exact same meal up again night after night. Now, don't get me wrong, I definitely do my fair share of re-heating. Some things are just better the next night. Pot Roast with Bacon, for example, gets more magically delicious after a night in the fridge. (Can I get an "amen!"??) But if you put a little twist on the original meal, it's more exciting for its encore performance. In fact, sometimes the husband doesn't even know we're having leftovers. I love getting sneaky in the kitchen.
Here are some of my favorite tricks for using up those pesky leftovers. And if you don't tell your family it's not a brand new meal, your secret's safe with me.
Make Mexican food.
I disguise leftover meat as a topping for nachos or a filling for burritos. Rotisserie chicken, pot roast, pork, whatever. I shred it up and stir in some chili powder. Pile it on chips or a tortilla, top with cheese, and bake until melty. Who doesn't like nachos for dinner?
Use your freezer.
I don't have a big chest freezer (someday....oh, someday!), just the standard unit that came with our fridge. But I pack that sucker full with leftovers. Making Lazy Beef Enchiladas? Double the filling. Put the second half in a baggie, squeeze out the air, and freeze it until later. Then you can just take 5 minutes to thaw it out and layer with tortillas when you're ready for a fast meal.
Toss a salad.
Shoot. I throw anything in a salad. It's a perfect meal for the summertime when you don't feel like cranking up the oven. Just the other day, for example, I sliced up the remnants of Ginger-Soy Marinated Steak and tossed it with lettuce, mandarin oranges, red pepper, and edamame. I drizzled on some balsamic vinegar and olive oil, and I had the perfect (healthy!) dinner. (Then I ate a giant ice cream cone. The end.) Now that corn on the cob is starting to show up in the produce section, there's all kinds of salad ideas. Make a few extra ears when you're serving corn on the cob. The next night, slice the kernels off and make Corn and Black Bean Salad or Therese's Corn and Tomato Salad.
Always buy a rotisserie chicken.
I know you're raising your eyebrow as you read this. "Uh, Erin? This is about leftovers, not buying new stuff." Well just hear me out. Every time I go to Costco, I buy a rotisserie chicken. Sometimes we eat it for dinner with mashed potatoes from a box. (Yes...from a box. I never said I was fancy.) Or I slice it up for sandwiches for lunch. Whatever we don't eat in a couple days, I chop up. Then I put one or two cup portions in baggies and put them in the freezer. Do you know how many recipes call for cut-up cooked chicken? Oh, about a googolplex. Curried Chicken Salad, Baked Chicken Chimichangas, Cheesy Chicken Quesadilla Bake, Cheesy Chicken Packets (made with crescent rolls...good gravy), Couscous with Chicken, Chevre, and Cranberries, Green Chile Chicken Enchiladas, Enchiladas with Pumpkin Sauce... I could go on, but you get my point.
Make Asian food.
No need to call for Chinese take-out when you have leftovers to use up. Pull the Tupperware of rice from the bowels of your fridge. Chop up that half-a-chicken-breast or the nub of pork tenderloin from yesterday's dinner. Now make Healthier Fried Rice. You can thank me later. And let's talk for a second about Lettuce Wraps. Thai Peanut Pork in the slow cooker is delicious on its own, but the leftover potential takes it to stratospheric heights of awesomeness. Thai Peanut Pork Lettuce Wraps. Just do it.
Bake fresh cookies...Yes, I said fresh.
What tastes better than cookies straight from the oven? Uh, nothing. Some next time you're making Neiman Marcus Chocolate Chip Cookies, roll the extra dough into balls, place them on a baking sheet, and pop it in the freezer until the dough is frozen solid. Then toss the frozen dough balls in a baggie and bake as many as you want when the cookie craving strikes. Just add a minute or two to the baking time.
Monday, October 8, 2012
Make-Ahead Marvels
As a new mom, I'm keeping my eyes peeled for make-ahead meals. Something I can make the night before or earlier in the day while Danny is snoozing. If dinner is waiting in the wings, it's much less stressful when hunger pangs strike at 6:00 p.m., and Danny, the husband, and I all want to eat at the same time.
Here are some of my favorite make-ahead meals from the Hot Dinner Happy Home archives:
Overnight Oats II: Everyone says that breakfast is the most important meal of the day. And one can only eat so many bowls of Reese's Peanut Butter Puffs cereal.
Ham and Cheese Toasties: Put these simple and delicious sandwiches together when you have a chance and pop them in the fridge. When you're ready to eat, just heat them in the oven until the cheese is melted.
Slow Cooker Baked Potato Soup: This soup is filling enough for even the heartiest appetites.
Chicken Packets: These reheat beautifully so you have dinner and lunch for the next day. Double bonus.
Pot Roast with Mushroom Gravy: Another slow cooker recipe. This is feel-good food.
Tuna Noodle Casserole: This is a fresh take on your mom's classic recipe that doesn't use cream-of-anything soup.
Turkey Meatloaf Florentine: Healthy. Easy. Delicious.
Here are some of my favorite make-ahead meals from the Hot Dinner Happy Home archives:
Overnight Oats II: Everyone says that breakfast is the most important meal of the day. And one can only eat so many bowls of Reese's Peanut Butter Puffs cereal.
Ham and Cheese Toasties: Put these simple and delicious sandwiches together when you have a chance and pop them in the fridge. When you're ready to eat, just heat them in the oven until the cheese is melted.
Slow Cooker Baked Potato Soup: This soup is filling enough for even the heartiest appetites.
Chicken Packets: These reheat beautifully so you have dinner and lunch for the next day. Double bonus.
Pot Roast with Mushroom Gravy: Another slow cooker recipe. This is feel-good food.
Tuna Noodle Casserole: This is a fresh take on your mom's classic recipe that doesn't use cream-of-anything soup.
Turkey Meatloaf Florentine: Healthy. Easy. Delicious.
Subscribe to:
Posts (Atom)