Friday, October 29, 2010

Happy Halloween...from Chipotle!

On one haunted Halloween of yore, the husband and I dressed as a giant burrito in order to score free food at our local Chipotle.  We were in college and merely fiesta-loving pals at the time, but that night, the sparks began to fly.  Or maybe it was indigestion...

Anyway, Chipotle has always held a special place in my heart since that night.  The husband, well, he just really likes burritos.

But I digress.  This post is more than just a love story; it is a Halloween treat from Chipotle to the world!  Visit your local Chipotle this Halloween after 6:00 PM, and you'll get a burrito for 2 bucks!!  I'm talking hot dinner on the cheap, people!  The best part is that your $2 will help raise $1 million for Jamie Oliver's Food Revolution.  Pretty sweet.  Visit Chipotle's website if you'd like to learn more.  

Happy Halloween!

Whoops!

Has this ever happened to you?

You work hard to make a delicious and nutritious dinner for your family.  You sit down at the table to eat, and, ewww, it tastes nas-tay.  The dinner, gorgeous in your mind, is a flop.

At our house, we have a standing rule about such dinners.  If dinner is unpalatable, we go out for fast food.  Why suffer when you can have McNuggets?  I heartily recommend this rule because it takes the pressure off!  If dinner is bad, you have a back-up plan.  That gives you the freedom to try new things in the kitchen.

The most recent dinner disaster in my home was a pork loin roast I made in my slow cooker.  Although it smelled delicious when I walked in the door after work, it was overcooked and dry.  I was particularly frustrated because it was a big hunk of meat.  Instead of throwing it (and my hard-earned money!) all in the trash, I wanted to figure out some way to redeem the pork.  What could I do to add some moisture back in and disguise the bland flavor?

Come back on Monday to find out how I turned disaster into delicious.

Thursday, October 28, 2010

Glazed Curry Carrots with Golden Raisins

There are some things that I keep in my fridge at all times:

  • Milk - Builds strong bones AND soothes the ulcers of certain over-worked husbands and friends.
  • Goat Cheese - Nectar of the gods.
  • Baby Carrots - Crunchy, sweet, yet mysteriously healthy.
Try out this delicious side dish next time you're looking for a twist on traditional carrots.

Glazed Curry Carrots with Golden Raisins
Serves: 4
Adapted from America's Test Kitchen Family Cookbook

1 pound baby carrots (or, if you have time on your hands, 1 pound regular-sized carrots sliced on the bias)
1/2 cup chicken broth
1 tablespoon sugar
1/2 teaspoon curry powder
1/4 teaspoon salt
1 teaspoon butter
1/3 cup golden raisins
2 teaspoons lemon juice (optional)
Pepper

In a large skillet, combine carrots, chicken broth, sugar, curry powder, and salt.  Cover and bring to a boil.  Reduce heat to a simmer and continue to cook covered, stirring occasionally, until the carrots are almost tender, about 8 minutes.

Uncover, return to a boil, and continue to cook until the liquid has reduced to about 2 tablespoons, about 2 minutes.  

Stir in butter and raisins and continue to cook, stirring frequently, until the carrots are completely tender and the glaze is lightly golden, about 2-3 minutes.  Off the heat, stir in lemon juice and season with additional salt and pepper to taste.  

Wednesday, October 27, 2010

Evites You'll Be Proud to Send


With the Holidays upon us, it's likely you have a hearty menu to share with friends and family thanks to HDHH. When you want to send word quickly, digital invitations do make a fair option. Then the search is on for a decent invitation, and alas, there isn't a pixel to be found that even begins to announce your event in style. Please allow me the great pleasure of introducing you to a few sites that take the art of eviting to the next level, leaving your dignity in tact.


I promise you, you will not miss the ads for magical belly shrinkers, the host of pop-ups, the fiercely obnoxious tunes and jiggling graphics. Alright, maybe you'll miss the girls that dance 'cuz interest rates have dropped again. But they're invited to the party anyway...

I always say, the invitation is the first thing your guests receive from you, so make it special. Oh, and prepare to be copied. Remember, imitation is the best form of flattery.


Tuesday, October 26, 2010

Introducing the Lady of the House


As many of you know, I’m not actually a bona fide housewife; I just make dinner.  So, I’m bringing in a ringer to help me, er, I mean help YOU, the fabulous readers of Hot Dinner Happy Home, learn a bit more about keeping house…in a fantastic and fashionable manner, of course. 

So, joining us with a weekly post on the home, I’d like to introduce the Lady of the House.  Let’s have a chat with our new domestic diva, shall we?

Erin: Lady of the House, we're glad you’ll be joining us.  Anyone who has seen the disorder that is my happy home knows I have a thing or two to learn about being a housewife.  I’m wondering, for whom do you keep house?  Also, is that question grammatically correct?

Lady of the House:  Well, I'm thrilled to be here!!  Thanks so much for having me.  Your question is stated in perfect grammar, my dear.  I'm keeping house these days for a hard-working and often hungry husband and our six month-old little dumpling.  (Let's just say, the HDHH blog is quite the handy tool around dinner time.)  Now figuratively, I keep house for the FedEx guy, the landlord, the million possible reasons I might have to open my front door.  So you could say it's the fear of being found for the slob that I really am that compels me to keep the place tidy.

Erin: I completely understand.  I've been embarrassed by baskets of dirty laundry in the living room one too many times.  Now, let’s get philosophical for a moment.  What is a happy home to you?

Lady of the House:  It's a lot of things, so perhaps a list will suffice.  In no particular order, a happy home is: clean sheets and pressed pillowcases, something cooking on the stove, music, laughter at the kitchen table, open windows and curtains fluttering in the fresh air, meaningful art, flowers beside the bed, lamplight, candles, a roaring fire, a stocked pantry, guests, organized drawers, a proper welcome.  I could go on and on, but perhaps the happiest home is a work in progress--that dreaming and doing thing we do our whole lives.
  

Erin: Wow.  I feel really warm and fuzzy inside just thinking about that answer.  So, what can we look forward to hearing about in your posts?   

Lady of the House:  You'll be getting a lot of sass for one thing!  I'll fill you in on fabulous, can't-live-without websites, tips for making things lovely, good gift ideas, old-fashioned housewife practices that deserve a revival, and plenty of ways to fritter the family budget.

Erin: I think I'm speaking for the whole HDHH world when I say, I CANNOT WAIT.  Speaking of the HDHH gang...we’re a hungry group on this site.  What’s your favorite meal?

Lady of the House:  If I could live on appetizers, I'd be set.  I love the presentation, the 2-bite maximum, the wacky combinations, everything.  My favorite appetizer, which also happens to be perfect this time of year, is stuffed figs.  It's goat's cheese inside a fig, wrapped in prosciutto, baked for a few minutes, and drizzled with balsamic reduction.  Yum-my!

Erin: Ooooh!  I think I have a new recipe to try.  So there you have it, folks.  Come back tomorrow when the Lady of the House will show us how to add a little pizzazz to our parties before they even get started.  And on Thursday I'll be back with more hot dinner.  

Monday, October 25, 2010

The Original Asian Lettuce Wraps

Although the ingredient list is long, these Asian Lettuce Wraps are pretty quick and easy.

Unless you have an evening like this...

You get home from work, and your kitchen smells surprisingly like a community pool.  When you open the cupboard under your sink, the blast of bleach causes your nose hairs to wither.  You realize that everything under the sink is swimming in a little lake of Clorox spray.  Apparently, your gallon jug of cleaning product has sprung a leak.  Great.

You get almost everything cleaned up, but the bottom of your box of garbage bags is completely saturated with Clorox.  When you lift it up, it disintegrates, and all 25,000 of your Kirkland Signature garbage bags go flying around your kitchen.  In the process, each bag gets covered in more Clorox.  GREAT.

As you're debating the environmental and financial impact of chucking 25,000 unused garbage bags, you remember that the city is working on your plumbing, and they have disconnected your sewer from the main line.  In order to prevent "unpleasant odors" from penetrating into your house, they have forbidden you from running water down the drain.  GREAAAAT.

So, you cook dinner with as little water as possible, which causes, of course, the biggest mess ever.

If you have had a day like this, it's okay to eat in front of the most recent episode of 30 Rock.  In fact, it's probably better that way.

Asian Lettuce Wraps
Adapted from the cyber kitchen of allrecipes.com
Serves: 4

For Wraps:
16 leaves of butter lettuce (or iceberg or romaine, just use something crunchy)
1 pound ground turkey
1 tablespoon oil
1 large onion, chopped
2 cloves garlic, minced
1 tablespoon soy sauce
1/4 cup hoisin sauce
2 teaspoons pickled ginger, minced
1 tablespoon rice wine vinegar
1/2 teaspoon Asian chile pepper sauce
8 ounces water chestnuts, drained and chopped
5 green onions, white and light green parts only, chopped
2 teaspoons dark sesame oil

For Dipping Sauce:
1/4 cup plum sauce
1 tablespoon orange juice
1/2 teaspoon corn starch
1 tablespoon teriyaki sauce

In a skillet over high heat, brown the ground turkey and onion in 1 tablespoon oil.  (If you have lots of time on your hands, brown the turkey first, then set it aside before browning the onion in the same pan.  This will allow the turkey to brown better.  If you're in a hurry, just throw them both together.  That's certainly what I do.)  Add garlic, soy sauce, hoisin sauce, ginger, vinegar, and chile pepper sauce into the skillet and stir.  Stir in the chopped water chestnuts, white and light green parts of the onion, and sesame oil.  Continue cooking until the onions begin to wilt, about 2 minutes.

Meanwhile, make the dipping sauce.  Whisk together plum sauce, orange juice, corn starch, and teriyaki sauce in a small saucepan. Boil for 1 minute.

Arrange lettuce leaves on a platter and add the meat in a big pile.  Serve with the sauce, letting everybody make his or her own lettuce wraps.  And make sure you have plenty of napkins.

Thursday, October 21, 2010

Seven Layer Bars

When you make Seven Layer Bars, you will have this conversation:

You: I made Seven Layer Bars.

Other Person: Really?  What are the seven layers?  (Please note: Other Person will not expect you to have an answer to this question.)

You: Butter...

Other Person (interrupting):  Mmm, butter...

You won't need to continue the conversation after that.  Other Person will be too busy stuffing his face with Seven Layer Bars.  I was obviously a fortune teller in a previous life.

Seven Layer Bars
Serves: depends on your sweet tooth!

1 1/2 cups graham cracker crumbs (this is one "sleeve" of graham crackers)
1/2  cup butter (1 stick), melted
1 cup pecans, chopped
1 cup chocolate chips
1 cup butterscotch chips
1 1/2 cups flaked coconut
1 1/3 cups sweetened condensed milk (this is one 14 ounce can)

Preheat the oven to 350 degrees.  Line a 13 x 9 pan with parchment paper to make it easier to get the Seven Layer Bars out of the pan.

Combine the graham cracker crumbs with the melted butter and press into the bottom of the pan to create a crust.  Sprinkle chopped pecans over the graham cracker crust.  Top the pecans with chocolate chips and butterscotch chips.  Sprinkle the coconut over the chips.  Finally, drizzle the sweetened condensed milk over the coconut.  (If you avoid the very edges, maybe the last 1/8", of the bars when you're drizzling the sweetened condensed milk, this will also help you get the bars out of the pan at the end.  I used to pour a ton of the milk on the edges, and this was a sticky mistake.)

Place the pan in the oven and bake for 20-25 minutes or until lightly golden brown on top.  Cool at least 20 minutes, then slice into bars.

Wednesday, October 20, 2010

Chicken and Salsa Wraps

A lunchtime starvation situation led to this sandwich, and it has been repeated many times since.  Feel free to substitute your favorite ingredients.  For example, in the photo I switched out a tortilla for a Flat Out Wrap and used extra lettuce.  Because of all the roughage,  I had to eat it open-faced.    

Chicken and Salsa Wraps
Serves: 2

2 wraps (tortilla, flatbread, etc.)
2 ounces goat cheese
2 cups mixed greens
6-8 ounces leftover rotisserie chicken, sliced thinly (or use deli turkey meat)
1/2 cup peach mango salsa
Salt and pepper

Spread goat cheese on one side of each wrap.  Evenly divide mixed greens, chicken, and salsa between the wraps.  Sprinkle with salt and pepper to taste.  Roll up or eat open-faced.

Tuesday, October 19, 2010

Salmon En Cocotte

It was a night that didn't go exactly according to plan.  I got stuck late at work and then still had to go to the grocery store before dinner.  At the rate I was moving, we wouldn't be eating until midnight, but I really wanted to give this Salmon En Cocotte a whirl.

Once all the ingredients were in my eco-friendly grocery bags, I was ready to go.  The husband wasn't home yet, so I took my time slicing and dicing.  I was having a nice time cooking, but I couldn't help but wonder when the husband was going to be home.  I figured if I was going to make hot dinner, we should probably eat it before it got cold.

After all my lolly-gagging, I finally pulled the salmon out of the oven around 8:30, and it looked a little blahhhh.  Nuts.  I must have over-cooked it or something.

And still no husband.

To give myself some wifely credit, I waited about five more minutes before I decided it was time to get to business and eat my overdone fish.  I poured myself a (tall) glass of wine and sat down at the table.

As if on cue, the husband walked in the door.  "Hi, hon!  Sorry I'm late.  I had a meeting, and my phone died, so I couldn't call."

He had tried to call!  That's all a girl can ask for.  So, I filled up his plate with (still hot!!) dinner, and we sat down to our salmon.

I tasted it, and GLORY BE!  Forget its gray-ish hue, I could eat an entire pan of this stuff.  It was excellent.

So, although it didn't seem to be going well, a little hot dinner set our evening right.

Salmon En Cocotte*
*Don't let the fancy French name fool you!  This dinner is much more simple than it sounds.
Adapted from Entertaining by Cooks Illustrated
Serves: 4    

4 skinless salmon fillets (about 6 ounces each)
Salt and pepper
2 tablespoons olive oil
2 medium leeks, white and light green parts only, halved lengthwise, sliced thin, and rinsed thoroughly
2 sprigs fresh thyme leaves
2 medium garlic cloves, minced
1/2 cup dry white wine (preferably Pinot Gris or Sauvignon Blanc)
2 tablespoons butter, cut into two pieces

Adjust oven rack to lowest position and heat oven to 250 degrees.  Pat fillets dry with paper towels and season with salt and pepper.

Heat oil in large Dutch oven over medium-low heat until shimmering.  Add leeks, thyme, and a pinch of salt.  Cover, and cook until softened, about 8-10 minutes.  Stir in garlic and cook until fragrant, about 30 seconds.  Remove pot from the heat.

Lay fillets, skinned side down, on top of leeks.  Place large sheet of foil over the pot and press to seal, then tightly cover with lid.  Transfer pot to the oven and cook until salmon is opaque and flakes apart with a fork, about 25 minutes.  The internal temperature should be 125 degrees.  (The salmon won't have the lovely golden color of pan-seared salmon, but don't be fooled!  It will still taste delicious.)

Transfer salmon to a serving platter and tent loosely with foil.  Stir wine into leeks in pot and simmer over medium-high heat until slightly thickened, about 2 minutes.  Off heat, whisk in butter and season with salt and pepper to taste.  Spoon sauce over salmon and serve.

Monday, October 18, 2010

Grilled Potatoes in a Foil Packet

As I may have mentioned, the husband and I recently returned from a vacation to glorious California.  I'll spare you more details of how wonderful it was, but I'll share one little story.

We decided that it would be both thrifty and delicious to cook a meal while we were on our trip.  We snagged some steaks for a screamin' deal, salad fixin's, and a couple spuds from the local Albertson's.

Inspired by a potato chat I'd had recently with Jennifer and Kathi at work, I decided to cook my taters in foil packets on the grill.  If nothing else, it would make for easy clean-up.  Thankfully, the vacation kitchen was stocked with olive oil and, glory be!, Montreal Steak Seasoning.  A few quick minutes on the grill, and the potatoes were fantastic.  The husband cooked the steaks to perfection, and the salad made us feel like we could safely indulge in pancakes, chocolate bars, and milkshakes for the rest of our trip completely guilt-free.

Grilled Potatoes in a Foil Packet
Serves: 4

2 very large potatoes, cut into 1/2 inch chunks
2 tablespoons olive oil
1-2 tablespoons Montreal Steak Seasoning (or salt and pepper)

Preheat grill to medium heat.  Cut four large pieces of aluminum foil.  Layer the pieces so your foil is of double thickness.  Evenly divide potatoes between your two "beds" of foil.  Drizzle each pile of spuds with 1 tablespoon of olive oil and sprinkle with Montreal Steak Seasoning.  Crimp edges of packet so it's closed tightly, but the potatoes still have some room to breath.  Cook at medium heat for about 20 minutes or until potatoes are tender.

P.S. If I plan ahead next time, I'm going to chop up an onion and include it in the foil packets.  Mmmm.

Sunday, October 17, 2010

My Apologies

Greetings, loved ones.
Let's take a journey.

I know a place
Where the grass is really greener.
Warm, wet, and wild.
There must be something in the water...

You could travel the world,
But nothing comes close to the Golden Coast.

When Katy Perry penned those wise words for her hit song "California Gurls" (and, yes, my spell check works just fine, thank you), she really hit the nail on the head.

The reason I'm telling you this is not to get that catchy jam stuck in your head (as it is now in mine), but rather to offer an explanation/apology for the somewhat lackluster posts last week.  You see, the husband and I just returned from a weeklong vacation in California.  Much like Snoop Dogg in California Gurls, cooking was more of an appearance than a star.  Hey, dinner is still hot even when it's delivery!  

So, this week, I'm bringing my A-game.  Get ready...

Vacation Potatoes
At least I did something productive while I was gone.

Salmon en Cocotte
Sounds fancy, doesn't it?

Chicken Salsa Wrap
Next time you have a bunch of stuff in your fridge, just wrap it in a tortilla.  It might work out!

Seven Layer Bars
Oh, yes.

San Francisco
This is not actually a recipe...I just couldn't resist one last vacation photo.

Wednesday, October 13, 2010

How To

There are many things about cooking that I have yet to learn.  For instance, I am terrible at peeling hard boiled eggs.  No matter what I do, little bits of shell are left clinging to the side.  If I manage to get all the shell off, there are craters of white missing.  There must be some way to do this so-called simple task quickly and easily.

Other tricks of the trade that continue to allude me have to do with choosing ingredients.  In the produce aisles or the farmers market, I'm often trying to choose good ingredients.  If I'm going to spend my hard-earned money on food, I want to make sure it's the best.  It really frosts my cookies when I get something home and it's sub-par.  

One item that is always tricky to pick out is a good melon.  Something about that rind is intimidating...you have no idea what's going on under there!  So here are a few tricks I use to pick a melon.  I can't guarantee that any of them work for sure, but it's better than facing a stack of fruit unprepared!

Pickin' a Melon

  • Smell - Give your melon a whiff.  Does it have a sweet, melon-y smell?  If so, it's probably ripe.  But beware of a melon that smells super sweet!  It might be over-ripe.
  • Heft - If your melon is heavier than another melon of a comparable size, it's probably ripe. 
  • Melon Button - You know the part at the top of a melon where it was attached to the vine?  Well, someone told me if this "melon button" was on the small side, the melon was ripe.  My source, by the way, was some dude in the fruit aisle of the grocery store, so this tip is particularly suspect.  

So, what about you?  Do you have any tips for picking a melon or any other ingredient?  And if you know how to peel a hard boiled egg, please, please share.

Tuesday, October 12, 2010

"Mabel, Mabel, strong and able..."

When the husband and I were in college, we attended an "etiquette dinner."  We figured they would at least feed us better food than the dining hall, and we were more than willing to assume the guise of improving our manners for such a benefit.

Aside from the usual "start with the flatware on the outside and work your way in," there was one topic that stuck with me.

Gristle.

"If you encounter a piece of gristle wile you're chewing," they told us, "you should raise your fork to your mouth, tastefully(?!?!) deposit the gristle onto the fork, then set the piece of blubber on the side of your plate."

Uh, no.  The husband and I both agreed that we would make a much more ridiculous scene attempting to spit a meat chunk on the tiny tines of a fork than by faking a mouth wipe and leaving the gristle in a napkin.  Several years later, though, we learned the error of our thinking.

It was our wedding anniversary, and we were celebrating at a fancy-pants steakhouse.  The lights were dim, I was looking pretty fly (if I do say so myself), and the food was delish.

Then...gristle.

According to our preferred method of gristle disposal, the husband fake-mouth-wiped the offending piece of prime rib into his cloth napkin.  All good, right?

No.  Not good.

After dinner, the husband set his crumpled napkin onto the table and reclined in a full-belly coma.  Our attentive waiter hustled over to take care of the inappropriately-placed napkin.  Did he clear it away?  Oh, no.  He shook out the "wrinkles" to fold it up, sending the gristle catapulting out to the middle of our empty table.

The husband's eyes were the size of, well, the prime rib he had just demolished.  By some miracle, the waiter hadn't noticed the hunk of half-chewed beef on the table.  With cat-like reflexes, the husband grabbed the gristle and put it back in the napkin.

Seeing the (again crumpled) napkin back on the table, the water returned to help us out yet again.  Shake, shake, shake, annnnnd the gristle goes flying.

We then laughed until our eyes watered, and I came close to wetting myself.

So, please, PLEASE learn from our mistake.  Always spit gristle on a fork and place it on the side of your plate.

Monday, October 11, 2010

Roasted Sweet Potatoes and Brussels Sprouts

Halloween is approaching, and my sweet tooth is already starting to ache.  The husband and I picked up a super-sized bag of candy for the trick-or-treaters, and I made the mistake of opening it.  Now all those little bars of chocolate-y goodness are calling my name.

Lest I fund my dentist's retirement in its entirety, I might as well make vegetables that taste like candy.  Ok, who am I kidding, almost like candy.

Sweet potatoes are like the M&Ms of the vegetable world.  Everybody likes M&Ms and everybody likes sweet potatoes.  (Well, besides my father, but that's a whole different story...)  Brussels sprouts, on the other hand, are a little bit scary to most folks.  So, temper the fear by pairing them with sweet potatoes.  Brussels sprouts don't seem so frightening when they are basking in the safety of a sweet spud.

And if you serve this at the dinner table and the crowd starts getting a little whiny, tell them to give it a shot before they complain.  I have a sinking suspicion they'll like brussels sprouts after all.

Roasted Sweet Potatoes and Brussels Sprouts
Serves: 4

2 sweet potatoes, peeled and cut into 1/2-inch pieces
1 1/4 pounds brussel sprouts, trimmed and halved
2 tablespoons olive oil
Salt and pepper

Preheat the oven to 450 degrees.  Line a baking sheet with aluminum foil for easy clean-up.  Toss together sweet potatoes, brussel sprouts, olive oil, salt and pepper.  Arrange the vegetables in a single layer on the baking sheet.  (If they are too crowded, divide the veggies between two baking sheets and rotate them halfway through cooking.)  Roast 20-25 minutes, until spotty-brown and tender, tossing the vegetables with a spatula halfway through cooking.

Sunday, October 10, 2010

Pear and Brie Panini

I am lucky enough to enjoy the "chore" of cooking.  Something even non-chefs can enjoy, though, is cooking with your comrades.  Grab a beer, a glass of wine, or an ice cold chocolate milk, and share the responsibility.  Everyone has a good time, and if the food tastes rotten, it's everybody's fault!

Some friends recently invited us over to cook dinner with them.  They are both FABULOUS chefs, with specialties ranging from coffee cake to seared tuna.  Anyway, this time they had a killer idea for heating up cold dinner.  I am still dreaming about this meal.

Without further ado, hot, hot, hot dinner...

Pear and Brie Panini
Serves: 4

4 ciabatta rolls (or your favorite bread), sliced in half
1/2 red onion, thinly sliced
1 teaspoon rosemary, chopped fine
1 tablespoon olive oil
8 ounces brie cheese, softened
2 cups arugula
8 thin slices pancetta
3 pears, thinly sliced
Salt and pepper

Preheat panini press.  Heat 1 tablespoon oil in a small skillet.  Saute onion with rosemary, salt and pepper (to taste) until softened, about 5 minutes.

Meanwhile, spread each slice of bread with softened brie.  Top one slide of bread with arugula.  Layer two slices of pancetta on top of the arugula, then sprinkle with sauteed onions.  Top onions with pears.  Place the second slice of bread on top to close up your sandwich.  Grill sandwiches in your panini press until the rolls are crusty and the cheese is melty.

If you don't have a panini press:

  • Wrap sandwiches in foil and bake for 10 minutes at 400 degrees.
  • Use your George Foreman grill just like you would use a panini press.
  • Place sandwiches in a heated skillet.  Put a heavy pot on top of the sandwiches to weigh them down.   

Thursday, October 7, 2010

Warm Quinoa Salad with Roasted Squash and Pecans

There has been a change of plans!

Yesterday I promised a way to heat up a cold dinner situation, but I'm going to have to disappoint.  I promised my pal J the recipe below, so hot, hot, hot dinner is postponed until Sunday night.  Please come on back then!

Anyway, today's recipe began with a change of plans, too.  J invited me to cook dinner with her at her abode.  I was in charge of bringing a recipe and ingredients.  Perfect!  I thought.  I'd been wanted to make this farro salad recipe for months.  On my way to J's house, I swung by the grocery store to pick up the food stuffs.

I checked out the ingredient list as I meandered the aisles.

"Farro, covered in cold water and soaked overnight."  Dang.  That was not happening for dinner in 45 minutes.  Good thing I had half a box of quinoa left over from Quinoa with Corn and Black Beans.  I'd have to use farro another time.

"Delicata squash."  Hmmm.  How about butternut squash?  They carry that one.

"Pomegranate seeds." Uh, no.  I am NOT about to spend 30 minutes peeling that sucker just to stain my shirt with those naughty red seeds.

"Fuyu persimmon."  WHAAAAAT?!  I'm pretty sure that's a cuss word someone snuck into the recipe.  I'll skip it.

"Feta cheese."  After all these changes, I'm just gonna use goat cheese.  I like it, that's why.

In this case, the change of plans worked out in my favor, because the resulting recipe was real good.  Hope you enjoy!

Warm Quinoa Salad with Roasted Squash and Pecans
Serves: 6-8

1 1/2 cups quinoa
1 medium butternut squash, peeled and diced small (about 1 3/4 cups)
2 tablespoons balsamic vinegar
1 tablespoon apple cider vinegar
1 tablespoon shallot, finely chopped
1/4 cup olive oil, plus extra for roasting squash
1/3 cup pecans, lightly toasted and chopped
1/4 cup parsley, chopped
1/3 cup dried cranberries
1/4 cup dried apricots, roughly chopped
3 ounces goat cheese, crumbled
Salt and pepper

Preheat oven to 400 degrees.  Cook quinoa according to package directions.

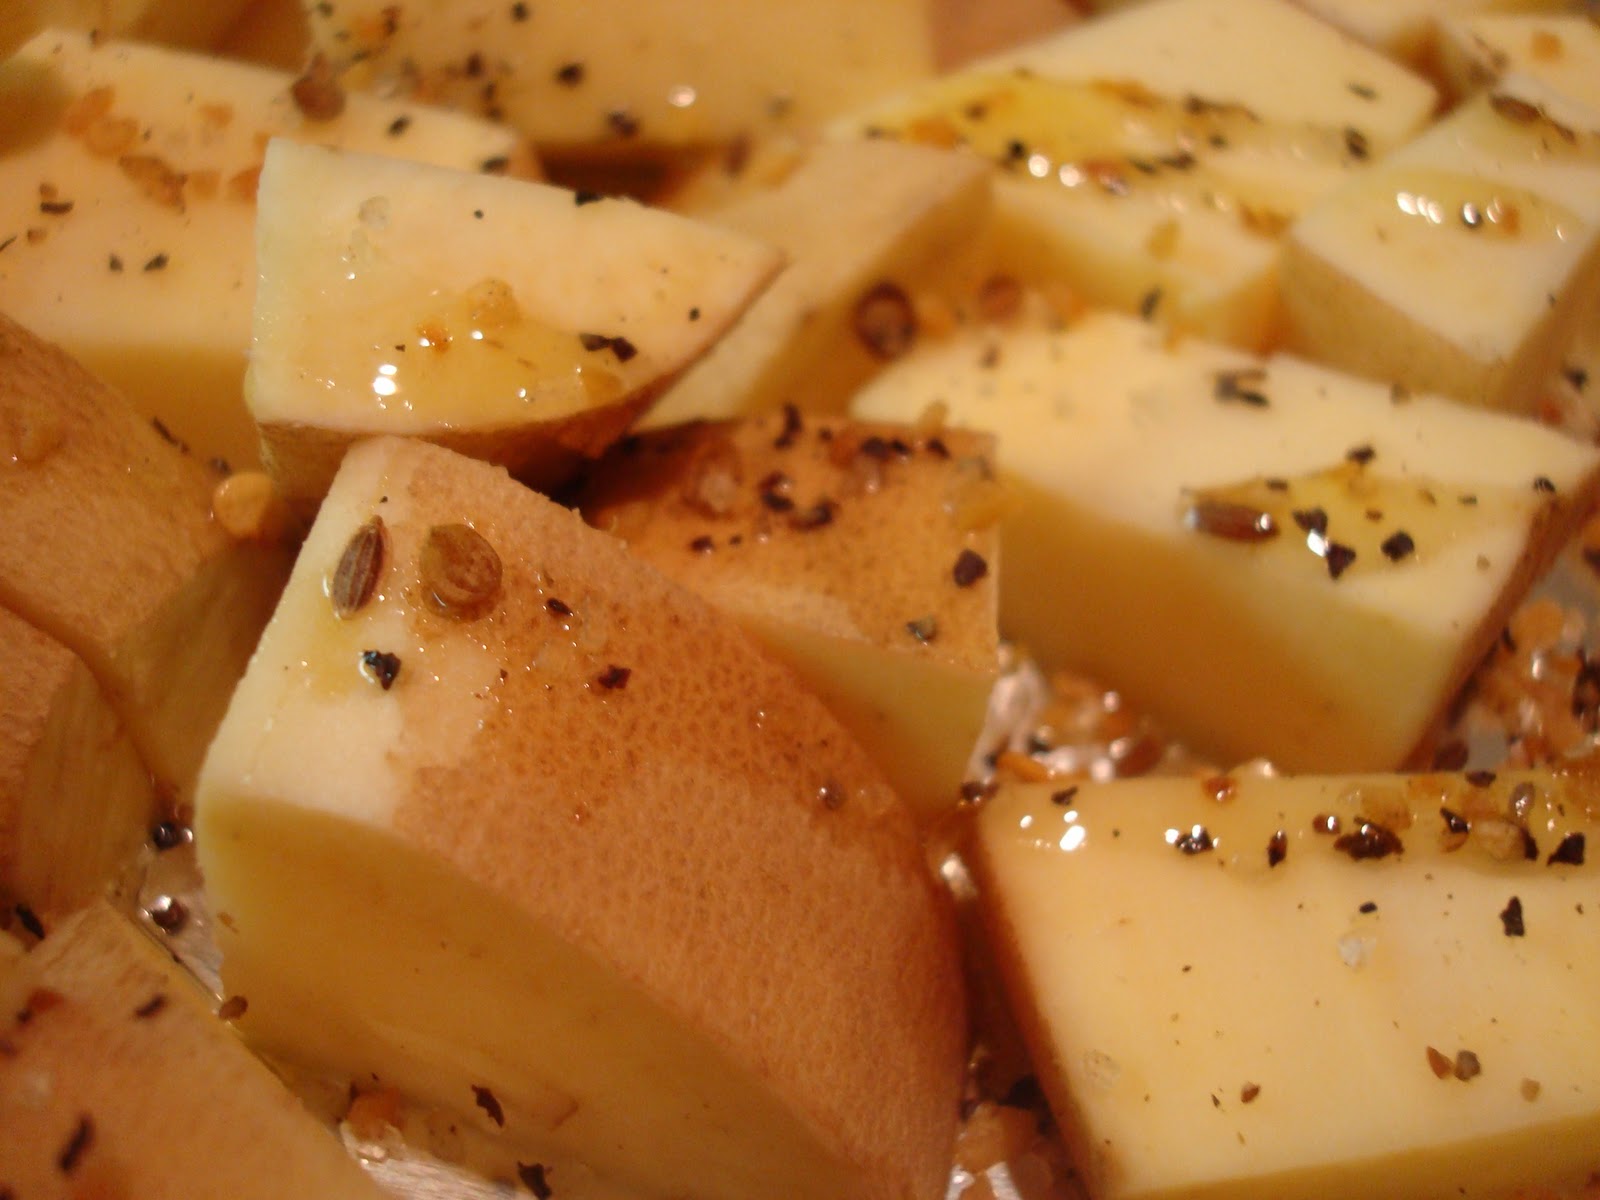
Meanwhile, ready all other ingredients.  Toss the squash cubes with 1-2 tablespoons olive oil and season with salt and pepper.  Transfer to a baking sheet (lined with parchment paper or aluminum foil for easy clean up) and roast in the oven for about 15 minutes until spotty-brown, caramelized, and tender, stopping once halfway through to flip the squash with a spatula.  (We diced our squash quite small, about 1/4", so if yours is in larger pieces, you'll need to increase the roasting time.)

In a small bowl, whisk together the balsamic and apple cider vinegars and shallot.  In a steady, slow stream, whisk in the olive oil until blended.  Season to taste with salt and pepper.

Drain the cooked quinoa.  Place the quinoa in a serving bowl along with cooked squash, pecans, parsley, cranberries, and apricots.  Pour the dressing over the salad and toss.  Add the crumbled goat cheese and season with salt and pepper to taste.  Toss again gently.  Serve over a bed of arugula if desired.  Or just stuff your face as quickly as possible.

Wednesday, October 6, 2010

Question

The husband and I have an ongoing debate about hot dinner vs. cold dinner.  In my mind, cold dinner is acceptable any time, and even the only appropriate option on some occasions.  Some suppers that fit into this category are cereal, PB&J, and, if I'm honest, ice cream.  In the husband's opinion, however, these are acceptable dinner options, um, never.

There are a few other "cold dinner" options that we are on the fence about.  These include sandwiches, salads, and leftover pizza straight from the fridge.

So, friends and followers, what do you think?  What are acceptable, and, dare I say, popular cold dinner options at your table?

And come on back tomorrow to hear how some friends of ours took a cold dinner and made it hot, hot, hot.  

Tuesday, October 5, 2010

Coffee Cake Muffins

When the husband and his co-workers moved to a new office, I donned my apron and busted out the ol' muffin tins.  I figured every workplace needs a taste of Happy Home.


Coffee Cake Muffins
This recipe is adapted from "Sock-It-To-Me Cake" by the Cake Mix Doctor.
Serves: 16

1 package plain yellow cake mix
3/4 cup light brown sugar
2 teaspoons cinnamon
3/4 cup pecans, finely chopped
1 cup sour cream
1/3 cup vegetable oil
1/4 cup water
1/4 cup granulated sugar
4 large eggs
1 teaspoon vanilla extract

Preheat the oven to 350 degrees.  Line muffin tins with paper liners (or mist with vegetable oil spray and dust with flour.)  Set pan aside.

For the filling/topping, place 2 tablespoons cake mix, the brown sugar, cinnamon, and pecans in a small mixing bowl and stir until well combined.  Set the bowl aside.

Place the remaining cake mix, sour cream, oil, water, sugar, eggs, and vanilla in a large mixing bowl.  Blend with an electric mixer on low speed for 1 minute.  Stop the machine and scrape down the sides of the bowl with a spatula.  Increase the mixer speed to medium and beat 2 more minutes.  The batter should look thick and smooth.

Fill muffin cups about 1/3 of the way full with batter.  Then, sprinkle about 2 teaspoons of filling/topping on top of the batter.  Finish filling the muffin cups with the remaining batter.  Then sprinkle with 1-2 teaspoons of filling/topping.  (Your muffin tins will be verrrrrry full...I like big muffins.)

Bake in preheated oven for about 26 minutes, until the muffins are golden brown and spring back when lightly pressed with your finger.  Remove the pan from the oven and place on a wire rack to cool for 5 minutes.  Then, remove muffins from their tin.

Coffee cake muffins are extra delicious warm, but your co-workers will enjoy them any way you serve them.

Monday, October 4, 2010

Chicken with Cipollini Onions and Riesling

Admit it.  You have a celebrity crush.  Whether it's the girl/guy you want to be or the girl/guy you want to be with, everybody has one.

I have a total celebrity crush on Giada De Laurentiis.

She's so awesome, it's almost cruel.  She gets paid to cook food (something I love) on TV (another thing I love.)  She's real pretty (who has hair-commercial hair like that!?  Come on!) and lives in a killer house.  (Not that I've actually been, I just see it on the Food Network.)  Plus, her husband makes pants.  WHAAAAAT?!?!  That's just not fair.  I am uber proud of my husband, but if he took up pant-making on the side, I wouldn't complain.

I could wax eloquent about Giada all day, but I digress.  The subject at hand is food...Giada's food, in this case...so let's get to it.

I set out to make Giada's recipe "Chicken with Tarragon and White Wine." Star ingredient here is, obviously, tarragon.  Well, I went to the grocery store, and the tarragon looked like dog doodie.  Yes, DOODIE.  And I was not about to pay $3.99 ($3.99!!!) for nasty-looking tarragon.  I figured I'd just substitute the dry stuff from my cupboard at home.

Well, that's an easy enough substitution...if you actually have dried tarragon.  I, of course, did not.  Sigh. I began sniffing every spice in my cupboard until I found something that I thought would work.  I settled on poultry seasoning, which is apparently useful for something other than stuffing my Thanksgiving turkey.  Basil was a close second, though.  So, if you are fresh out of poultry seasoning, just sniff around until you find something that smells delicious.  And then change the name of the recipe so no one knows about the mistake.

On that note...here's my recipe for "Chicken with Cipollini Onions and Riesling."

Chicken with Cipollini Onions and Riesling
Serves: 4

1/4 cup olive oil
4 bone-in, skin-on chicken breasts (feel free to use dark meat, I just prefer the breast)
Salt and pepper
1/4 cup plus 2 tablespoons flour
1 1/2 cups cipollini onions, peeled, trimmed, and halved if large
4 cloves garlic, sliced
1 cup Riesling
3 1/3 cups chicken broth
1 tablespoon poultry seasoning
2 tablespoons butter
2 tablespoons parsley, chopped

In a Dutch oven, heat 1/4 cup olive oil over high heat.  Season chicken with salt and pepper and dust with flour.  Cook the chicken until browned on all sides, about 8 minutes.  Remove the chicken to a plate and set aside.

Turn the heat down to medium-high.  Add the onions, season with salt and pepper, and saute until they are softened, about 5 minutes.  Add the garlic for the last 30 seconds of cooking.  Add the wine and scrape up the browned bits on the bottom of the pan.  Return the chicken to the pan.  Add 3 cups of chicken broth and the poultry seasoning.  Bring the mixture to a boil.  Cover, reduce heat to medium-low, and simmer until the chicken is cooked through.  This will take about 30 minutes.  Turn chicken several times during cooking.  Transfer chicken to a plate and tent with foil while you finish the sauce.

In a small bowl, mix together 1/3 cup chicken broth and 2 tablespoons flour.  Whisk the flour mixture into the sauce until it is smooth.  Bring the sauce to a simmer and cook, uncovered, until it has thickened, about 8-10 minutes.  Stir in the butter and season with salt and pepper.  Return chicken to the pot and sprinkle with 2 tablespoons parsley.

The sauce for this chicken is fan-freakin'-tastic.  I'd recommend serving it with something that you'll want slathered in the sauce.  Mashed potatoes, perhaps?  Please feel free to comment if you have any suggestions for a side dish.

Sunday, October 3, 2010

Roasted Green Beans


Some dinners are born of genius.  Some are born of gorgeous ingredients.  Many of mine are born of laziness.

Roasting green beans falls firmly in the lazy category.  The oven is already on, I figured, why not roast the green beans?  

Best.  Choice.  Ever.

Have you ever roasted green beans?  If not, try it this week.  I dare you.  And then I dare you to not eat all of them. 

Good stinkin' luck.


Roasted Green Beans
I won't include specific amounts, but make a bit more than you usually would for green beans. Trust me on this one.

Green beans, stem ends trimmed
Olive oil
Salt and pepper

Preheat the oven to 425 degrees.  Line a large baking sheet with aluminum foil to make clean-up easier.  Make sure you use a large pan because you don't want the green beans to be crowded together.  If they're crowded in the pan, the beans will steam, and it will be more difficult to get the delicious brown caramelization thing happening.  Use two pans and rotate them halfway through cooking if one pan gets too full.

Place green beans on the foil-lined baking sheet.  Drizzle the beans with olive oil (about 1-2 tablespoons) and sprinkle with salt and pepper.  Use your hands to toss everything together so all the beans are oiled and seasoned evenly.

Place the baking sheet in the oven and roast for 12-15 minutes.  Halfway through cooking, toss the green beans with a spatula so they roast evenly.  When they are finished, the beans will have lovely brown spots and will taste like vegetable heaven.