Showing posts with label baked goods. Show all posts

Monday, May 9, 2016

Kentucky Derby Cookies

This past weekend was Derby weekend and I was nostalgic thinking of my Old Kentucky Home. As usual on the first Saturday in May, I teared up at the playing of the state song just before the big race.

I was lucky enough to get to cover three derbys while a reporter for the Lexington Herald-Leader, where I met my husband. The Bluegrass is a special place.

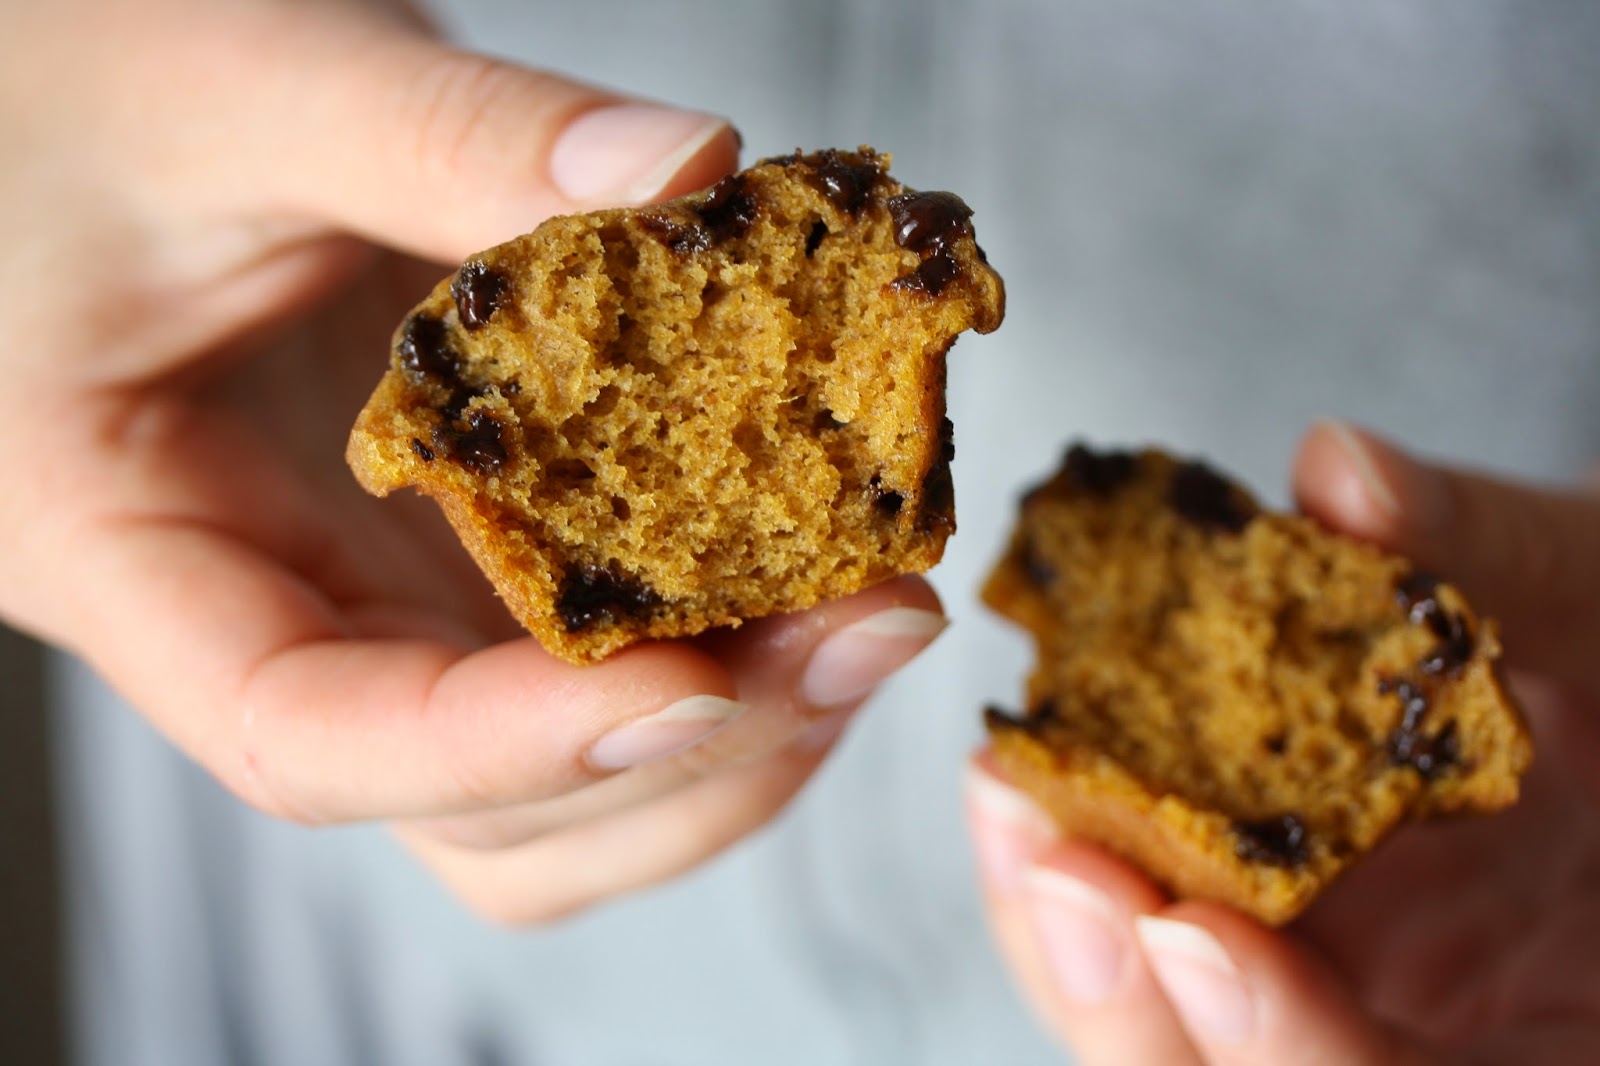
Often on Derby Day, I make Derby pie. But this year I decided to create something different -- Kentucky Derby Cookies. Think of them as Derby pie in cookie form. Yes, there's bourbon and two kinds  of  nuts -- pecans and walnuts. That's because I learned that some versions of the pie have walnuts and others have pecans, which is what I've always used. Why choose?

And why wait until next Derby to bake up these delicious cookies? With more than half a cup of bourbon I promise you will enjoy them any day of the year. Besides, we have a Triple Crown to watch out for in the coming weeks.

Then next year, you can add Kentucky Derby Cookies to your Derby Day menu.

XOXO,
Amy


Kentucky Derby Cookies
(Note: This is a double batch that yields 7 dozen cookies. I like to bake a lot of cookies and freeze half or more for later. If you want to cut this recipe in half, no problem. For the bourbon, use 5 tablespoons)

5 1/2 cups all-purpose flour
2 teaspoons baking soda
1 teaspoon salt
2 cups butter, softened
1 cup white sugar
2 cups packed brown sugar
4 eggs
1 teaspoon vanilla extract
1/2 cup plus 2 tablespoons bourbon
1 12-ounce package semisweet chocolate chips
1 12-ounce package chopped pecans
1 12-ounce package chopped walnuts

Preheat oven to 350 degrees.

In a medium bowl, combine the flour, baking soda and salt -- and then set aside.

In a large bowl, cream together the sugars and butter until smooth. Add in eggs and mix to combine. Mix in vanilla extract and bourbon. Stir in chocolate chips and pecans.

Drop large spoonfuls of cookie batter on lightly greased cookie sheets. Bake for 9-10 minutes or until just beginning to golden. Cool cookies on wire racks.


Monday, March 14, 2016

Amy's Yummy Year

This time last year, my friend Erin invited my friend Andrea and I join her on this delicious blog she created. Andrea and I bellied right up. Thank you, Erin for the creative culinary outlet. It's been a sweet year blogging with two awesome foodie friends who share the goal of putting food on the table and keeping the tradition of family dinner alive.

Here are some of my happiest Hot Dinner Happy Home moments from the past year as well as some of my favorite dishes by Andrea and Erin.

Enjoy!

XOXO,
Amy

Happiest Moments

  • Creating Spring on Toast with Erin while my Lucy and Penny "babysat" her Danny-boy. (Love that Erin shared this memory in her Friday post.)


Favorite dishes by Andrea


Favorite dishes by Erin

  • Erin's Slow Cooker Thai Peanut Pork is the first HDHH dish I ever made and I chatted it up A LOT on my Facebook page. I couldn't even tell you how many friends have made that dish. Suffice to say it's a hit from coast to coast and all points in between.
  • Parmesan and Yogurt Crusted Chicken is a George family go-to dinner. My younger daughter Penny requested it for her birthday dinner last month.
  • I see Spiced Pecans becoming my go-to holiday party nosh. I didn't make them last year like I intended. But in 2014 my friends walked off with the few remaining nuts after the Thanksgiving feast Chez George. I don't blame them, because, after all, we call these crack nuts.

Friday, February 12, 2016

Overnight Coffee Cake

Sunday is Valentine's Day. Have you ordered your roses? Reserved the corner table at a fancy restaurant? Put the champagne on ice? No? Okay, good. Me neither.

Overnight Coffee Cake is your perfect plan for a lovely Valentine's Day. Prep the batter the night before and pop it in the oven while you're bleary-eyed the next morning. By the time you've changed out of your jammies and brewed your tea, it's ready to devour, perfectly warm from the oven. Bonus points if you bring it to your honey while they're still snuggled in the covers. Double bonus points if the breakfast tray includes a mimosa. Just saying...

Let's get cooking!
Erin


Overnight Coffee Cake
From the Randall Church Cookbook (You know I love a good church cookbook recipe.)

Coffee Cake:
2 cups flour
1 cup granulated sugar
1/2 cup brown sugar
1 teaspoon baking soda
1 teaspoon baking powder
1/2 teaspoon salt
2 teaspoons cinnamon
1 cup buttermilk*
2/3 cup butter, melted
2 eggs

Topping:
1/2 cup brown sugar
1/2 cup chopped pecans
1 teaspoon cinnamon

THE NIGHT BEFORE:
Combine flour, granulated sugar, brown sugar, baking soda, baking powder, salt, and cinnamon in a large mixing bowl. Add buttermilk, butter, and eggs. Beat at low speed until combined, then continue to beat at medium speed for 3 minutes. (If you don't feel like using your mixer, I had success beating the batter by hand with a whisk.) Pour batter into a greased 9" x 13" baking dish.

Combine topping ingredients in a small bowl. Sprinkle evenly over batter. Cover and refrigerate 8-12 hours.

IN THE MORNING:
Preheat oven to 350 degrees. Uncover coffee cake and bake for 35-40 minutes, or until a toothpick inserted into the center comes out clean. Serve warm.

*Don't have buttermilk? Don't let that stop you! You can easily make a buttermilk substitute. Mix 1 cup milk and 1 tablespoon lemon juice or white vinegar. Let it sit on the counter for about 5 minutes until it thickens and starts to curdle, then proceed with the recipe.


Monday, February 8, 2016

French Chocolate Cake

Recall from last week's post Penny's birthday dinner -- Parmesan and Yogurt Crusted Chicken, Carolina Collard Greens, scalloped potatoes and this nearly flourless French Chocolate Cake.

I made this cake exactly per the recipe in pastry chef David Lebovitz's memoir, The Sweet Life in Paris. I selected it because it offers something for everyone in the George family -- high quality dark chocolate for maman and a cake that doesn't require icing, which les enfants don't like anyhow. Plus, it is so rich that a teeny piece is perfect -- and perfect for papa who doesn't have a huge sweet tooth.

I highly recommend the cake and the book, which explained a lot about Parisians that I already knew but plenty that I didn't. Sweet Life is also full of recipes that appear easy to do -- and eat. In fact, the chocolate cake was my second dish from the book. When I made the Chicken Tagine with Apricots and Almonds, I swear my house smelled just like Chez Omar, the popular Moroccan restaurant in Paris' Le Marais neighborhood.

XOXO,
Amy


French Chocolate Cake
From The Sweet Life in Paris by David Lebovitz

9 ounces bittersweet or semisweet chocolate, roughly chopped
8 tablespoons unsalted butter
1/3 cup sugar
4 large eggs, at room temperature, separated
2 tablespoons all purpose flour
Pinch of salt

Preheat oven to 350 degrees. Butter a 9-inch loaf pan and line the bottom with a strip of parchment paper.

In a large bowl set over a pan of simmering water or likewise in a double boiler, heat the chocolate and butter together until just melted and smooth. A note about the chocolate, for this and for homemade brownies I use Scharffen Berger Baking Bar - 70% Bittersweet Chocolate. Worth the 10 bucks.

Remove chocolate and butter from the heat and stir in half the sugar, then the egg yolks, and flour. (I love this part from the book: "You don't need to measure the half-quantity of sugar exactly. Just pretend you're a French woman cooking in her home kitchen and don't worry about it.)

Whip egg whites with the salt, using an electric hand mixer or whisk. Keep whipping until the whites form soft peaks. Gradually whip in the remaining sugar until the whites are smooth and hold their shape when the whisk or beaters are lifted.

Use a rubber spatula to fold one-third of the egg whites into the chocolate mixture to lighten it. Next fold in the remaining egg whites just until the mixture is smooth and no visible white streaks remain.

Pour batter into pan, scraping sides of the bowl so you bake up all that goodness. Smooth the top of the batter with rubber spatula. Bake for 30-35 minutes. Do not overbake.

Let cake cook in pan before cutting and serving.

The cake can be stored for up to three days. Some French women believe it is better after it sits for a day or two. The cake can also be wrapped in plastic and frozen for up to one month.

Monday, November 30, 2015

Ginger Cookies

We're kicking off a week of holiday baked goods today, dear readers.

Actually, my daughters and I got the baking party started last week by appearing Friday on Fox 46's Good Day Charlotte to show off our Sugar Cookies. (Click here to watch the "What's Your Dish?" segment featuring Lucy, Penny and me. Click here to read the blog post all about it.)

Anyhow, ginger cookies are my favorite cookies of all time. Always have been, always will be. And now my two little gingers love baking and eating them, too!


My mom made ginger cookies for me throughout my childhood. Sometimes I'd ask for these cookies -- like ginger snaps but soft -- instead of birthday cake. I still would -- no matter that my birthday is in June.


I say make ginger cookies this holiday season and all year round!

XOXO,
Amy

PS: The key to ginger cookies is to find unsulphured blackstrap molasses. Molasses comes from sugar cane and is the byproduct in the production of sugar. Juice extracted from sugar cane is boiled up to three times to become three different kinds of molasses -- light molasses from the first boiling, dark molasses from the second boiling and blackstrap molasses from the third boiling. In these ginger cookies, blackstrap molasses brings out the flavor of the cloves, ginger and cinnamon, whereas light molasses makes some disappoing, bland cookies. Blackstrap molasses is super healthy too, so pass me another cookie. Kidding. No, seriously, for real, pass me another cookie.


PPS: I never bake a single batch of cookies. If I'm getting out all my baking supplies, I'm going to make it worth the effort and double the recipe. This recipe doubles nicely and the cookies freeze well after they are baked, too.

Ginger Cookies
Yields about five dozen cookies

2 1/3 cups flour
2 teaspoons baking soda
1/4 teaspoon cloves
1 teaspoon ginger
1 teaspoon cinnamon
1 cup sugar, plus more for rolling cookie dough
1 egg, beaten
4 tablespoons unsulphured blackstrap molasses
1 cup unsalted butter, softened to slightly runny

Combine all  dry ingredients, except sugar, and set aside. Mix together sugar and all other ingredients. Gradually add the dry mix to the egg and butter mixture. Refrigerate cookie dough for a few hours or overnight -- or place in freezer for a shorter amount of time. Basically, you want to dough to harden a bit so that  you can roll it into balls.

When ready to bake, preheat oven to 350 degrees. Roll dough into small balls and then roll in sugar. Bake on ungreased or lightly greased cookie sheets for about 9 minutes. You will see the bottoms of the cookies turn very slightly brown. Be careful not to overbake!


Monday, October 12, 2015

French Yogurt Cake

I've read about yogurt cake in beaucoup French books and memoirs. In Pamela Druckerman's Bringing Up Bébé: One American Mother Discovers the Wisdom of French Parenting, par exemple. And more recently in Elizabeth Bard's Lunch in Paris: A Love Story with Recipes. Both books make me a teensy bit wistful that I didn't pick up and move to the City of Light while in my 20s.

Anyhow, yogurt cake is a popular treat in France. It's often the first cake that les enfants learn to make and I can see why. No electric mixer needed. Most ingredients are always on hand. It's quick to put together, which means you don't have to wait long -- just a little over an hour really --- until you devour your slice. Of course, Mom or Dad should handle the lemon zesting.

French kids use the same 8 ounce yogurt cup to measure the sugar and flour. I couldn't find 8 ounce yogurt cups, so I bought a 24 ounce container, so Lucy, Penny and I could make this cake multiple times.

I adore this cake. It's quick. Simple. Sweet, but not too sweet. No icing required. Tastes even better the next day.

XOXO,
Amy


French Yogurt Cake
From Lunch in Paris: A Love Story with Recipes by Elizabeth Bard

1 cup plain, whole milk yogurt
1 cup sugar
A large pinch of sea salt
1 teaspoon vanilla
1/3 cup vegetable oil
2 large eggs
1 2/3 cups all-purpose flour
1 1/2 teaspoons baking powder
1 teaspoon baking soda
Zest of one lemon
One 16-ounce can apricots, drained and quartered (Note: My store had 8-ounce cans only, so I got two of those.)

Preheat oven to 350 degrees.
Lightly butter a 10-inch round cake pan and line with parchment paper.

In a medium bowl, combine the yogurt, sugar, salt and vanilla, stirring or whisking until smooth. Add oil in a steady stream, while whisking to combine. Add eggs one by one, whisking to combine after each one.

In smaller bowl, combine the flour, baking powder and baking soda. Add flour mixture little by little to the yogurt mixture, whisking along the way to combine. Stir in lemon zest. Pour cake mixture into prepared cake  pan. Top with chopped apricots.

Bake on center rack for 45 minutes, until golden brown and slightly risen; a toothpick inserted in the center should  come out clean.

Lift cake by parchment paper and place on wire rack to cool.

This cake is even better the second day -- provided it sticks around that long. It gets more moist as it sits.

Elizabeth Bard points out in her book that this cake is a "blank canvas" that you can  make  your own based on the fruits you like or have in your fridge at the time. Try fresh raspberries or pears sprinkled with brown sugar, she suggests.

My girls enjoyed this cake. They ate it several mornings for breakfast -- with a banana on the side, so no judgment. But they didn't love the apricots and asked that next time I try peaches instead, so that's what I did the second time around. I used canned peaches (in juices, not syrup), drained and chopped. I sprinkled some cinnamon over the peaches as I would when making a peach cobbler.

Verdict: The girls preferred the cake with peaches; I liked the apricot version better.

Bottom  line: This is a great go-to dessert for any day of the week. I plan to make it beaucoup times.

Friday, October 2, 2015

Seven Layer Bars

I first posted my recipe for Seven Layer Bars in 2010. They are one of my all-time favorite treats. Every time I make Seven Layer Bars, I wonder why I don't whip these babies up every week. Oh...I know. Because I would eat every. single. one. And that wouldn't be so great for fitting into my pants. ("Baby weight? No...this is Seven Layer Bar weight.") Studded with chocolate and butterscotch and gilded with the nectar of the gods that is sweetened condensed milk, I can't limit myself to just one. They are just so, so good.

Next time you need a treat for a bake sale, a potluck, or just a night on the couch with Netflix, make yourself a batch of Seven Layer Bars. You'll be glad you did.

Let's get cooking!
Erin


Seven Layer Bars
Originally posted October 2010

1 1/2 cups graham cracker crumbs
1/2 cup butter
1 heaping cup chopped pecans
1 heaping cup chocolate chips
1 heaping cup butterscotch chips
1 3/4 cups sweetened flaked coconut
1 (14 ounce) can sweetened condensed milk

Preheat oven to 350 degrees. Grease a 9" x 13" baking dish and set aside.

In a small bowl, combine graham cracker crumbs and butter. Press evenly into the bottom of the prepared baking dish to form a crust. Sprinkle pecans over the crust. Top with chocolate chips and butterscotch chips. Sprinkle coconut on top of that. Finally, drizzle sweetened condensed milk over the coconut. (I find it helps to avoid drizzling the sweetened condensed milk around the very edges of the pan. The condensed milk can bake onto the edges of the pan, and this makes it really sticky and tough to get out of the pan.)

Bake in preheated oven for about 20 minutes, until the coconut is light golden brown. Cool, then slice into bars.


Monday, September 28, 2015

Sugar Cookies

I love sugar cookies. Not the labor-intensive ones that you roll out, cut out and ice and that look pretty but are kinda dry and bland. Correction: I love my sugar cookies. Loaded with butter. Falling apart in your mouth.

I mostly make these cookies at Christmas, decorating them with red and green sugar. But sometimes when I need a quick dessert and don't want to run to the store for special ingredients, these cookies are the answer. I always have all of the ingredients on hand.

I recently whipped up my sugar cookies for an impromptu grill-out dinner party Chez George. I doubled the recipe so I'd have enough to take to a dinner party where we were the guests.

By the way, these cookies freeze nicely, too. FYI in case you are like me and you like to get a lot of baking done for the holidays or teacher gifts.

XOXO,
Amy


Sugar Cookies
Yields 5 dozen

1 cup unsalted butter, softened
1 cup sugar
1 egg
1 teaspoon vanilla
2 cups all purpose flour
1/2 teaspoon baking soda
1/2 teaspoon cream of tartar
1/4 teaspoon salt
Colored sugar sprinkles

Cream together butter and sugar. Add egg and vanilla.

In separate bowl, mix all of the dry ingredients, except the sugar sprinkles. Gradually add the flour mixture to the butter-sugar-egg mixture and combine.

Place the cookie dough in freezer for an hour or fridge for a couple hours or overnight.

After the cookie dough  has hardened a little, remove from fridge or freezer and shape into tablespoon-sized balls. Place balls on ungreased cookie sheets. Pour colored sugars onto individual plates. Take a glass and rub butter on the bottom or tap it onto the cookie dough to get it greasy enough to transfer the sugar sprinkles to the cookie balls. Dip the glass into a plate of colored sugar and then tap down gently on a cookie ball, flattening it just a little. Repeat. Use a different glass for each colored sugar.

Bake at 350 degrees for about eight minutes. The cookies should not turn brown and you want to barely see any brown at the bottom.

The cookies will seem soft when you remove them from the oven--and they are kinda fragile, so be careful. Transfer cookies to wire racks. Eat a few immediately--worth it!


Friday, May 15, 2015

Coconut Carrot Muffins

Everyone's talking about coconut oil these days. It's the new thing. (Actually, I'm pretty sure it's been a thing for a while now, and I'm just behind the times.) I've heard the virtues of using coconut oil for cooking, cleaning, baking, moisturizing...pretty much everything under the sun. It was high time I gave this newfangled oil a whirl, and Coconut Carrot Muffins seemed like the perfect opportunity.

These healthy muffins are vibrant with carrots and pineapple, studded with sweet raisins, and rich with coconut flakes and coconut oil. And with a pinch of orange zest stirred in, each bite is fragrant with citrus. Geez, are these babies good.

Let's get cooking!
Erin


Carrot Coconut Muffins
Makes 36 mini muffins
Adapted from these Morning Glory Muffins

1 3/4 cups all-purpose flour
1/2 cup whole wheat pastry flour*
2 tablespoons oat bran
1 teaspoon salt
2 teaspoons baking powder
1/2 teaspoon baking soda
2 teaspoons cinnamon
2 whole eggs
2 egg whites
3/4 cup brown sugar
1/2 cup unsweetened applesauce
1/2 cup coconut oil, melted and cooled
8 ounces crushed pineapple
2 teaspoons vanilla
1 teaspoon orange zest (optional)
1 1/2 cups grated carrots
1/2 cup raisins
1/2 cup sweetened flaked coconut

Preheat oven to 350 degrees. Grease a muffin tin or line with paper liners and set aside.

In a large bowl, whisk together all-purpose flour, whole wheat pastry flour, oat bran, salt, baking powder, baking soda, and cinnamon. In a separate bowl, stir together whole eggs, egg whites, brown sugar, applesauce, coconut oil, pineapple, vanilla, and orange zest. Stir the wet ingredients into the dry ingredients. Stir in carrots, raisins, pineapple, and coconut.

Fill prepared muffin tins with batter. I filled my mini muffin cups to the top and ended up with 36 muffins. Bake at 350 for about 15 minutes, until muffins spring back when you touch them and a toothpick inserted into the center of a muffin comes out clean. Allow to cool in the muffin tins for 5 minutes, then remove the muffins to a wire rack to finish cooling.

I made mini muffins, but you could certainly make regular-sized muffins. I would guess they'd need about 25 minutes to bake. If you try it, let me know!


*I happened to have 1/2 cup of whole wheat pastry flour that I was looking to use up. If you don't have whole wheat pastry flour, feel free to use entirely all-purpose flour or substitute whole wheat flour. Also, if you have more whole wheat flour on hand than I did, by all means use more!

Friday, April 24, 2015

Baked Steel Cut Oatmeal

There are too many descriptors for Baked Steel Cut Oatmeal. Allow me to note just a few: delicious, healthy, hearty, fruity, nutty, filling, sweet, chewy, easy... I could go on, but I've got dishes to wash TV to watch.

When I saw a recipe for Baked Steel Cut Oatmeal, I knew I had to try it. I've mentioned my love of oatmeal once or twice on this blog. Or maybe three times. My pantry is a Tetris tower of instant oats, old-fashioned oats, and steel cut oats just waiting for their turn to shine on the breakfast table.

This recipe couldn't be simpler to make with ingredients you probably have in your pantry and freezer. It takes a while to bake, so stir it together before you hop in the shower and put on your false eyelashes or whatever it is that you do in the morning. And then enjoy the mind-blowing aroma of oats and brown sugar as your oven does the heavy lifting.

Let's get cooking.
Erin


Baked Steel Cut Oatmeal
Adapted from The Kitchen and this Baked Oatmeal
Serves 4-6

1 cup steel cut oats
1/2 teaspoon salt
2 cups milk
2 tablespoons butter, melted
1 egg
1/2 cup brown sugar
1/2 teaspoon cinnamon
1 cup frozen peaches*
1 cup frozen raspberries*

Preheat oven to 350 degrees. Grease an 8" x 8" baking dish and set aside.

Combine oats and salt. In a separate bowl, whisk together milk, butter, egg, brown sugar, and cinnamon. Stir into the oats. Gently fold in peaches and raspberries. Pour into prepared baking dish and cover with aluminum foil.

Bake for 30 minutes. Remove the foil and continue to bake until the oats are tender and most of the liquid has been absorbed, about 50 additional minutes. Serve warm.

*Feel free to replace peaches and raspberries with your favorite fruit. I bet mixed berries or even chopped apple would be divine. If you come up with another delicious combination, please let me know.

Monday, April 20, 2015

Strawberry Shortcake

My daughters and I have an Easter tradition. Lucy and Penny can pick any dessert and I will make it. They chose crème brûlée last year -- giving me the excuse to buy a kitchen torch and ramekins -- and raspberry tart the year before that and cheesecake the year before that.

This year, I asked them to pretty please pick something quick and easy and that didn't require crazy equipment or hard-to-find ingredients as we'd be spending the holiday at my parents' house. At one point, one of them mentioned strawberry shortcake. Perfect!

I've made this strawberry shortcake since then, whipping it up for a casual dinner party Chez George. And I am pretty sure I will be making it a few more times between now and the end of summer. 

This version reminds me of the strawberry shortcake my mom used to make, using Bisquick for the cake. At some point, I want to mix in a few basil leaves with the strawberries. My favorite Charlotte restaurant serves this amazing strawberry cake with basil gelato. Mmmmm...I'm going to be thinking about that cake for a while now.

Anyhow, I hope you enjoy this delish classic.

XOXO,
Amy


Strawberry Shortcake
Adapted from AllRecipes.com
Yields 1 8-inch round cake

2-3 pounds fresh strawberries
1/3 cup white sugar
2 1/4 cups all-purpose flour
4 teaspoons baking powder
2 tablespoons white sugar
1/4 teaspoon salt
1/3 cup butter, softened
1 egg
2/3 cup milk
1 cup whipped heavy cream, sweetened to your liking

Place a metal bowl in the freezer. You will use this bowl at the end to make your whipped cream.

Trim and slice strawberries and toss them with 1/3 cup of white sugar. Set aside.

Preheat oven to 425 degrees. Grease an 8-inch round cake pan.

In a medium bowl, combine the flour, baking powder, 2 tablespoons white sugar and the salt. Slice the softened butter into the dry mixture and use a pastry cutter until the mixture is crumbly. (Note: My mom and I don't have pastry cutters, so I used a potato masher, which worked just fine.)

Press batter into the prepared pan. Bake at 425 degrees for 15 to 20 minutes or until golden brown. Let cool partially until you are ready to serve.

Prepare the whipped cream. Pour the cream into the chilled bowl, add about 2 tablespoons sugar. Set mixer to medium and whip cream for a minute or two before upping the speed. Mix until soft peaks form and it looks like the consistency of what come out of the Reddi-Wip can. (Note: Erin uses powdered sugar and vanilla extract. She also has instructions for ensuring you don't end up making butter. Click here.)

Cut cake into wedges and plate. Top with strawberries and some of their juices and the whipped cream. You can also garnish with fresh mint or basil.

Monday, April 13, 2015

No Sugar Banana Bread

I recently had dates on hand for a cookie recipe that I never made. I lost track of the recipe, so I thought I'd experiment with my sister-in-law's tried-and-true banana bread. Note that I decided to try this while the kids were out at the park with their dad, so they wouldn't see me chopping dates and skipping the white sugar. Genius, I know.

I was afraid the bread wouldn't be sweet enough with  just the dates, so I did add in a little honey. I also decided to use butter instead of Crisco, because that seems healthier. I used up some whole wheat flour. I tossed in some chocolate chips as a little treat since we we're being good by using dates. I would have added chopped walnuts, but I didn't have any on hand. I had pecans in the pantry, but Penny -- who had returned from the park, never the wiser about the dates -- vetoed the pecans.

Guess what? Lucy and Penny gobbled up this bread and begged for seconds. Lucy commented on liking the texture better. This bread is indeed more moist than the original we'd been making for years. (Ssssh, don't tell Aunt Jennie.) Penny commented on the chocolate chips, which was not at all surprising. Thing is this bread would be super yummy -- and truly no sugar -- without the chips and that's how I plan to make it next time.


XOXO,
Amy


No Sugar Banana Bread
2 cups flour (I used up the remaining 1 1/2 cup white whole wheat flour I had; the rest was all purpose flour)
1 teaspoon baking soda
1/2 teaspoon salt
1 teaspoon cinnamon
1 cup packed dates, pitted and chopped
1/2 cup butter, melted
Honey, just shy of 1/4 cup
2 eggs
1 cup mashed bananas (about 2 or 3)
1 tablespoon lemon juice
1 cup (or less) chocolate chips (optional)
1 cup chopped walnuts (optional)


Preheat oven to 350.

Stir together the first four dry ingredients and set aside.

In large bowl, mix dates and melted butter on medium to medium high speed. Add the honey, eggs, bananas and lemon juice--mix until combined and the dates are no longer lumpy. Sift in dry ingredients, little by little.

Pour mixture into greased loaf pan. Bake at 350 for 60-65 minutes or until a toothpick inserted into the middle comes out clean. Cool on wire rack for 10 minutes before removing from pan.

Thursday, April 2, 2015

Lemon Buttermilk Cake

When Amy invited me for dinner and shared her plan to make Spring on Toast, I knew I needed to come up with a dessert that was equally seasonal. Well this Lemon Buttermilk Cake is a little ray of springtime sunshine.

Rich, dense, and moist, this not-too-sweet cake shines with the perfect amount of tang and zip from buttermilk and lemon. While the cake is lovely on its own, it begs to be smothered in berries and freshly whipped cream.

The husband and I have whipped cream in a can in our fridge at all times, but this cake calls for something special. Grab a carton of whipping cream at the grocery store and do it up right. If you haven't made your own whipped cream yet, don't be afraid! It's not difficult; you just need to keep an eye on it to make sure it doesn't turn into butter. (So don't turn on your mixer and go start a load of laundry.) And the ridiculously delicious flavor is absolutely worth the five minutes of effort.

When you're getting ready for your next Spring gathering (Easter, perhaps?), let this Lemon Buttermilk Cake be the star of your menu.

Let's get cooking!
Erin


Lemon Buttermilk Cake
Adapted from Real Simple and this Lemon Pound Cake

2 cups flour, plus extra for the pan
2 teaspoons baking powder
1/4 teaspoon salt
1/2 cup (1 stick) butter, melted
1 1/2 cups sugar
3/4 cup buttermilk
2 eggs
1 tablespoon grated lemon zest
1/4 cup lemon juice (from about 1 large lemon)
1 teaspoon vanilla extract
Lightly sweetened berries, for serving
Whipped Cream, for serving (recipe below)

Preheat oven to 350 degrees. Grease a 9" x 5" loaf pan and dust with flour, tapping out excess. Set pan aside.

In a large bowl, whisk together flour, baking powder, and salt. Set aside.

In a separate bowl, whisk together melted butter, sugar, buttermilk, eggs, lemon zest, lemon juice, and vanilla. Add wet ingredients into the dry ingredients and whisk everything together.

Pour batter into prepared loaf pan. Bake in preheated oven until a toothpick inserted into the center comes out clean, about 1 hour. Cool in the pan for ten minutes, then transfer to a rack to cool completely.

Serve with lightly sweetened berries and whipped cream.


Whipped Cream

1 cup heavy whipping cream
2 tablespoons powdered sugar
1 teaspoon vanilla extract

Put the bowl of your electric mixer and the whisk attachment in the freezer for about 10 minutes. (This will help your cream whip up more easily.) Add whipping cream, powdered sugar, and vanilla to the cold bowl. Turn the mixer to medium speed until the cream starts to get a bit bubbly, about 1 minute. Crank up the speed to high and whip until soft peaks form, about 1-3 minutes longer.

Heads-up: Be careful not to whip the cream too much or it will actually turn into butter. And, yes, I did learn this the hard way.

Wednesday, March 11, 2015

Irish Soda Bread

When we were living in Milwaukee, our local grocery store made raisin-studded, sugar-crusted Irish Soda Bread for St. Patrick's Day every year, and it blew my mind. It wasn't exactly authentic, but it was dang good.

Since I couldn't walk down the street to the store to pick up soda bread this year, I set out to duplicate it at home. Traditional buttermilk and all-purpose flour for simplicity. Baking soda and baking powder for a little rise, salt for flavor, and sugar because that's how I roll. (I said it wasn't authentic, okay?) Studded with raisins and sprinkled with coarse sugar crystals to guild the lily.

I was giddy with excitement when I pulled this baby out of the oven. The scent alone was absolutely tantalizing. The sugar glittered on the golden crust like treasure at the end of a rainbow.

So I ate a quarter of the loaf for dinner.

Tender and rich with just enough sweetness. Raisins in every bite. Crisp with sugar crystals. Holy cow. The luck of the Irish is with you today, folks, because this bread is good.

Happy St. Patrick's Day!


Irish Soda Bread

3 cups all-purpose flour
1/4 cup sugar
1 teaspoon salt
1/2 teaspoon baking soda
1/2 teaspoon baking powder
4 tablespoons butter, melted
1 1/3 cups buttermilk
1 cup raisins
2 tablespoons milk (You might not need it all.)
1 tablespoon coarse sugar crystals (I used Sugar in the Raw.)

Preheat the oven to 350 degrees. Line a baking sheet with parchment paper and set aside.

In a large bowl, whisk together flour, sugar, salt, baking soda, and baking powder. Stir in melted butter until the mixture looks crumbly. Stir in buttermilk and raisins until the dough just comes together in a shaggy mixture.

Turn out the dough onto a lightly-floured counter. Knead just until the dough comes together in a smooth ball, about 10 times. Pat dough into an 8" circle and place on prepared baking sheet. Brush top of dough with milk and sprinkle with coarse sugar. Use a knife to cut a large "X" on the top of the loaf.

Bake for about 45 minutes, until the crust is golden brown and a toothpick inserted into the center comes out clean.

Thursday, February 19, 2015

Brown Sugar Oatmeal Coffee Cake

It is cold.

I recognize that it's February—the doldrums of winter—and that cold weather should be expected. But the entire eastern half of the country is blanketed in a bone-chilling, arctic blast, and I just don't like it.

What better way to show the weather who's boss than to crank up the oven and bake something warm and cozy? Brown Sugar Oatmeal Coffee Cake is rich, filling, and topped with a sweet, crunchy crumble that will knock your socks off.

So, Jack Frost, you just bring it. We've got Brown Sugar Oatmeal Coffee Cake, and we're ready for anything. Even spring.


Brown Sugar Oatmeal Coffee Cake

Coffee Cake:
1 3/4 cups old-fashioned oats (not instant)
1/2 cup (1 stick) butter
2 1/2 cups boiling water
1/4 cup yogurt (plain or vanilla would be lovely)
2 cups brown sugar
2 teaspoons vanilla
3 eggs
2 3/4 cups flour
2 teaspoons baking soda
3/4 teaspoon salt
1/2 teaspoon cinnamon (optional, but tasty)

Topping:
1 cup brown sugar
2 tablespoons flour
2 teaspoons cinnamon
2 tablespoons butter, melted

Preheat oven to 350 degrees. Grease and flour a 9" x 13" broiler-safe (i.e. probably not glass) pan and set aside.

In a large bowl combine oats, butter, and boiling water. Allow to sit for 20 minutes. Stir in yogurt, brown sugar, vanilla, eggs, flour, baking soda, salt, and (if using) cinnamon. Pour into prepared pan and bake for 40 minutes.

Meanwhile, mix topping ingredients together in a small bowl until crumbly. Sprinkle on top of baked coffee cake. Turn the oven to broil and move the oven rack a bit closer to the broiler element. Broil for 3-5 minutes, until the topping begins to melt and get crunchy.

Serve warm for the most delicious treat.

Monday, October 6, 2014

Pumpkin Chocolate Chip Mini Muffins

I loved experimenting with pumpkin in a savory recipe when I made Pumpkin Black Bean Chili, but I had to return to my first pumpkin love: pumpkin muffins. Scented with warm spices and studded with mini chocolate chips, these muffins will brighten up even the dreariest fall morning.


And if you haven't reached pumpkin overload yet, check out these pumpkin recipes, too:


Aren't you glad it's pumpkin season?


Pumpkin Chocolate Chip Mini Muffins
Makes 48 mini muffins
Adapted from this pumpkin bread recipe

2 1/3 cups all-purpose flour
1 cup whole wheat pastry flour*
1 tablespoon baking powder
2 teaspoons baking soda
1 teaspoon salt
2 teaspoons cinnamon
1 teaspoon ginger
1/2 teaspoon nutmeg
3/4 cup granulated sugar
1 cup brown sugar
2 eggs
4 egg whites
1/2 cup vegetable oil
1/2 cup vanilla yogurt**
2/3 cup water
1 (15 ounce) can pumpkin
1 cup mini chocolate chips

Preheat the oven to 350 degrees. Grease a mini muffin tin*** and set aside.

In a large bowl, whisk together all-purpose flour, pastry flour, baking powder, baking soda, salt, cinnamon, ginger, and nutmeg. In a separate bowl, stir together sugar, brown sugar, eggs, egg whites, oil, yogurt, water, and pumpkin. Stir the wet ingredients into the dry ingredients. Stir in chocolate chips.

Fill prepared mini muffin tins so each cup is full to the top. Bake for about 14 minutes, until the muffins spring back when you gently press down the top or a toothpick inserted into a muffin comes out clean. Cool for 5 minutes in the tin, then remove to a wire rack to cool completely

Notes:
*If you don't have whole wheat pastry flour, don't let that stop you from making this recipe! You can absolutely substitute all-purpose flour. (Use 3 1/3 cups all-purpose flour.)
**I used non-fat vanilla Greek yogurt because that's what I found in my fridge. Feel free to use regular (non-Greek) yogurt or plain yogurt in place of the vanilla Greek yogurt.
***Not in the mood for mini-muffins? This recipe makes 24 standard muffins or two loaves of bread if you prefer. Bake standard muffins for 23-25 minutes and bread for about 1 hour.


P.S. This recipe is linked on the Archives Friday link party!

Monday, September 8, 2014

Chocolate Chip Zucchini Bread

It has been too long. WAY too long.

I have no good or even interesting explanation for why I haven't posted a recipe for six months. Six long, long months. We moved from Milwaukee to North Carolina and in the midst of packing and unpacking every piece of junk we had acquired in our ten years in the great middle west, I just didn't feel like cooking.

So I didn't.

But I'm back in the kitchen now! And I'm baking zucchini bread. In my humble opinion, this is the best way to use up a bumper crop of zucchini. Don't have a green thumb? Well, you're in good company. Just pick some up at the farmer's market, swing by the grocery store, or, if you're feeling sneaky, slip into your neighbor's backyard under the cover of darkness and pilfer some of theirs. Your secret's safe with me.


Chocolate Chip Zucchini Bread
Makes 2 loaves

2 cups all-purpose flour
1 cup whole wheat pastry flour
3 1/2 teaspoons cinnamon
2 teaspoons baking soda
1/2 teaspoon baking powder
1 teaspoon salt
1 egg
2 egg whites
1/2 cup brown sugar
3/4 cup granulated sugar
1/2 cup vegetable oil
1 cup unsweetened applesauce
3 teaspoons vanilla
3 cups grated zucchini
1 cup chocolate chips

Preheat oven to 350 degrees. Grease two 9" x 5" loaf pans and set aside.

In a medium-sized bowl, whisk together all-purpose flour, wheat flour, cinnamon, baking soda, baking powder, and salt.

In a separate large bowl, whisk together egg, egg whites, brown sugar, granulated sugar, oil, applesauce, and vanilla. Stir in zucchini. Stir in dry ingredients and chocolate chips.

Evenly divide batter between prepared loaf pans. Bake in preheated oven for about 1 hour or until a toothpick inserted in the middle comes out clean.


Friday, January 31, 2014

Creme de Menthe Brownies

My mother-in-law is one of the best cooks I know. I'm always learning something new from her. When I told her I needed to bring a treat to my Bible study, her eyes lit up. Immediately, she knew the perfect recipe to please a crowd. "Creme de Menthe Brownies!"

She was right on the money with this one. Decadent and delicious, these tender brownies are topped with a layer of mint buttercream and crowned with rich chocolate glaze.

Next time you need a sweet treat—for the Super Bowl, perhaps?—give Creme de Menthe Brownies a try.


Creme de Menthe Brownies
From my mother-in-law Cheryl

Brownie Layer:
1 cup sugar
1/2 cup butter, softened
1 cup flour
1 (16 ounce) can Hershey's chocolate syrup
1 teaspoon vanilla extract
4 eggs, beaten

Mint Buttercream:
2 cups powdered sugar
1/2 cup butter, softened
2-3 tablespoons milk
1/4 teaspoon peppermint extract
3 drops green food coloring (optional)

Chocolate Glaze:
1 cup semi sweet chocolate chips
6 tablespoons butter

Preheat oven to 350 degrees. Grease a 9" x 13" baking dish with cooking spray and set aside.

Brownie Layer: Cream together 1/2 cup butter and sugar until fluffy and light. Add flour, chocolate syrup, vanilla, and eggs and beat until thoroughly combined. Pour into greased baking dish and bake for 20 minutes. Allow brownies to cool.

Mint Buttercream: Whisk together powdered sugar, 1/2 cup butter, 2 tablespoons milk, peppermint extract, and food coloring. If buttercream is a bit stiff, add up to an additional 1 tablespoon milk, until the buttercream is fluffy. (I used a total of 2 1/2 tablespoons of milk.) Frost cooled brownie layer with mint buttercream.

Chocolate Glaze: In a small saucepan over medium heat, melt together chocolate chips and 6 tablespoons butter, stirring very often. Gently pour glaze over the mint buttercream and use a spatula or the back of a spoon to carefully spread the glaze to the edges. Refrigerate until the chocolate is set, about 30 minutes to 1 hour.


Monday, December 16, 2013

Cinnamon Crisps

Whenever we visit the husband's family in Seattle, he needs to eat at Taco Time at least once. Usually more like two or three times. I don't fully understand what excites him so much about Taco Time, but since I have plenty of inexplicable crazy, I don't ask questions about his devotion to the Crisp Beef Burrito.

A meal at Taco Time isn't complete without an order of Cinnamom Crustos for dessert. So without a trip to Seattle in our near future, the husband and I set out to make Crustos in our humble Milwaukee kitchen.

Flour tortillas are fried until flaky and crisp then dusted with cinnamon sugar. Well, in snow terms it's more of a cinnamon sugar blizzard than a dusting, but that's how we roll.


Cinnamon Crisps
Serves: 4 reasonably, 2 realistically

1/4 cup granulated sugar
1 1/2 teaspoons cinnamon (or to taste)
2 quarts vegetable or peanut oil
4 flour tortillas, each cut into 8 wedges

In a small bowl combine sugar and cinnamon until well blended. Set aside.

In a large Dutch oven with high sides, heat oil over medium-high until it reaches 350 degrees. Very carefully add half the tortillas and cook for 2 minutes, until the tortillas are golden and crisp, flipping with a slotted spoon halfway through cooking. (Flipping the tortillas ensures they cook evenly on both sides.) Place tortillas on a paper towel-lined plate and sprinkle generously on both sides with cinnamon sugar. Repeat with remaining tortillas.


Cinnamon crisps are ridiculously delicious served warm, but no one will complain if they're room temperature.

Wednesday, December 11, 2013

2013 Food Blogger Cookie Swap: Cardamom Cookies

Food memories.

I'm talking about Mom's Potato Casserole or Grandma's Chocolate Cake or Spamwiches. (Don't ask.) One bite and you're immediately transported back to the dining room table in your childhood home. Everyone's gathered around, candles are flickering, and the gang is singing happy birthday. (Off key? Perhaps.)

A flavor that envelops me in a flood of food memories is cardamom. When I was a gap-toothed little girl, my grandma would visit with her sister and brother-in-law. Gram, Great Aunt Phyllis, and Great Uncle George would pile out of the velour-seated Town Car bearing gifts from her hometown of Rockford, Illinois: sweet rolls and coffee cake from her local bakery scented with cardamom. Gram didn't cook, but she bought with the best of them. It was my first taste of the warm spice, and I was hooked.

Fast forward 15 years to the first Christmas I spent with the husband's family. A homemade loaf of braided bread graced the breakfast table. As I devoured my first slice, spread generously with butter and dusted with sugar, I was transported back to Gram's visits. It was Cardamom Bread! Suddenly the first Christmas away from my family felt so much more like home.

When I thought about what to bake for this year's Great Food Blogger Cookie Swap, I couldn't wait to share the taste of my home with all of you. It seemed only appropriate to make Cardamom Cookies. Tender and buttery with the subtle warmth of cardamom, these little gems are rolled in a snowfall of sugar until they sparkle.

If you're looking to round out your cookie tray, consider trying one of these delicious treats that I was lucky enough to receive as part of the Food Blogger Cookie Swap: Peanut Butter Cookies from Mackenzie at Susie Freaking Homemaker, Snickerdoodles from Christine at If you give a gal a mixing bowl..., and Cranberry Bliss Cookies from Kimberly at Rhubarb and Honey. Thanks for sending holiday cheer my way, ladies!

Cardamom Cookies
Gently adapted from The American Club
Makes about 24 cookies

1 cup butter, at room temperature
2/3 cup granulated sugar
1 large egg yolk
1/2 teaspoon vanilla
2 cups flour
1/4 teaspoon baking soda
1/2 teaspoon ground cardamom
1/4 teaspoon salt
1/2 cup superfine sugar (Or pulse granulated sugar in your blender a few times to make it fine.)

Preheat oven to 350 degrees.

In the bowl of an electric mixer, beat together butter and sugar at medium-high speed until smooth, fluffy, and increased in size, about 2-3 minutes. On low speed, beat in egg yolk, vanilla, flour, baking soda, cardamom, and salt until combined. (Dough will be crumbly.)


Shape dough into 1" balls. (Since the dough is crumbly, you may need to press it together in the palms of your hands in order to form the balls.) Place dough about 1" apart on an ungreased baking sheet. (Seriously, ungreased. No parchment paper or anything. I tried baking the cookies on parchment paper, and they spread way too much.) Bake in preheated oven for about 15 minutes until cookies are just golden. (This recipe works best if you bake one tray of cookies at a time. If you bake two trays in the upper and lower thirds of your oven, watch the bottoms very carefully to make sure they don't burn.)

Remove cookies to a wire rack to cool. Once completely cool, roll cookies in superfine sugar.