Wednesday, June 29, 2016

Beat-the-Heat July 4th menu

A couple weeks ago a friend messaged me for July 4 menu ideas that were easy to make, didn't need the oven and would work well for feeding a crowd.

That got us thinking. Amy, Erin and I put our heads together and came up with some suggestions.

These recipes should satisfy your guests, earn you some rave reviews and keep your house cool so you can beat the heat and spend more time celebrating summer and our nation's independence. Happy July 4th to you and yours!

Mangia! Mangia!
Andrea

Main Dishes:

Brats! They're so Midwest. You can boil them in beer ahead of time and grill them last minute.


Turkey Feta Spinach Burgers. Change up the usual burger fare with these super-tasty gems.


Slow Cooker Pulled Pork – 2 ways.If you have time to apply a rub and let your pork sit in the fridge overnight, tryNorth Carolina Pulled Pork in the slow cooker. If you want an even easier but just as tasty version, use a bottle of your favorite barbecue sauce and get cooking with this recipe!
Side Dishes:

Greek Quinoa Salad stays fresh in the fridge. It's a very complimentary side for grilled meat or a stand-in main dish for when your cousin's vegetarian girlfriend shows up unexpectedly.


Summer Salad with Berry Vinaigrette. Erin figured out a way to bottle summer with this recipe! 
Dessert & a Cocktail: 

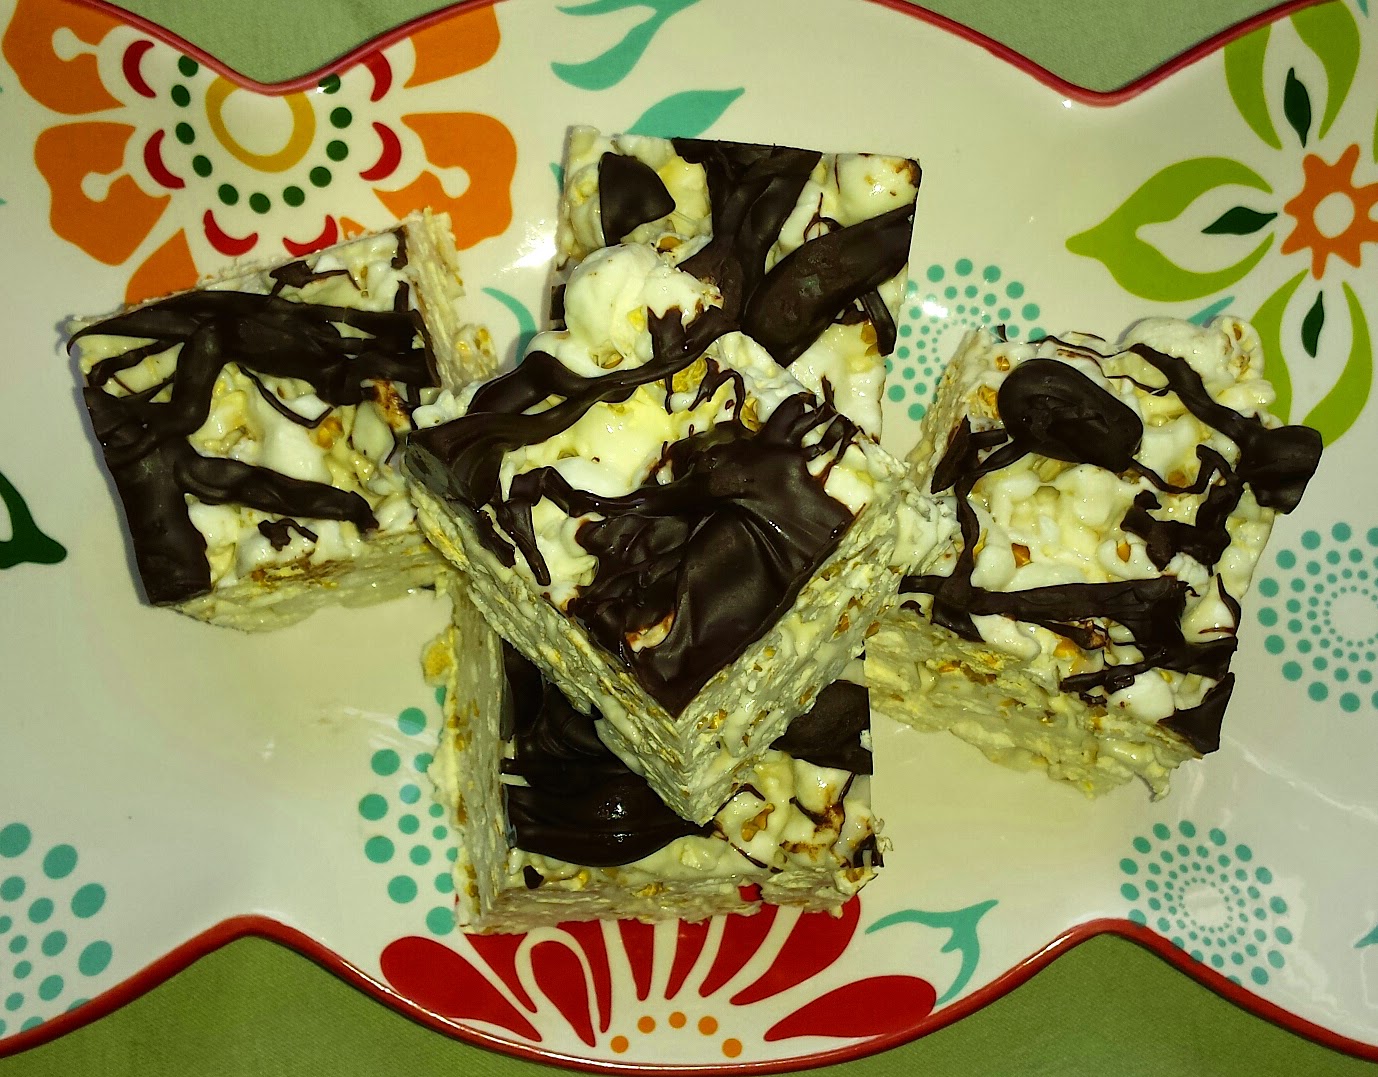
Popcorn Marshmallow Bars. Get patriotic and add red, white and blue M&Ms to these treats.
Watermelon Raspberry Rum Punch. Grown-ups need a treat, too. This cocktail is refreshing, slightly sweet and oh so yummy.


Monday, June 27, 2016

Watermelon Pizza

We had friends over for dinner last week. The moms and four girls went to the pool first. Between pool time and it being nearly 100 degrees out, my goal was to keep it easy and to turn up the heat as little possible in the kitchen. So, Jeff smoked a beautiful salmon. I threw together a salad and pulled out the pasta salad I'd made the night before. For dessert, I thought it would be fun for Lucy and Penny and their friends Hannah and Sophie to make the watermelon pizza I'd seen in my latest Good Housekeeping magazine.

Aren't they all adorbs?

From left to right: Penny, Hannah, Lucy and Sophie hard at work making watermelon pizzas.


The girls loved making their "pizzas," but didn't love eating them so much. The "sauce" — made of cream cheese, ricotta and honey — was weird and I tended to agree. But they liked the berries and the watermelon itself, of course. In the future, I'd turn this into a fruit salad, cutting the watermelon into bite-sized chunks and mixing in the berries and a little mint. I bet they'd gobble it up.

Still, it was fun to watch and a great way to get kids involved in the kitchen.

XOXO,
Amy


Watermelon Pizza
Adapted from Good Housekeeping

1 seedless watermelon, cut into four rounds
8 ounces cream cheese, softened
16 ounces ricotta cheese
2 tablespoons honey
Couple handfuls of coconut, toasted
Variety of berries of your choosing -- blueberries, strawberries, raspberries, blackberries
Kiwi, optional but could serve as your "pepperoni"
1 bunch of mint, roughly chopped

Mix cream cheese, ricotta and honey together. Spread this "sauce" on your watermelon rounds. Next, sprinkle toasted coconut and top with berries and fruit. Sprinkle chopped mint.

Cut each round into quarters. Enjoy!

Friday, June 24, 2016

Copycat Texas Roadhouse Rolls

Have you ever been to the restaurant chain Texas Roadhouse? When the first one opened in my hometown (hey, Buffalo!!), our family headed over to check it out. It was a hit for our family with three kids because they gave us peanuts to eat while we waited for our food, and we could throw the peanut shells on the floor. Yes, you heard me right. Peanut shells straight on the floor. It was the best ever.

Until you started eating the Texas Roadhouse rolls. Then you realized that the rolls were even better than the thrill of peanut throwing.

Soft, tender, buttery, with a touch of sweetness, these rolls were the stuff my carb-loving dreams were made of. You could imagine how thrilled I was when a couple decades later (geez, I'm old) I stumbled across a copycat recipe for Texas Roadhouse Rolls.

You know what? They were even better than I remembered.

Get to your kitchen post haste. Bake up a batch of Copycat Texas Roadhouse Rolls. Schmear them with honey butter and eat four or twelve in one sitting. Then bask in the glory of homemade rolls. You're welcome.

Let's get cooking!
Erin

P.S. This recipe has a lot of instructions, but don't be daunted! At the bottom of the post, I documented the baking process with some lousy cell phone pics to (hopefully) help remove the fear factor.


Copycat Texas Roadhouse Rolls
From Like Mother Like Daughter
Makes about 3 dozen rolls

2 cups milk (I used 2%)
1/2 cup warm (110 degrees) water
1 tablespoon active dry yeast
1/2 cup sugar, divided
1/2 cup honey
About 8 cups all-purpose flour, divided
2 eggs, lightly beaten
3 tablespoons butter, melted and cooled
2 teaspoons salt
Oil for greasing the bowl
Extra butter for brushing tops of rolls
Honey Butter for serving, recipe below

**SEE BELOW THE RECIPE FOR STEP-BY-STEP PHOTOS.**


Heat milk in a small saucepan. As soon as little bubbles form and milk starts to simmer, remove from the heat. Set aside to cool until milk is just warm (about 110 degrees.)

Meanwhile combine water, yeast, and 1 tablespoon sugar in the bowl of your stand mixer. Let the mixture rest until the yeast gets bubbly and frothy, about 5 minutes. Add remaining sugar, honey, 3 1/2 cups flour, and warm milk to the yeast mixture. Mix together on low until combined, about 2 minutes. Stir in eggs, butter, and salt. At this point, your dough will be quite runny.

Add additional flour 1/2 cup at a time until dough separates from the sides of the bowl. (I added an additional 4 1/2 cups flour at this point, for a total of 8 cups.) The dough will still be pretty sticky, but it will pull away from the sides of the bowl as the mixer spins. Allow the dough to rest for 5 minutes.

Turn dough out onto a lightly floured counter. Knead dough for 5 minutes. If the dough starts to get sticky, add additional flour 1 tablespoon at a time. (I added about 3 additional tablespoons of flour as I kneaded the dough.)

Place dough in an oiled bowl. Turn the dough so the top and sides are coated with the oil. Loosely cover bowl with greased plastic wrap. Allow dough to rise in a warm place until it's doubled in size, about 1 hour. (I like to turn my oven on for a minute, then turn it off and allow the dough to rise in the OFF oven. I also experimented with allowing the dough to rise in the laundry room while I was drying some clothes. The dough rose more quickly in the briefly warmed oven.)

Punch down the dough for about 30 seconds. Lightly flour your counter and use a rolling pin to roll dough into a rectangle about 1/2" thick. Fold rectangle in half so it's 1" thick. Pinch edges and roll them under so the two halves are sealed.

Use a pizza cutter to cut dough into 2" squares. Place rolls on greased or parchment-lined baking sheets and cover with greased plastic wrap. Allow rolls to rise in a warm place until doubled in size, about 1 hour.

Meanwhile preheat oven to 350 degrees. Bake rolls until golden brown, about 12-15 minutes. Rub the tops of warm rolls with butter. (I like to peel back the wrapper from a stick of butter and just use the whole stick to spread on top of the rolls.) Serve warm with Honey Butter.


Honey Butter

1/2 cup (1 stick) butter, at room temperature
1/4 cup honey
1/8 teaspoon salt

Whisk together all of the ingredients. Store in the fridge if you're not serving right away.


Instructions for Copycat Texas Roadhouse Rolls WITH PICTURES

2 cups milk (I used 2%)
1/2 cup warm (110 degrees) water
1 tablespoon active dry yeast
1/2 cup sugar, divided
1/2 cup honey
About 8 cups all-purpose flour, divided
2 eggs, lightly beaten
3 tablespoons butter, melted and cooled
2 teaspoons salt
Oil for greasing the bowl
Extra butter for brushing tops of rolls
Honey Butter for serving

Heat milk in a small saucepan. As soon as little bubbles form and milk starts to simmer, remove from the heat. Set aside to cool until milk is just warm (about 110 degrees.)

Meanwhile combine water, yeast, and 1 tablespoon sugar in the bowl of your stand mixer. Let the mixture rest until the yeast gets bubbly and frothy, about 5 minutes. (See picture below.)

Add remaining sugar, honey, 3 1/2 cups flour, and warm milk to the yeast mixture. Mix together on low until combined, about 2 minutes. Stir in eggs, butter, and salt. At this point, your dough will be quite runny. (See picture below.)

Add additional flour 1/2 cup at a time until dough separates from the sides of the bowl. (I added an additional 4 1/2 cups flour at this point, for a total of 8 cups.) The dough will still be pretty sticky, but it will pull away from the sides of the bowl as the mixer spins. (See picture below.) Allow the dough to rest for 5 minutes.

Turn dough out onto a lightly floured counter. Knead dough for 5 minutes. If the dough starts to get sticky, add additional flour 1 tablespoon at a time. (I added about 3 additional tablespoons of flour as I kneaded the dough. See picture below.)

Place dough in an oiled bowl. Turn the dough so the top and sides are coated with the oil. Loosely cover bowl with greased plastic wrap. (See before picture below.)

Allow dough to rise in a warm place until it's doubled in size, about 1 hour. (I like to turn my oven on for a minute, then turn it off and allow the dough to rise in the OFF oven. I also experimented with allowing the dough to rise in the laundry room while I was drying some clothes. The dough rose more quickly in the briefly warmed oven. See after-rise picture below. The dough is big and puffy!)

Punch down the dough for about 30 seconds. Lightly flour your counter and use a rolling pin to roll dough into a rectangle about 1/2" thick. Fold rectangle in half so it's 1" thick. Pinch edges and roll them under so the two halves are sealed. Use a pizza cutter to cut dough into 2" squares. (See picture below.)

Place rolls on greased or parchment-lined baking sheets and cover with greased plastic wrap. Allow rolls to rise in a warm place until doubled in size, about 1 hour. (See picture below.)

Meanwhile preheat oven to 350 degrees. Bake rolls until golden brown, about 12-15 minutes. Rub the tops of warm rolls with butter. (I like to peel back the wrapper from a stick of butter and just use the whole stick to spread on top of the rolls. See picture below.) Serve warm with Honey Butter.

Wednesday, June 22, 2016

Greens, Chicken & Pasta Salad

As I may have mentioned, I'm a baseball mom. This means many of my waking hours are spent on a ball field in the spring, summer and fall months, but especially in the summer. Last Saturday I was at the diamond for 12 hours straight.

This doesn't leave much time for cooking and a mom can only stomach so many hot dogs and pork chop sandwiches for lunch and dinner.

Enter the summer salad. If it can be made ahead and holds up for a few days in the fridge, I am all over it. Last season, Amy's Chickpea Salad was my go-to meal. 

This year, it's going to be this yummy spin on pasta salad, thanks to my latest issue of Cooking Light magazine, which features simple summer dinners. I made some changes to the original recipe to help it keep longer in the fridge and to use what I had on hand. I also prefer to double the recipe, so that I can feed a crowd. Let me know how you make it your own!

Mangia! Mangia!
Andrea


Greens, Chicken & Pasta Salad
Inspired by this recipe from Cooking Light

8 ounces uncooked whole wheat pasta, fusilli or your favorite shape
1 large shallot, thinly sliced
1 teaspoon minced garlic
3 ounces Brie cheese, rind removed and finely chopped
2 cups of skinless, shredded boneless chicken breast (make it even easier and use a pre-cooked rotisserie chicken)
2 teaspoons cider vinegar
1 teaspoon ground pepper, divided
1 teaspoon kosher salt
2 teaspoons extra virgin olive oil
5 ounces of arugula, spinach, baby kale or baby chard (or a mixture of these)
1/2 a pint of grape tomatoes

Cook pasta until al dente. Do not add any salt or oil to the water. Set aside 1/4 cup pasta liquid before draining the pasta. 

Place sliced shallot and garlic in a small bowl. Pour pasta water on top and let sit for 5 minutes.

In a large bowl combine hot pasta and Brie cheese. Stir until cheese melts. Add chicken, vinegar, shallot mixture, 1/2 teaspoon pepper and salt.

In a separate bowl, toss greens with olive oil and remaining 1/2 teaspoon pepper. Add greens to pasta mixture. Add tomatoes and stir to combine. 

Serve immediately or chill. Holds up well in the refrigerator for about 3 days.


Monday, June 20, 2016

Easy Crockpot Mexican Lasagna

Confession: I'm off my cooking game. I've never been so off my cooking game. But I have good reason.

Reason: I started my own business in April, bidding adieu to corporate America and hustling all for myself. It's called By George Communications and I love it. But the thing is all of my creative energy is going into my business and writing and strategizing for my clients. I'm working from home, so I don't need to come home and unwind by cooking. I don't want to turn off my work brain the way I used to want and need to do.

These days when I do cook, it tends to be from recipes rather than something I create on my own. That has to be OK for right now. I mean we are eating here Chez George. Nobody is going hungry. And my Hot Dinner Happy Home cohorts Andrea and Erin keep telling me to give myself some grace. That's what we're about here. We recognize that we all want to put dinner on the table. But it's not always easy and so we take it one dinner at a time.

Here is an easy go-to dinner that I recently made for the third or fourth time and that everyone always loves. So, seriously, why am I complaining? This Easy Crockpot Mexican Lasagna is adapted slightly from America's Test Kitchen Slow Cooker Revolution; Volume 2: The Easy-Prep Edition.

Instead of microwaving the meat, I fry it up on the stove. It's impossible to get the meat to cook up into a super fine consistency – that you want for easy layering – via the microwave. I also omit the jarred jalapenos, because the kids and hubby don't like them. Finally, I use 90 percent lean ground beef, not 85 percent lean; 90 percent lean is easier to find at the grocery.

I hope you enjoy this easy dinner!

XOXO,
Amy


Easy Crockpot Mexican Lasagna

2 pounds 90 percent lean ground beef
20 ounces of red enchilada sauce (I have seen this in 10 and 20 ounce cans)
2 cups shredded Monterey Jack or Colby Jack cheese (I typically use the latter, which is easier to find)
1/4 cup jarred jalapenos, chopped (optional)
1/2 cup fresh cilantro, minced (optional, but I use it)
12 (6-inch) corn tortillas

Cook meat on stove top, breaking into super fine pieces, drain and return meat to skillet. Stir in one cup enchilada sauce, 1 cup of cheese, jalapenos (if using), and 1/4 cup cilantro.

Line your slow cooker with an aluminum foil collar and spray with vegetable oil spray. (The purpose of the foil collar is to put a layer between your food and the heating element of the slow cooker. Without a foil collar or sling – the latter involves lining the bottom of your slow cooker – some dishes, like this one, and fish, will overcook and dry out. To make a foil collar, simply fold two pieces of aluminum foil to fit around the inside of your slow cooker.)

Spread 1/4 cup enchilada sauce at bottom of crockpot.

Arrange 3 tortillas at the bottom, breaking the third tortilla in pieces so that it will fit to fully cover the bottom. Top with a third of the beef mixture and 3 more tortillas; repeat layering two more times until all 12 tortillas have been used. Cover the top layer of tortillas with enchilada sauce and cheese. (See pictures of all these steps below.)

Cook for 2 to 3 hours on low, until casserole is heated through.

Remove foil collar. Sprinkle with remaining cilantro and serve.


Repeat layers above two more times and you end up with this...


Friday, June 17, 2016

Banana Breakfast Cookies

Danny and I made No-Bake Granola Bars last week. We sat at the kitchen table, shoveling them down like there was no tomorrow (Danny ate four in one sitting. FOUR.), and Elaine looked on glumly as she pushed her Cheerios around her tray. Poor little Elaine wanted a granola bar, too. Lame-o Cheerios ain't gonna cut it when everyone else is eating something as wonderful as a No-Bake Granola Bar. But the bars have honey in them. And since Elaine isn't one year old yet, honey is off limits.

So I set out on a mission to find a tasty and healthy treat that both my kids could enjoy. I've pinned a million recipes for breakfast cookies, and I had a pile of overripe bananas to use up. Inspiration struck.

Elaine went bananas (no pun intended) over these Breakfast Cookies. She ate two for snack and two more for breakfast the next day! Mission accomplished.

Let's get cooking!
Erin


Banana Breakfast Cookies
Adapted from With Salt and Wit
Makes 12 cookies

3 small, very ripe bananas
2 teaspoons vanilla extract
1 1/2 teaspoons cinnamon
1/4 teaspoon salt
2 cups oats*
3 tablespoons ground flax
2 tablespoons chia seeds
1/4 cup mini chocolate chips (optional, but encouraged!)

Preheat oven to 350 degrees. Line a large baking sheet with parchment paper or grease with cooking spray. Set aside.

In a medium bowl, mash bananas as thoroughly as possible. Stir in vanilla, cinnamon, and salt until everything is evenly incorporated. Stir in oats, flax, chia seeds, and chocolate chips.

Form dough into 12 balls (they'll be slightly bigger than golf balls) and place on prepared baking sheet. Use the bottom of a greased glass to gently press each ball into a cookie shape. Bake for about 13 minutes, until cookies are set, but soft to the touch in the center. Cool on the baking sheet for 5 minutes before removing to a wire rack to cool completely. Store cookies in the fridge.

*I used old fashioned oats because my son is a fan of the hearty oat texture. If your family doesn't like the texture of old fashioned oats, try quick cooking oats.

Wednesday, June 15, 2016

Grandma Lucy's Angel Food Cake

When I was a kid, it wasn't June unless we had Grandma's angel food cake slathered in strawberries and whipped cream for my Dad's birthday.

Lucky for all of us, my grandma taught me the recipe and her tricks for making sure this dessert stays light and fluffy:

  • Never make it on a humid day (back then not everyone had air conditioning).
  • Use a serrated knife to slice the spongy goodness.

It's been awhile since I made angel food cake – June of 2012, to be exact, because my Dad was visiting on his birthday, which happens to be the same day as my husband's.

Last summer, my youngest son Sam took a liking to angel food cake after I let him buy one at the grocery. He can easily devour one "angel cake" on his own in about two days. I had great intentions of making some for him, but life got in the way.

So....a visit from my parents earlier this month, plus a successful strawberry picking outing, plus a couple of angel food cake lovers in the house meant only one thing – it was time to whip up Grandma's Angel Food Cake.

With Father's Day coming this weekend, you might consider making some for the Dads in your life.

Mangia! Mangia!
Andrea


Grandma Lucy's Angel Food Cake
1 cup cake flour (I use Swans Down)
1 1/2 cups plus 2 tablespoons white sugar
12 large egg whites, at room temperature
1 1/2 teaspoons cream of tartar
1/4 teaspoon salt
2 teaspoons vanilla
1/2 to 1 teaspoon almond extract

Preheat oven to 375 degrees. Have ready a tube pan with a removable bottom (sometimes called an angel food cake pan). Do NOT grease the pan.

In a medium bowl, sift together the cake flour and 3/4 cup plus 2 tablespoons sugar. Set aside.

A note about the egg whites: For this recipe, separate the egg whites one at a time into a small bowl or cup before adding to the mixing bowl. You want to be sure there are no bits of yolk, as this will prevent the whites from becoming as fluffy as they need to be. Reserve the yolks for another use.

In a large bowl, combine egg whites, cream of tartar and salt. Beat with an electric mixer until the egg whites begin to form peaks. Add remaining 3/4 cup sugar and then continue to beat until stiff peaks form, like in the photo below:


Sprinkle flour mixture over egg whites. Add vanilla and almond extracts. Using a rubber spatula or wooden spoon, fold flour and extracts into egg whites. Do not stir. Gently fold in from the sides and bottom of the bowl. This combines all ingredients without deflating the egg whites.

Spoon batter into angel food cake pan, distributing evenly. Slowly move a knife through the batter to remove air bubbles. Smooth out top with rubber spatula or wooden spoon.

Bake for 35 to 40 minutes, or until top of cake is lightly browned and it springs back when you gently push the cake with your finger.


Remove from oven and let cool on a wire rack for about 15 minutes, or until the pan is cool enough to touch.

Then invert cake pan on a funnel to let the cake continue to cool. Don't worry, the cake will not fall out of the pan! Cool completely, at least 2 hours.


Remove tube pan from funnel. Run a rubber spatula around the edges of the cake pan to loosen the cake. Place a plate or cake stand on the top of the cake and invert the pan. Gently lift cake pan up. If cake does not begin to slide out on its own, tap the sides of the pan. Remove outer pan, then ease bottom of pan off what is now the top of the cake. You may need to use a rubber spatula to separate the cake from the pan.


Now you're ready to slice and serve Grandma Lucy's Angel Food Cake. To ensure that the cake retains it's height, be sure to use a serrated knife to cut the cake.

Angel food cake is delicious all by itself, but at my house, we think it tastes even better with fresh strawberries and whipped cream.

Friday, June 10, 2016

Simple Spoonbread

I was really pleased with myself because I had made a plan for dinner. The husband was going to grill pork chops, so I prepped them with a spice rub during the kids' nap time. I'd even sliced zucchini spears to throw on the grill with the meat. I just had to chop the potatoes to pop in the oven at the last minute.

Well, pride cometh before the fall, my friends.

I opened the bag of spuds and...Ewww. My potatoes had eyes on them. And not just one or two that I could dig out with my pairing knife. Lots and lots and lots of eyes. Shudder. Back to the drawing board.

Earlier in the day, I was perusing an edition of Eating Well magazine and stumbled across a recipe for spoonbread. Since I happened to have all the ingredients on hand, I thought I'd give it a whirl.

Man, you guys. This stuff was awesome. Simple Spoonbread reminds me of light, airy cornbread. It has a lovely corn flavor with just a hint of sweetness. The cheese brings richness and ground chipotle adds just a hint of smokey heat. And it's super kid-friendly. Our daughter devoured it.

Now read the recipe and check your pantry for the ingredients. Have them all? Good. Now you know what you're making for dinner tonight.

Let's get cooking!
Erin


Simple Spoonbread
Adapted from Eating Well

2 1/2 cups milk (I used 1%), divided
1 teaspoon agave
3/4 teaspoon salt
1/8 - 1/4 teaspoon (or more!) ground chipotle powder, depending on your spice tolerance
3/4 cup cornmeal
2 tablespoons butter
1 cup shredded cheese (I used colby jack. Cheddar would also be lovely.)
3 eggs, preferably at room temperature, separated

Preheat oven to 400 degrees. Grease a 2 quart baking dish and set aside. (An 8" or 9" square dish works well.)

In a medium saucepan over medium-high heat, combine 2 cups milk, agave, salt and chipotle powder. Heat until the milk starts to bubble around the edges, then whisk in cornmeal. Cook, stirring, until the cornmeal thickens and starts to pull away from the pan, about 3 minutes. Remove from the heat and stir in butter and cheese.

Meanwhile beat egg whites with an electric mixer on high speed until they are white and form soft peaks, about 3 minutes. Set aside.

In a separate bowl, whisk together egg yolks and remaining 1/2 cup milk. Stir a third of the cornmeal mixture into the egg yolks to temper them. Then stir in the remaining cornmeal mixture.

Using a spatula, gently fold a third of the egg whites into the cornmeal mixture. Fold in the remaining egg whites in two additions. Pour the batter into the prepared baking dish. Bake until spoonbread is puffed and golden brown in spots, about 20-25 minutes. Serve warm.


P.S. Want more spoonbread in your life? Check out Andrea's Buttermilk Spoonbread, too! 

Wednesday, June 8, 2016

Strawberry Salsa

It's strawberry season out here in Central Illinois, which means a trip to the local you-pick berry farm. This year the timing worked out quite well as my Mom and Dad were visiting. We loaded my boys into the car and headed out for a little adventure.

After 30 minutes, we had two boxes overflowing with strawberries. About 30 pounds worth, to be exact.

What's better than berry picking with Grandma and Grandpa? Eating the fruits of your labor – and all the goodies you can make with fresh strawberries.

These babies are so much sweeter than those in the grocery store. We used them in numerous ways: strawberry milkshakes, fruit salad, strawberry smoothies, freezer jam, strawberry sauce and piled on top of angel food cake with whipped cream.

After freezing enough strawberries to fill three giant ziplock bags, I decided to try strawberry salsa.

Say hello to your new summertime appetizer and topper for grilled chicken, pork, steak or seafood. Slightly sweet and spicy, this salsa is fresh and pretty to look at, too.

I've made multiple batches already, as an easy way to use up all those berries.

Mangia! Mangia!
Andrea


Strawberry Salsa
**Note: Adjust amounts to your personal taste

2 cups strawberries, chopped
1 or 2 tablespoons pickled jalapeño slices, chopped
or
1 fresh jalapeño pepper, seeds removed, chopped
1/2 of a red onion (about 1/2 cup), finely chopped (or substitute green onion)
2/3 to 1 cup of chopped fresh cilantro
1 yellow, orange or green bell pepper, chopped
Juice and zest of 1 lime
Salt and pepper to taste
Optional: If using pickled jalapeño slices, toss in a few teaspoons of the brine to spice things up a bit more.

Combine all ingredients in a medium bowl.

Serve immediately or chill for 30 minutes or more to let flavors develop.

I served strawberry salsa with tortilla chips and grilled scallops and shrimp.


Monday, June 6, 2016

Oven-Roasted Kohlrabi Medley

I recently came into some kohlrabi -- when the Friday cycle instructor brought in some grown by her budding farmer son, owner of Old Sol Produce. I'd heard of kohlrabi, but wasn't sure what to with it. First, let me explain that  kohlrabi is in the cabbage family and is a popular vegetable in German fare in and today's farm-to-table restaurants. The taste is like a cross between cabbage and the sweeter broccoli stems. I think it's delicious.


So, anyhow, I found a bunch of cool recipes online for things like kohlrabi fritters and even a kind of salad with radishes (kohlrabi can be eaten cooked or raw), but in the end I didn't have time to do anything fancy, so I just roasted it with a bunch of other vegetables -- carrot, parsnip, eggplant and red onion.


BTW, here is a great guide from the kitchn on How To Roast Any Vegetable. I love the roasting times by vegetable type.

I recommend giving kohlrabi a try -- at home or when you're at a farm-to-table restaurant.

XOXO,
Amy

Oven-Roasted Kohlrabi Medley

2 kohlrabi, trimmed, outer later peeled/removed and cut into 1/4" to 1/2" slices
A variety of vegetables cut and trimmed. Use whatever you like or have on hand.
Cooking spray
Salt, pepper and seasoning to taste
1-2 table spoons olive oil

Preheat oven to 425 degrees. Prepare vegetables. Spray pan, baking dish or sheet with cooking spray. Place vegetable in a single layer and top with salt and pepper and seasoning of your choice. (I used Penzeys Sunny Paris seasoning.)

Place in oven and check  every 15 minutes until veggies are roasted sufficiently -- to your taste. If you are roasting softer vegetables (i.e. tomatoes, yellow squash) with root veggies (i.e. carrots, parsnips, kohrabi), you might want to add those later in the roasting process as they won't take as long. Again, consult the kitchn's guide above.

The fork is piercing a piece of kohlrabi.


Friday, June 3, 2016

Slow Cooker Tomato Soup

The spring has been touch-and-go here in Seattle. One day is 80 and sunny, and the next is 55 with drizzle. On one such grey day, I had a hankering for soup. I've been meaning to make tomato soup for infinity, so I seized the opportunity. I was also hoping that making one last batch of soup would jinx the weather into turning warm again. Today's forecast is 79 and sunny, so I think it worked. You're welcome, Seattle.

Next time the sun creeps behind the clouds, pull your slow cooker out of its summer hibernation and make a batch of this Slow Cooker Tomato Soup.

Let's get (slow!) cooking!
Erin


Slow Cooker Tomato Soup
Adapted from America's Test Kitchen

2 tablespoons butter
2 (28 ounce) cans diced tomatoes, drained, juice reserved
1 onion, minced
1 cup chopped carrots
2 tablespoons brown sugar
1 tablespoon tomato paste
1/2 teaspoon salt
3 tablespoons flour
3-4 cups chicken or vegetable broth
2 bay leaves
1/2 cup half and half
Pepper
Chopped basil for garnish, optional

Melt butter in a large skillet over medium-high heat. Add drained tomatoes, onion, carrots, brown sugar, tomato paste, and salt. Saute until softened and most of the liquid is evaporated, about 15 minutes. Stir in flour and cook for 1 minute. Stir in 1 cup broth, scraping up the browned bits from the bottom of the pan.

Place tomato mixture into the slow cooker with reserved tomato juice, an additional 2 cups broth, and bay leaves. Cook on low for 4-6 hours, until tomatoes start to break down.

Puree with an immersion blender or in batches in the regular blender. Stir in half and half and remaining 1 cup broth if desired, depending on how thick you like your soup. Season to taste with salt and pepper. Garnish with basil.

Wednesday, June 1, 2016

Oven Fried Chicken

Summer and fried chicken seem to go hand-in-hand, but I've never really made it before. So when Max and Sam started asking for fried chicken that didn't come in a bucket or a box, I figured why not? I can compete with Popeyes, right?

My mom used to make a corn flake fried chicken in the summers that I remember taking to picnics. I'll have to ask her for the recipe and a demo when she visits this summer!

Until then, I'll tide my boys over with this version, inspired by two different recipes from Farm Journal's Best-Ever Recipes. This main dish is perfect for lunch or dinner.

Next time, I want to try soaking the chicken in buttermilk overnight before frying it up in a Dutch oven. Stay tuned.

Mangia! Mangia!
Andrea


Oven Fried Chicken
3 to 4 pounds bone-in chicken pieces, or one whole chicken, cut up
1/2 cup milk
1/2 cup Italian seasoned bread crumbs
2 tablespoons Parmesan cheese
2 tablespoons fresh parsley, finely chopped
1/2 teaspoon dried basil
1/2 teaspoon dried oregano
1/2 teaspoon garlic powder
1/4 teaspoon salt
1/4 teaspoon ground black pepper
2 tablespoons melted butter

Preheat oven to 375 degrees. Spray bottom of a roasting pan with cooking spray and set aside.

Pat chicken pieces dry with paper towel.

Pour milk into small bowl.

In a medium bowl, combine bread crumbs, Parmesan cheese, parsley, spices, salt and pepper.

Working with one piece of chicken at a time, dip chicken into milk, then coat with bread crumb mixture. Place chicken in roasting pan with the skin side up. Repeat until all chicken pieces are coated in bread crumbs.

Cook for 30 minutes, then drizzle with melted butter. Cook for another 20 minutes until golden brown.

Serve warm or cold. Delicious either way!