Monday, June 29, 2015

Teriyaki Chicken with Ginger Veggie Couscous

Take-out meals definitely serve their purpose, but making your own versions at home is more fun, healthier and budget-conscious, too.

I always have chicken in the freezer and a box or two of couscous on hand, so this was easy to whip up. A bag of matchstick carrots in the crisper drawer is the perfect add to the couscous, along with green onions and broccoli. As for the ginger, here's my tip: Instead of buying a piece of ginger root and using a micro-zester or a grater, I buy a tube of minced ginger. It lasts longer in the fridge than the root and speeds things up quite a bit.

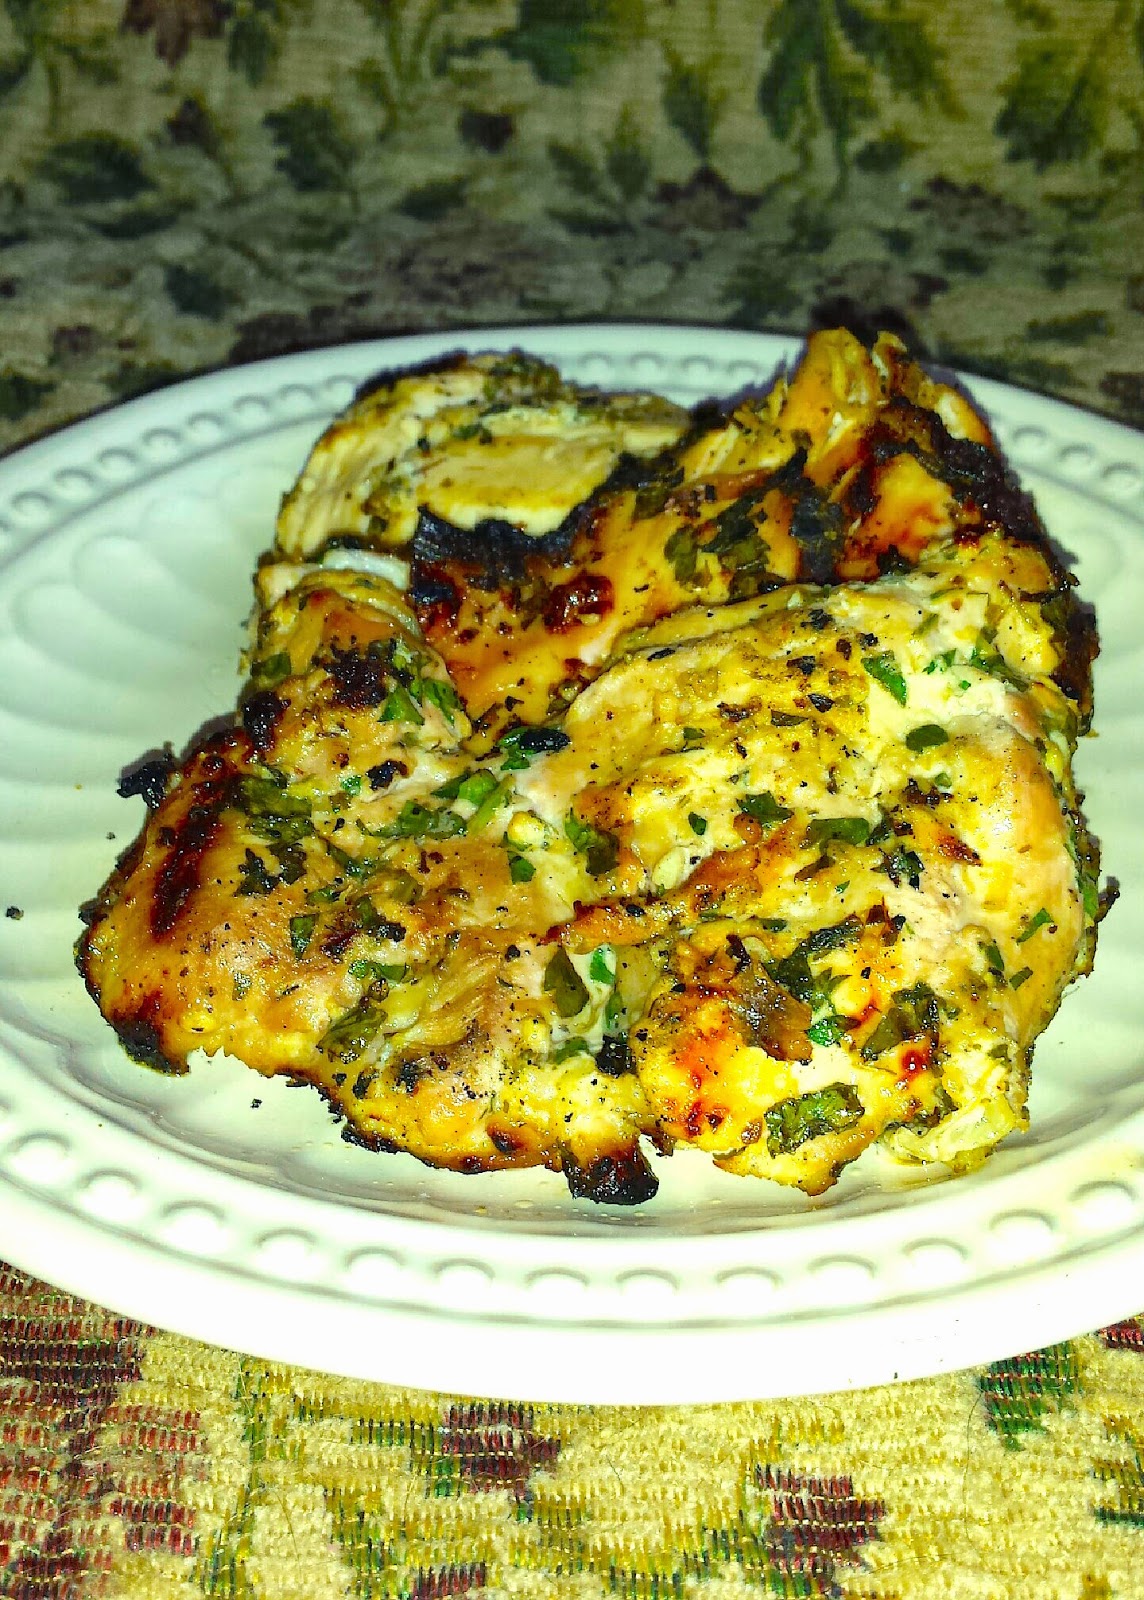
You can use this teriyaki sauce as a marinade for grilled chicken or you can pour it over the chicken and bake it in the oven. Either way the flavor is restaurant-worthy.

Mangia! Mangia!
Andrea


Teriyaki Chicken

1 cup soy sauce
1/2 cup cider vinegar
2 cloves garlic, minced
1 teaspoon minced or grated ginger
1/2 teaspoon black pepper
1/4 cup brown sugar
2 tablespoons cornstarch
2 tablespoons cold water
3 to 4 pounds chicken pieces (skinless breasts or skinless thighs)

If oven baking, preheat oven to 425 degrees. If grilling, preheat your grill to medium about 10 minutes before you plan to cook the chicken.

In a saucepan, combine soy sauce, cider vinegar, garlic, ginger, pepper, brown sugar, cornstarch and cold water. Simmer over low heat until sauce thickens and begins to bubble. Remove pot from heat and set aside.

Place chicken in a 13 x 9 inch pan. Pour teriyaki sauce over chicken, turning the chicken pieces to coat both sides.

If baking, place in oven for 30 minutes or until chicken is no longer pink. Remove chicken from baking pan and place on serving platter. Top with remaining teriyaki sauce from baking dish.

If grilling, cover pan and put in refrigerator to let chicken marinate for 30 minutes. Preheat your grill. Remove chicken from marinade and grill on medium for 5 to 8 minutes per side, brushing with the extra marinade as you turn the chicken pieces. Cook until chicken is no longer pink inside.

Ginger Veggie Couscous

1 box wheat or plain couscous
1 tablespoon olive oil
1 and 1/2 teaspoons minced ginger
1 to 2 teaspoons minced garlic
1/2 cup sliced green onions
1/2 cup carrots, finely chopped
1 cup broccoli florets, chopped
1 to 1 and 1/2 teaspoon sesame oil
2 tablespoons soy sauce

Prepare couscous according to package directions, except omit oil or butter.

Heat oil in a 12-inch skillet over medium heat. Add ginger, garlic, onions, carrots and broccoli. Cook, stirring frequently, for about 5 minutes or until vegetables are tender. Remove from heat.

Add couscous to skillet and stir to combine. Add sesame oil and soy sauce, and gently mix to combine the sauces.

To serve, plate chicken (slicing breast meat is a nice touch) with veggie couscous and enjoy!

Friday, June 26, 2015

A Tribute to the South

Last June, the husband, our boy, and I packed up our little house in Milwaukee and moved down south to Charlotte, North Carolina. And we've loved it here. If you haven't been to Charlotte yet, you've gotta get down here for a visit. The people are kind and polite, the weather is great, and it's a beautiful part of the country.

But we can't leave well enough alone. So this week we're packing up our little house in Charlotte and moving out west to Seattle, Washington. We are very excited about our new hometown, but you know what doesn't thrill me? Packing a gazillion boxes. I'm tired just thinking about it. So instead of bubbling wrapping my tchotchkes, I'm rounding up my favorite Southern-inspired recipes and reminiscing about my time in Charlotte.

Let's get cooking...some Southern food, y'all!
Erin

Bread & Butter Pickles: There's something about the South that makes me feel domestic, and what's more domestic than pickling?


Canned Applesauce: Okay. Maybe canning is more domestic than pickling.

Grilled Peach Salad with Goat Cheese: I don't know if it's the vicinity to Georgia or what, but they grow some killer peaches around here.


Lightened-up Chicken Curry Salad: When summer hits in Charlotte, it's just too hot to turn on the oven. Whip up this Chicken Salad with rotisserie chicken and you have the perfect no-cook meal.


Three Cheese & Bacon Macaroni & Cheese: Mac & cheese is southern. The TV told me so.


Spring on Toast: I made this egg and asparagus dish with Amy, one of my favorite Southerners.


Baked Cheesy Grits: I mean...GRITS.


Succotash with Green Beans: This just feels Southern to me.


Lemon Buttermilk Cake: I have used buttermilk in more recipes since moving to the South. And this cake is glorious.

Mint Julep: This one is obvious. Bottoms up!


Wednesday, June 24, 2015

Sour Dough Coffee Cake

When a friend gave me a bag of Amish Friendship Bread starter earlier this year, I had no choice but to experiment.

To me, that's really what these bags of goo are all about. If you have kids (especially boys!) they will love squeezing and 'burping' the bags of starter as the yeast ferments with the milk, flour and sugar. And you can teach them a little science along the way. In fact, I've caught Sam several times sneaking into the dining room to squeeze the starter bags.

My sour dough starter is still going strong since I received it in March. And I've learned quite a bit, as Erin did when she received some starter a few years back.

If you haven't been gifted a bag, I encourage you to make your own. The recipe is here. When you (and your friends) get tired of using the starter, I'm happy to report that the freezing method does work. I made this coffee cake with a bag of starter slush that I thawed and re-started after it spent about two months in cold storage. Those little yeast molecules picked up fermenting right where they left off.

Once you make the traditional Amish Friendship Bread, it's easy to use starter for other things, including cakes, brownies, cookies, pancakes, biscuits and pie crust. If you need ideas be sure to visit the online bible of friendship bread recipes at the Friendship Bread Kitchen.

I'm not a huge fan of the instant pudding mix and loads of sugar that many starter recipes use. Luckily for me, when Robin T.  delivered my first starter bag, she included pudding-free recipes developed by her co-worker Claudia T. This coffee cake recipe is a spin off. And it is the best coffee cake. Ever. The day after my recipe tinkering I had to give away batches of cake to my neighbors because we could not stop eating it.

Mangia! Mangia!
Andrea


Sour Dough Coffee Cake

For the cake batter
2 cups of sour dough starter
1 1/2 cups of flour
3/4 teaspoon baking soda
1/2 teaspoon cinnamon
1/4 teaspoon salt
3/4 cup sugar
1/3 cup oil
1 egg
1 teaspoon vanilla

For the topping
1 teaspoon cinnamon
1/4 teaspoon nutmeg or ginger, or 1/2 teaspoon pumpkin pie spice (experiment!)
1/2 cup butter at room temperature
1/2 cup old fashioned oats
3/4 cup brown sugar
2 tablespoons flour
1 cup chopped nuts (pecans, walnuts, almonds, etc.)

Preheat oven to 350 degrees. Spray a 9 x 13 inch pan with cooking spray or grease with butter or shortening.

Using a plastic or wooden bowl and spoon, mix together all ingredients for the cake batter. (Do not use metal. It reacts with the yeast in the starter and gives it a funny taste.) Pour mixture into pan and spread out evenly.

Place all topping ingredients in a second bowl. Using two knives or a pastry cutter, incorporate butter into other ingredients until crumbs begin to form. Sprinkle topping generously over cake batter. You might have some left over. (You can freeze the extra topping and use it when you make this coffee cake again — because there will be a next time.)

Place pan in oven and bake for 30 minutes to 40 minutes, until the top is browned and a toothpick inserted into the center comes out clean.

Let the cake cool. Then cut yourself a piece and indulge. And keep your starter going so that you can make this again.

Here's Max holding one of our starter bags.


Monday, June 22, 2015

Skippy (aka Skip and Go Naked)

I love when I get to hang out with my Ohio family. We play cards, usually euchre, gin and knock poker, while drinking Skippies. The Skippy is short for Skip and Go Naked. But I can assure you that we are fully clothed -- if not fully sober -- while partaking.

And it turns out we are not alone. Just Google "Skip and Go Naked" and you will find plenty of recipes, some called "Hop, Skip and Go Naked."

Also, ask your friends if they have heard of this frozen limeade/beer/vodka concoction. Andrea and Erin have pals in Illinois and Wisconsin respectively who refer to this drink as the Strip and Go Naked. If I had to guess, I would say all this nakedness has to do with the Skippy being the perfect drink in the heat of summer. (Hello, it's approaching 100 degrees in Charlotte as I write this!)

The traditional Skippy -- at least in my family -- is made of limeade, beer, and vodka. However, I do like the Skippy with cranberry, beer and vodka. If you are looking for a poor man's margarita, make a limeade, beer and tequila Skippy.

About the beer: think cheap, canned, all American beer. Absolutely do NOT waste your craft brews on the Skippy.

XOXO,
Amy


Skippy (aka Skip and Go Naked)

6 oz. frozen limeade (or pink lemonade or cranberry)
6 oz. cheap beer
6 oz. vodka (or tequila)
Ice (amount varies by taste)

Blend together equal parts of limeade, beer, and booze along with the right amount of ice for you and your fellow Skippy drinkers. How slushy do you like your Skippy? How strong? Only you know the answer. Experiment -- that should turn out well!

Ideally, you can find a 6 ounce can of limeade concentrate, but they are hard to find. That's what works best; you dump the entire thing into the blender and then fill the empty can up with beer and toss that in the blender, and repeat with the booze of your choice. Most standard home blenders will accommodate 6 ounces -- max! -- of each of the main ingredients (limeade, beer, and booze), allowing plenty of room for ice. The Vitamix might be roomy enough for a bigger batch; I'll have to try that.

Another thing to try: One of Andrea's friends makes her Skippies over ice and to cut down on the limeade -- which has a ton of sugar -- she uses some lime-flavored La Croix sparkling water.


.

Friday, June 19, 2015

Zucchini Rice

I found Zucchini Rice on Pinterest forever ago, and I'm kicking myself for not trying this simple and delicious recipe sooner. It's incredibly flavorful, but still versatile enough to pair with just about anything. Pork chops, grilled steak, teriyaki salmon...My friends, you have found your side dish.

In addition to being tasty, Zucchini Rice is healthy! It's the perfect way to sneak an extra veggie into your meal. Your kids might not even know they're eating zucchini. And I won't tell them. Your secret's safe here, folks.

Let's get cooking!
Erin


Zucchini Rice
Adapted from: Dishing with Leslie
Serves: 6

1 tablespoon butter
1 cup rice
2 cups chicken broth or vegetable broth
1/2 cup shredded Parmesan cheese
1 large zucchini, grated (about 2 1/2 cups)
Salt and pepper

Melt butter in a large skillet over medium. Stir in rice and allow it to toast until golden brown, about 5 minutes, stirring occasionally. Stir in broth and bring to a boil. Reduce heat to low, cover, and allow rice to cook until tender, about 15-20 minutes. (It's okay if the liquid isn't totally absorbed. Just make sure the rice is tender.)

Stir in Parmesan, grated zucchini, and salt and pepper to taste. Cover skillet and allow to sit for 5 more minutes. Stir again and serve.

Wednesday, June 17, 2015

Grilled Eggplant Salad

Recipe inspiration is all around us — even at the local pharmacy.

The idea for this side dish originates from one of those free diabetes magazines. I was flipping through it while waiting for a script to be filled, way back in 2011. I love eggplant and usually grill it basted in balsamic vinegar and olive oil. Mixing it up with mint and lemon juice?? Just the ticket for a summer dinner.

When grilled, the eggplant takes on a creamy texture and the red onions mellow. Together with the mint and lemon juice, those tastes are super refreshing.

My husband and I devour this dish, which I usually serve with grilled steak or pork chops. It's growing on my boys, and I think I've served it to most of my relatives. I've grilled the vegetables on my outdoor grill and on the stovetop using my grill pan. Sometimes I forget the parsley. It doesn't matter – it always tastes so good.

I use a large eggplant and a large or jumbo red onion because I usually burn some pieces in the grilling process and have to toss them out. If you are an expert griller, tell me your secrets!

If there are any leftovers, I like to use them tossed with salad greens and crumbled feta cheese.

Mangia! Mangia!
Andrea


Grilled Eggplant Salad

1 large eggplant, sliced into 1/4 inches rounds
1 large red onion, sliced into 1/4 inch rounds
Vegetable or olive oil cooking spray or enough oil to coat eggplant and onion rounds
Juice of 1 lemon (2 to 3 tablespoons)
1/3 cup chopped flat leaf parsley
2 to 3 tablespoons chopped fresh mint
1 tablespoon olive oil
Freshly ground black pepper
Pinch of cayenne pepper
Optional: 1 to 2 teaspoons lemon zest

Preheat grill to medium. Spray or brush both sides of eggplant and onion slices with oil.

Grill eggplant and onion slices on medium for 2 to 3 minutes each side. Remove from grill and let cool on cutting board or in a bowl.


While vegetables cool, combine lemon juice, parsley, mint, olive oil, black pepper and cayenne pepper in medium bowl.

Chop eggplant and onion and add to bowl. Stir to combine. Serve immediately or chill to serve later.

Monday, June 15, 2015

Grilled ABC (Avocado Bacon Cheese) Sandwich

My husband and I do our best to instill important values in our children.

There's the Golden Rule: "Treat others as you would like to be treated."

And then there's Lucy's and Penny's Golden Rule: "Bacon makes everything better."

The grilled avocado bacon cheese sandwich is not an every day sandwich; it's a special treat, for sure. I make it whenever we have the good fortune of having ripe avocados and a little bit of bacon that needs to be used up.

XOXO,
Amy


Grilled Avocado Bacon Cheese Sandwich

Bacon
Butter spread or softened butter
Sliced bread
Avocado, sliced
Cheese slices

Cook bacon on a cookie sheet in the oven at 400 degrees. It will take about 15 minutes. No need to flip the bacon halfway. You will know when the bacon is done when it is sizzling all over. (BTW, I recently learned there is no other way to cook bacon. The mess is contained and the bacon stays flat versus curling up like it does in a frying pan.)

While bacon is in the oven, butter the outside of your slices of bread. Place buttered side down in a skilled sprayed with Pam. Turn heat under the skillet to medium to medium high. Place a piece of cheese on top of the bread and then layer with avocado. Next, layer with the cooked bacon, which you blotted with paper towels after removing from the oven. Layer another piece of cheese on top of the bacon. Add the top piece of bread. Cook as you would a grilled cheese. Be carefully flipping the sandwich so the insides don't spill out all over.

Eat up and enjoy just like this little girl!


Here's Penny giving thumbs up to her first grilled avocado bacon cheese sandwich. It was February 2, 2014, a date that called for a fun, festive, yummy dinner to honor Penny's fifth birthday and Super Bowl Sunday. The only thing that would have made the occasion better would have been if Penny's beloved Carolina Panthers had been playing in the big game.


Friday, June 12, 2015

Sauteed Zucchini with Corn

We've been talking about supermarket shortcuts quite a bit lately, and today's post is no exception. As busy moms, Amy, Andrea, and I are always looking for ways to shave five minutes off dinner prep time so we can spend more time with our husbands, kids, or Mint Juleps.

I know it's summer, and corn on the cob is popping up at farmers markets and it's darn cheap at the grocery store. But sometimes my kid wants to snuggle while I make dinner, and wielding a sharp knife with a squirmy toddler on my hip just isn't the best choice. Or, let's be honest, maybe I'm feeling hangry and my growling stomach can't wait for me to cut kernels off the cob. And that's when I turn to frozen corn.

A note about my new favorite frozen corn: the other day, my boy and I were shopping at Whole Foods, and I popped a bag of their 365 Everyday Value frozen corn in my cart. Sure it was more expensive than the stuff I usually buy at Publix, but whatever. I wasn't about to swing by another grocery store to save $1 on veggies from the freezer section.

When I opened the bag to make dinner that night, I snuck a few frozen kernels before I tossed them in the pan. Holy moly! It tasted just like corn I painstakingly cut from the cob myself in the heat of summer! I kept nibbling. And nibbling. And decided I'm a total convert. It was worth every extra cent I spent.

By the way, Whole Foods has no idea who I am. (Unless it's "the lady whose kid is trying to pilfer M&Ms from the trail mix bar." Sometimes we make a scene at the grocery store. Oy.) I was just surprised and super pumped to discover their most delicious corn, and I thought I'd share the tip with you.

That said, let's use whatever corn we happen to have in our freezer to make this ridiculously tasty side dish. Even the husband raved about it, and he doesn't even like zucchini! Now that's a vote of confidence.

Let's get cooking!
Erin

P.S. Looking for other grocery store shortcuts? I use pre-made mashed potatoes in my Shepherd's Pie, prepared pesto in these Savory Pesto Palmiers, and refrigerated biscuits for Slow Cooker Chicken and Biscuits. You've gotta get dinner on the table somehow!


Sauteed Zucchini with Corn
Adapted from Damn Delicious
Serves: 4

1 tablespoon butter
2 zucchini or yellow squash, halved or quartered if large and sliced 1/4" thick
3/4 cup corn (frozen or fresh)
1 tablespoon chopped fresh basil
2 tablespoons grated Parmesan cheese
Salt and pepper

Heat the butter in a large skillet over medium-high. Add zucchini and corn and cook, stirring occasionally, until vegetables are tender and spotty brown, about 7-8 minutes. (Don't stir constantly; allow the veggies to sit in the pan and sizzle a bit. The contact with the hot skillet allow those delicious brown spots to form.) Stir in basil, cheese, and salt and pepper to taste. Serve hot.

Wednesday, June 10, 2015

Greek Grilled Chicken

Now that warm weather has arrived, I am devoted to my grill. I love the flavor that cooking over the coals adds to meat and veggies. Plus, I get to spend a few minutes on our back patio sipping a cold drink while I cook dinner.

This marinated chicken is easy to prep and combines the tangy zip of yogurt with the bright freshness of lemon. You can use any cut of chicken, with the skin on or off. I like it best with skinless and boneless thighs. The slightly higher fat content of the dark meat means it stays moist.

Serve with your favorite house salad and a side of minty sugar snap peas. This also tastes great the next day, alone or on top of a salad.

Mangia! Mangia!
Andrea


Greek Grilled Chicken

1 cup plain greek yogurt
2 tablespoons olive oil
Zest of one lemon
Juice of one lemon
2 to 4 teaspoons minced garlic
1/2 tablespoon dried oregano
1/2 teaspoon salt
1/2 teaspoon black pepper
1 cup chopped flat leaf parsley
3 to 4 pounds of chicken pieces, such as thighs, breasts, legs

In a medium-sized bowl, mix together all ingredients except the chicken. Pour into large ziplock bag. Add chicken and seal bag. Massage chicken and marinade to coat all chicken pieces. Then place in refrigerator for 30 minutes to an hour.

Heat outdoor grill or a stovetop grill pan to medium. Remove chicken from marinade, and discard the marinade left in the bag.

Grill chicken, about 5 minutes or so on each side. Serve warm or cold.

Tuesday, June 9, 2015

Slow Cooker Pork Tomatillo-Verde Tacos

My love of tacos just got stronger, thanks to Herdez Tomatillo-Verde sauce.

This jarred Mexican cooking sauce is the latest addition to our stash of secret sauces that help us busy moms get an easy and tasty meal on the table fast.

Toss some Herdez in the slow cooker with your favorite cut of pork. After a few hours all you need to do is shred the meat and dinner is served! Add Amy's guacamole and your meal is complete.

Another plus: This dish holds up well on the warm setting, so don't worry if it needs to sit while you are still at work or swimming at the pool with your kids.

Mangia! Mangia!
Andrea


Slow Cooker Pork Tomatillo-Verde Tacos

1 tablespoon olive oil
3.5 to 4 pounds pork butt, shoulder, tenderloin or roast
1 and 1/2 jars Herdez Tomatillo-Verde cooking sauce
Soft corn tortillas
Taco toppings (shredded lettuce, cheese, salsa, guacamole)

Warm oil in a 12-inch skillet. Brown pork on all sides. Note: If you are pressed for time, don't bother to brown the meat.

Place pork in a 6 to 7 quart slow cooker. Pour 1 and 1/2 jars of tomatillo-verde sauce on top.


Cook on high for 3 to 4 hours or on low for 5 to 7 hours. Remember, the pork can sit at the warm setting for awhile too, so don't worry about that.

Remove pork from slow cooker and shred the meat using two forks. Return meat to slow cooker and stir into sauce to heat through.

Serve with soft corn tortillas and your favorite taco toppings.

Monday, June 8, 2015

Sriracha Pork Noodles

Move over Slow Cooker Thai Peanut Pork. Amy has a new favorite HDHH pork dish: Sriracha Pork Noodles.

I'm joking. Erin's Thai Peanut Pork became the first recipe on this blog to win over my belly. I've made it many times and passed it along to many friends, all of whom gave it rave reviews. I'd say they gave it two thumbs up but they were too busy shoveling the food in. So, if you love that dish, you are going to love Sriracha Pork Noodles.


XOXO,
Amy


Sriracha Pork Noodles
Adapted from Good Housekeeping

1 pound linguine or lo mein noodles
3 tablespoons soy sauce
2 tablespoons sriracha (or other hot sauce)
2 tablespoons balsamic vinegar
2 tablespoons olive oil
1 pound ground pork
Red pepper
Ground black pepper
11 ounces fresh spinach

Start water to boil to cook noodles according to package directions.

Mix together soy sauce, sriracha and balsamic vinegar and set aside.

Heat oil in skillet over medium high heat. Add pork and cook through, breaking up big pieces. Add a pinch of red pepper and and pinch or two of ground black pepper. When pork is cooked, add in the sauce and spinach and stir through until spinach is wilted.

Drain noodles and combine with meat, spinach and sauce.

Yum!


Friday, June 5, 2015

Fan Friday - June 5, 2015 edition

It's Fan Friday again, dear readers. Back by popular demand. Since our last Fan Friday post, more of you have sent emails and pictures chronicling your adventures testing out Hot Dinner Happy Home Recipes in your own kitchens. Thank you -- and keep 'em coming.

xoxo,
The Ladies

Kristi made Amy's Roasted Chicken.


Here's what Kristi had to say: "It was great! I wish I hadn't tented it though. May double the spices next time and rub under the skin. Made yummy broth, as well!" (Kristi tented the chicken with foil to hold it until her husband got home. The chicken got a little soggy. Perhaps next time she should try keeping it in a warm oven -- 200-225 degrees -- and telling hubby to hurry home.)

Like she said, Kristi also made her slow cooker chicken broth. Here's what she does: tosses the chicken frame in the slow cooker, adds onion, celery and whatever herbs she has on hand, covers with water and cooks on low over night. She strains in the morning! She promises you will never made broth on the stovetop again -- and Amy is convinced of that fact.


Both Sarah and Brian made Tomato-Avocado Quino Salad the same day that it posted to Hot Dinner Happy Home. They each reported that the dish was a big hit with their families. (You guys are so good for our collective ego here at HDHH.)

Sarah said: "Loved it. Brian (my husband) ate every bite and asked for seconds. Never happens with quinoa. xoxoxo."

Brian said: "I liked that the quinoa made a nice nest for the other ingredients. The vegetables just seemed to go better with the quinoa than they would have with rice or other grains; I wouldn't even want to think about doing this with rice. Bulgur maybe. 


This was my first time cooking quinoa, so it was hard for me to gauge when it was done. 

The olive oil makes a difference — I drizzled with garlic-infused oil (which Terry and I got at an oil boutique on Prince Edward Island on our honeymoon), and it was great. Terry used mushroom/sage olive oil, which seemed to be too much for this, surprisingly. I was expecting that the plain ingredients would benefit from some additional nuanced flavoring, but they were fine on their own. I did use chicken stock to cook the quinoa.

I would make again, though I'll probably try other quinoa experiments first for a while. 

Thanks for the inspiration!"

Don't you love Brian's detailed review? We also love that Brian used red quinoa (so pretty!) and served this "salad" as a side to a beautiful piece of salmon.


Wednesday, June 3, 2015

Minty Sugar Snap Peas

After weekends filled with baseball games and tournament foods (chips, burgers, hot dogs and brats) I am craving a fresh and light vegetable dish.

This is one of those sides created with what my fridge had to offer: a bag of sugar snap peas, some green onions and mint left over from a fruit salad.

This comes together in less than 10 minutes. The sugar snaps are crisp and the scallions add a mild onion flavor complimented by the lightly sweet mint. My husband enjoys this change of pace and the kids actually eat it, too. This side dish is so speedy and yummy it's becoming a regular on my rotating menu.

Mangia! Mangia!
Andrea


Minty Sugar Snap Peas

1 tablespoon olive or vegetable oil
1 bag sugar snap peas (12 to 16 ounces)
1 bunch green onions, sliced
2 to 3 tablespoons chopped mint
Optional: Salt and pepper to taste

Warm oil in a large skillet. Sauté sugar snap peas and green onions over medium flame for about 3 minutes. Remove from heat. Stir in mint. Serve warm or cold. Delicious both ways.

Monday, June 1, 2015

Family Cornbread

Growing up I don't think I ever knew you could make cornbread from a Jiffy box or that some "cornbread" is sweet. Now I'm more than all grown  up and here to tell you that cornbread should never come from a box or taste sweet.

My family always made homemade savory cornbread. That's why I call this Family Cornbread. My Ohio-born mom learned how to make it after marrying my Tennessee-born dad. Cornbread and homemade banana pudding with scratch-made (no box!) vanilla pudding.

Growing up we'd have Family Cornbread and beans for dinner. My grandma would make it to use in her cornbread stuffing, which also featured hard boiled eggs, the neck of the turkey and sage. (Note to self: Make grandma's stuffing.)

I serve Family Cornbread with all kinds of meals: beans, pulled pork, brisket -- to name a few. My BFF Andrea serves it with her Turkey, Black Bean & Sweet Potato Chili.

And while I don't keep  boxes of cornbread mix in my pantry, I do keep Ziploc bags of Family Cornbread mix. It's a trick I learned from Mom. Get an assembly line of bags going in your kitchen and add enough dry ingredients to each to make one cornbread. Smart.

XOXO,
Amy


Family Cornbread

3/4 cup all purpose flour
1 1/4 cup yellow or white cornmeal
1 tablespoon sugar
1/4 teaspoon baking soda
3/4 teaspoon baking powder
1 beaten egg
4 tablespoons melted shortening (Mom and I just use olive oil.)
1 1/2 cup buttermilk (Mom and I use light buttermilk.)

Preheat oven to 425 degrees. Grease bottom and sides of 9-inch cast iron skillet; I use Crisco.

Combine ingredients -- dry first and then wet -- and pour into prepared skillet. Bake for 25 minutes or until golden brown at the edges and pulling away from the pan. Remove from oven and immediately flip the cornbread onto a plate. Cut into wedges and serve with butter. Enjoy!