Showing posts with label applesauce. Show all posts

Wednesday, October 11, 2017

Fresh Apple Pie

I grew up close to an orchard and apple pie is one of the first things I learned how to bake. For years I would make the crust from scratch, using a big bowl and two knives to incorporate the butter into flour.

Discovering the pastry cutter in my early 20s was a major breakthrough. After I got married, a friend told me about using a food processor to slice the apples. Game changer! I once packed that kitchen gadget and drove it from Cincinnati to my parents house in New York just to make Thanksgiving pie baking easier.

This year I've been experimenting with prepping dough in the food processor, too. I recommend it for saving time and less mess. I also discovered (thanks to Ina Garten) that adding shortening to the dough recipe makes the dough  easier to work with.

After a recent visit to our local apple orchard here in Illinois, my boys were craving apple pie and my husband needed a treat for an office party. So I put the food processor to work. I had two pies in the oven in a little more than an hour.

Another secret to perfect pie: use a variety of apples. You need at least 2-3 Granny Smith, then use your favorites. Fuji, Honeycrisp, Macintosh and Jonagold hold up well, as does Sweet Tango, which I just discovered.

If you're a novice, don't be afraid of making pie. It's a great way to get the whole family in the kitchen.

If you end up with extra apple filling and enough dough scraps, let your kids make small hand pies or cook the apples in a saucepan for some apple sauce.

Mangia! Mangia!
Andrea


Fresh Apple Pie

For the crust:
1 1/2 sticks unsalted butter, chilled and cut into cubes
3 cups all purpose flour, plus more for rolling out the dough
1 tablespoon sugar
1 teaspoon salt
1/3 cup chilled vegetable shortening
1/2 cup ice water
Egg wash (1 egg whisked together with 1 tablespoon water)
1-2 teaspoons coarse sugar

For the filling:
4-5 pounds of mixed apples, peeled, cored, quartered and thinly sliced by hand or with food processor
1/2 cup sugar
2 tablespoons flour
1/4 teaspoon allspice
1 teaspoon cinnamon
1/2 teaspoon nutmeg
1 teaspoon salt
1 1/2 tablespoons butter, cut into chunks

*One note: I tend to just eyeball the apples and spices, tasting as I go. I also pile the apples high in the pie plate. So feel free to make your own adjustments.

To make the crust, set up your food processor with the steel blade. Add flour, salt and sugar to the processor bowl and pulse to combine. Add butter and shortening and pulse until the butter is the size of small pebbles, about 12 times.

With the food processor running, pour in the cold water until the dough comes together. Turn out onto a floured counter and roll into a ball. Wrap in plastic wrap and refrigerate while you make the filling.

To make the filling, thinly slice apples by hand or set up your food processor with the larger slicing disk. Place each apple quarter into feeder shoot and let the food processor do the work. Place apples into a large bowl.

Add sugar, flour, allspice, cinnamon, nutmeg and salt. Mix to combine so that all the apples are coated in the spices. Add more spices if you think it needs it, or if you used more apples. Set aside.

Grab dough from fridge. Lightly flour (1-2 tablespoons) a counter. Cut dough ball in half. Gently roll out one half of dough into a roughly 10-inch circle. Carefully fold in half and place into pie plate. Unfold and press dough into pie plate. Let extra dough hang over the edge, then trim it so that 1/2 inch or less hangs over.

Brush the edge of the bottom crust with egg wash. This will help the top crust stick to it.

Fill pie crust with apple filling. Arrange apples in a mound slightly higher in the center. Dot with butter chunks.

Roll out the rest of the dough to make the top crust. Place dough on top of filling. Trim off excess dough. Press together edges of dough. Crimp with fingers or a fork.

Brush with egg wash and sprinkle with sugar. Cut a few 1-inch slits in top crust to allow steam to escape during baking.

Place a sheet pan lined with parchment on a lower rack in the oven, to catch any drippings from the pie.

Place pie on a middle or upper middle rack in the oven. Bake for about an hour, until the crust is brown and the juices of the pie are bubbling. If crust is browning too fast, cover loosely with foil.

When done, remove and let cool before serving. Serve warm with ice cream or whipped cream. Refrigerate leftovers.


My kids devoured half the pie before I could take a pretty photo!


Friday, October 7, 2016

Apple Cinnamon Oatmeal Muffins

My son is four now (Four!! Insert all the crying emojis.), and he goes to preschool three mornings a week. He is a bit of a picky eater, and getting him to eat enough for breakfast that his little belly stays full until snack time is my morning mission.

We've been making his favorite No-Bake Granola Bars, but it was time to mix things up. Danny thought muffins would be tasty, but how to make a muffin that would be hearty enough to keep stick to his ribs? Enter superstar ingredient (and one of my kids' favorites): oatmeal.


These Apple Cinnamon Oatmeal Muffins are healthy, delicious, and filling. They taste like a cross between Brown Sugar Oatmeal Coffee Cake and Baked Oatmeal. The sprinkling of cinnamon sugar on top might even convince your kids that they are breakfast cupcakes. Just sayin'.

Let's get cooking!
Erin


Apple Cinnamon Oatmeal Muffins
Makes 10 muffins

1 cup old-fashioned oats
1 cup milk
1/2 cup no-sugar-added applesauce
1/2 cup brown sugar
1 egg
1 teaspoon vanilla
1 cup flour
1 1/2 teaspoons cinnamon, divided
1 teaspoon baking powder
1/2 teaspoon baking soda
1/2 teaspoon salt
1 tablespoon granulated sugar

In a medium bowl, combine oats and milk. Set aside to soak for one hour.

Meanwhile, preheat oven to 400 degrees. Grease 10 cups of your muffin tin and set aside.

Stir applesauce, brown sugar, egg, and vanilla into the milk-soaked oats. In a separate bowl, whisk together flour, 1 teaspoon cinnamon, baking powder, baking soda, and salt. Stir dry ingredients into the wet ingredients until just combined.

Evenly divide batter between 10 cups of your muffin tin. Combine remaining 1/2 teaspoon cinnamon and 1 tablespoon granulated sugar. Sprinkle cinnamon sugar over batter. (I didn't use all of the cinnamon sugar. Use any leftover for cinnamon crisps! Mmmm.)

Bake for 16-20 minutes, until muffins are set and a toothpick inserted into the center comes out clean. Allow to cool in the pan for 5 minutes, then remove to a wire rack to cool completely.


Wednesday, June 10, 2015

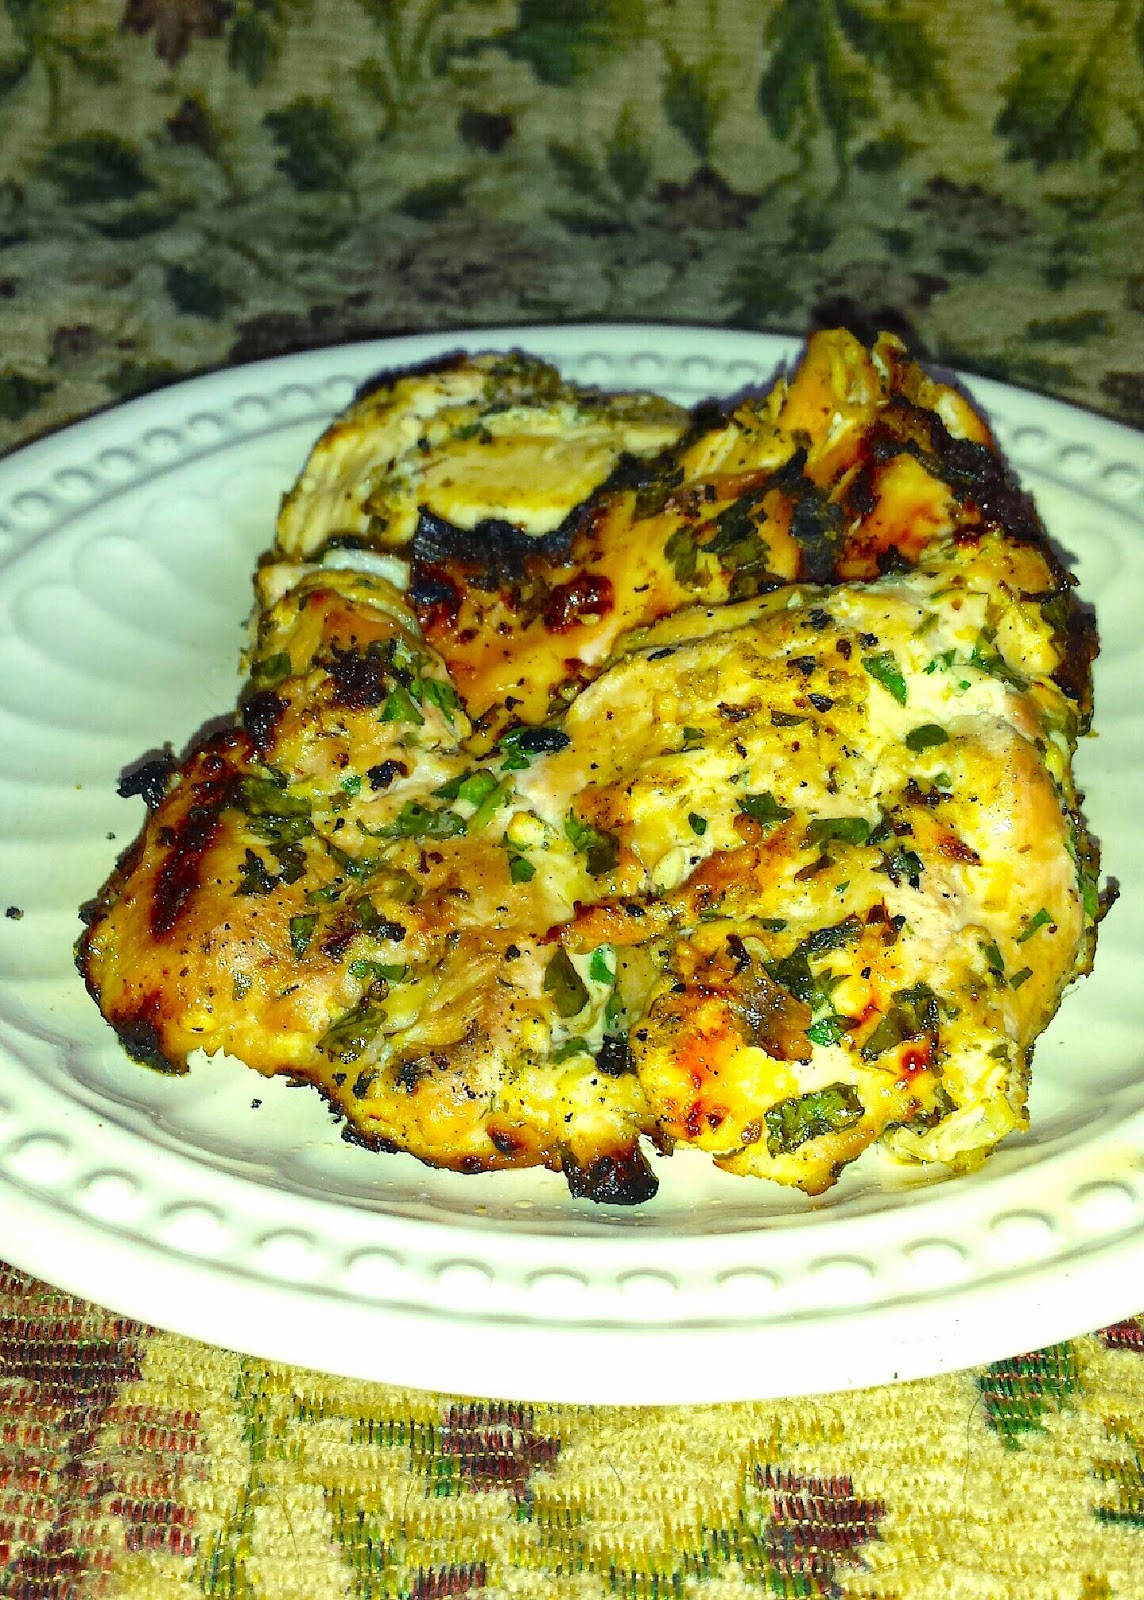
Greek Grilled Chicken

Now that warm weather has arrived, I am devoted to my grill. I love the flavor that cooking over the coals adds to meat and veggies. Plus, I get to spend a few minutes on our back patio sipping a cold drink while I cook dinner.

This marinated chicken is easy to prep and combines the tangy zip of yogurt with the bright freshness of lemon. You can use any cut of chicken, with the skin on or off. I like it best with skinless and boneless thighs. The slightly higher fat content of the dark meat means it stays moist.

Serve with your favorite house salad and a side of minty sugar snap peas. This also tastes great the next day, alone or on top of a salad.

Mangia! Mangia!
Andrea


Greek Grilled Chicken

1 cup plain greek yogurt
2 tablespoons olive oil
Zest of one lemon
Juice of one lemon
2 to 4 teaspoons minced garlic
1/2 tablespoon dried oregano
1/2 teaspoon salt
1/2 teaspoon black pepper
1 cup chopped flat leaf parsley
3 to 4 pounds of chicken pieces, such as thighs, breasts, legs

In a medium-sized bowl, mix together all ingredients except the chicken. Pour into large ziplock bag. Add chicken and seal bag. Massage chicken and marinade to coat all chicken pieces. Then place in refrigerator for 30 minutes to an hour.

Heat outdoor grill or a stovetop grill pan to medium. Remove chicken from marinade, and discard the marinade left in the bag.

Grill chicken, about 5 minutes or so on each side. Serve warm or cold.

Friday, October 18, 2013

Canning Applesauce

I will begin this post with two disclaimers:

Disclaimer Number One: I am not a canning expert. I tried it for the first time this year and wanted to let you know how it went from a newbie's perspective. I mentioned the Pick Your Own website in Monday's post, and it was also a great resource for canning. Check it out for legit tutorial from experienced canners. 

Disclaimer Number Two: Canning is not for the faint of heart. It takes a long time, and it's fussy.

With the important stuff out of the way, I will begin at the very beginning. I thought about canning for years, but everyone says it's a pain in the neck (It is. But it's a worthwhile pain in the neck.), and I'm a little worried about getting botulism. Since the pioneers managed to can food to see them through the long, harsh Midwestern winters without getting botulism, I thought I could give it a try. I mean, they didn't even have dishwashers with a sanitize setting. 

So here goes nothing...


Step 1: Preparation
Canning isn't something you decide to squeeze in one afternoon between Maury Povich and Judge Judy. You need to make sure you have all the tools in place. Here's what you absolutely need to can applesauce:
  1. Jars. I ordered pint-sized Ball mason jars from Amazon. Then I realized they were cheaper at the grocery store. Dang it. 
  2. Apples. Obviously.  
Here's what is really doggone helpful but not technically necessary:
  1. Canning Pot with Rack. This is essentially a really big pot with a removable rack for the jars to sit on. You need to lift jars of applesauce in and out of a pot of boiling water. Think that through. How are you going to get the jars out of boiling water? You can't very well reach your hand in there. You can purchase a "jar grabber" tool--essentially jar-shaped tongs--but if I'm going to buy something, I want it to be the thing that will make my life easiest. I bought a Graniteware 21 Quart Canner with Rack.
  2. Wide Mouth Funnel. You could spoon the applesauce into the jars very neatly, but I'm not very neat. I bought a Progressive Canning Funnel. 
Step 2: Sanitize the Jars
You need clean jars to make sure you don't introduce any gross stuff into the applesauce. Remember my fear of botulism? Let's avoid that. Wash the jars and lids in the dishwasher. Then keep them hot until the applesauce is ready. If you don't have a dishwasher, you can wash them in hot, soapy water then boil them for 10 minutes. 

Step 3: Make Applesauce
On Monday I shared my recipe for Crockpot Applesauce. When I was canning, I made one batch of Crockpot Applesauce and one batch on the stove in the biggest pot I have. I used about 40 apples in total, and it cooked down to make nine jars of applesauce. So, if you want to fill a bunch of jars, make a bunch of applesauce.

Step 4: Start Canning
First, fill the canning pot with hot water and bring it to a boil. Since it's a gigantic pot, it takes a while for the water to boil.


Meanwhile, fill your jars with applesauce. Take a clean jar from the dishwasher and use the funnel to pour applesauce into the jar. You want the applesauce to come within 1/4" of the top of the jar. Place a clean lid on top of the jar and screw it on. Repeat until all jars have been filled.

Place filled jars in the wire canning rack. Very gently lower the rack into the canning pot. Make sure the water covers the tops of the jars by 1-2 inches. Bring the water back to a boil. Once the water is boiling, start the timer. Boil the jars for 15 minutes. Once 15 minutes is up, very carefully remove the rack from the water; you don't want the jars to jostle around.


Store the jars in a place where they won't get bumped until they cool completely, probably overnight. Once the jars have cooled, check to make sure they're sealed. (The lid should be sucked down. If you can push it up and down, it's not sealed.)

Now congratulate yourself because you have successfully canned applesauce! 


Monday, October 14, 2013

Crockpot Applesauce

It's time for the annual pilgrimage to the apple orchard, folks. Don't know where the closest one is? The Pick-Your-Own website is a handy resource for all manner of U-Pick information. (And they're not paying me to say that; I just think it's a useful website.) So find a farm and get picking!

{Note: The preceding paragraph about apple picking was really just an excuse to show you a picture of my boy and his fluffy hair when we went apple picking. I have no shame.}


Once you've made it home with your bounty, you'll surely be thinking to yourself, "What am I supposed to do with fourteen bushels of apples?" Then an apple will roll off the counter and smack you on the foot and it will really smart and you'll hang your head in shame. It's really hard to exhibit self control when one is picking apples. Really hard.

Allow me help you out with some of that fruit. Today we're making applesauce, and we're doing it in the crockpot.

I have made applesauce many times. Why in tarnation did it take me so long to make it in my crockpot?! This is by far the easiest way to make applesauce. Bonus: Your house smells unbelievably delicious all afternoon. Seriously. If I could bottle this scent, I'd put Yankee Candle out of business.

This recipe calls for lots of apples, but they cook waaaaaay down. And it's not a bad thing to have extra applesauce on hand. It keeps well in the refrigerator and also freezes beautifully. Or you can get ambitious and can your applesauce. (Which I did. Yikes. More on that later this week!)

For now, let's get (slow) cooking.


Crockpot Applesauce

20 apples* (approximately), peeled, cored, and sliced
1/4 cup light brown sugar (or to taste)
1 teaspoon ground cinnamon (optional)
1/4 cup water


Fill your slow cooker with apple slices. I wanted to make a lot of applesauce, so I really piled those babies in there. Sprinkle apples with brown sugar and cinnamon. Pour water over top. Cook on high for about 4 hours or on low for about 6. If you like your applesauce chunky, you're finished at this point. If you like smooth applesauce, you can puree it in the food processor or food mill until it reaches your desired consistency.


*I used primarily McIntosh and Cortland apples. I think that using a variety makes for extra delicious applesauce.

Monday, December 26, 2011

Super Easy Meal #1: Pork Chops & Applesauce

We're all too busy playing with our Christmas presents to worry much about dinner. So, this week I'm offering a couple easy meals.

Super Easy Meal #1: Pork Chops & Applesauce
For this meal, you'll need a little help from your local butcher. Swing my his meat case and peruse the selection. I'll betcha he's got a tray of plump pork chops brimming with golden stuffing. See 'em? Maybe over there between the chicken breasts and the rump roasts? Yep, now you've got it. Get enough stuffed chops for your family. Grab some green beans (preferable the ones that some kind soul has gone to the trouble of trimming for you) and applesauce, and you're ready to go.

Once you're home, preheat the oven to 425 degrees. Meanwhile, prep your green beans for roasting. Wash, trim, and spread them on a large baking sheet. Drizzle with 2 tablespoons olive oil and sprinkle with lots of salt and pepper. Then set the tray aside.

Heat 2 tablespoons of oil over medium-high in a large oven-safe skillet. Generously sprinkle your pork chops with salt and pepper. Once the oil is hot, brown the pork chops for about 3 minutes on each side. (You'll know the meat is ready to flip when it doesn't stick to the pan.) Pop the whole pan in the preheated oven, and cook for about 15 minutes, until the pork chops reach an internal temperature of 145 degrees. Tent the chops with foil and allow them to rest for 5-10 minutes.

When the pork chops have about 5 minutes left to cook, add the tray of green beans to the oven to cook.  They'll need about 12-15 minutes total. Stir them around halfway through. (Check out this post for a detailed description of roasting green beans.) You want them to be crisp-tender with golden brown spots.

Serve the pork chops with applesauce and green beans. (Oh, and if you're feeling ambitious, make your own applesauce. It's delish.)