Rosemary is one of my favorite herbs, yet for a long time the only thing I ever combined it with was roasted baby red skin potatoes. Until this summer, when a friend started giving me lots of fresh rosemary from her garden.
The herb goes really well with other vegetables, too, as in Fresh Corn & Rosemary Basil Pesto.
Now that fall has arrived, it seemed fitting to use rosemary to flavor a pork roast for dinner. You probably already have everything else you need to make this marinade and sauce: olive oil, maple syrup and mustard are blended with the rosemary.
To me, this combination of flavors truly tastes like fall.
Mangia! Mangia!
Andrea
Rosemary, Maple & Mustard Pork
Inspired by this recipe from Eating Well
1 2-3 pound pork roast or pork loin roast
3 tablespoons olive oil
3 teaspoons chopped fresh rosemary
3 tablespoons maple syrup
3 tablespoons spicy brown mustard
Prick pork roast all over with a fork. Season with salt and pepper.
In a small bowl, mix together olive oil, rosemary, maple syrup and mustard.
Lightly coat a roasting pan with cooking spray. Place pork roast in pan. Pour about half of the sauce on top of the pork roast. Cover and refrigerate 2 hours to overnight.
Set aside the rest of the sauce and keep at room temperature.
Preheat oven to 375 degrees. Place roasting pan in oven. Cook for about 1 hour, or until pork is no longer pink inside.
Remove from oven and let sit for 10 minutes. If your roast is wrapped in a string net, remove string, then slice pork roast. Top with remaining sauce.
Showing posts with label fall. Show all posts
Wednesday, October 26, 2016
Rosemary, Maple & Mustard Pork
Labels:
dinner,
fall,
maple syrup,
marinade,
mustard,
pork roast,
rosemary,
sauce
Monday, September 26, 2016
Pumpkin Brownies
It might still be 90 degrees in Charlotte, but it's Fall, that time of year when everything comes up pumpkin. For example, while reading my People magazine (guilty pleasure) the other day, I found a recipe for The Cake Boss Buddy Valastro's "Pumpkin Chocolate Brownies."
I decided to try them out — minus the chocolate sauce, because my kids don't like frosting or icing. Plus, nine eggs, one and a half cups of butter and four cups of sugar make these brownies plenty sweet. In fact, the recipe called for four and a third cups of sugar and two and two thirds cups of butter, so I trimmed a bit. I also added a generous pinch of cloves, because you can't have pumpkin spices without the cloves.
The verdict: Pumpkin brownies deserve their place next to pumpkin lattes, pumpkin bread and pumpkin beer. Yum!
Happy Fall, y'all!
XOXO,
Amy
Pumpkin Brownies
Adapted from The Cake Boss Buddy Valastro's recipe in the Sept. 26 issue of People magazine
2 1/4 cups all-purpose flour
1 1/4 teaspoon ground cinnamon
1/8 teaspoon ginger
1/4 teaspoon ground nutmeg
1/4 teaspoon table salt
Generous pinch of ground cloves
9 large eggs
2 (15 ounce) cans plain pumpkin puree
4 cups granulated sugar
1 1/2 cups unsalted butter, melted
2 cups semisweet chocolate chips
Equipment note: This recipe makes two 9X12 pans of brownies! The batter barely fit in the bowl of my KitchenAid blender and some of it was sloshing out. Next time I will use a hand mixer and my largest bowl.
Preheat oven to 350 degrees.
In a medium bowl, stir together the flour and next five ingredients. Set flour mixture aside.
Using an electric mixer, beat eggs and pumpkin on medium speed until combined. Beat in sugar.
With mixer running, add in the melted butter in a steady stream. Next, gradually add in the flour mixture, stopping now and then to scrape the sides of the bowl. Stir in the chocolate chips.
Lightly grease two 9X12 baking pans and divide the batter between the two. Bake for 45 minutes or until toothpick inserted in the middle of the brownies comes out clean.
I decided to try them out — minus the chocolate sauce, because my kids don't like frosting or icing. Plus, nine eggs, one and a half cups of butter and four cups of sugar make these brownies plenty sweet. In fact, the recipe called for four and a third cups of sugar and two and two thirds cups of butter, so I trimmed a bit. I also added a generous pinch of cloves, because you can't have pumpkin spices without the cloves.
The verdict: Pumpkin brownies deserve their place next to pumpkin lattes, pumpkin bread and pumpkin beer. Yum!
Happy Fall, y'all!
XOXO,
Amy
Pumpkin Brownies
Adapted from The Cake Boss Buddy Valastro's recipe in the Sept. 26 issue of People magazine
2 1/4 cups all-purpose flour
1 1/4 teaspoon ground cinnamon
1/8 teaspoon ginger
1/4 teaspoon ground nutmeg
1/4 teaspoon table salt
Generous pinch of ground cloves
9 large eggs
2 (15 ounce) cans plain pumpkin puree
4 cups granulated sugar
1 1/2 cups unsalted butter, melted
2 cups semisweet chocolate chips
Equipment note: This recipe makes two 9X12 pans of brownies! The batter barely fit in the bowl of my KitchenAid blender and some of it was sloshing out. Next time I will use a hand mixer and my largest bowl.
Preheat oven to 350 degrees.
In a medium bowl, stir together the flour and next five ingredients. Set flour mixture aside.
Using an electric mixer, beat eggs and pumpkin on medium speed until combined. Beat in sugar.
With mixer running, add in the melted butter in a steady stream. Next, gradually add in the flour mixture, stopping now and then to scrape the sides of the bowl. Stir in the chocolate chips.
Lightly grease two 9X12 baking pans and divide the batter between the two. Bake for 45 minutes or until toothpick inserted in the middle of the brownies comes out clean.
Friday, December 18, 2015
Pork Chops with Apple Shallot Pan Sauce
We are mere days away from the winter solstice, and it is dark around here. Seriously, people. Seattle is really far north, and it looks like midnight at 3:30 p.m. Add in the cloud coverage and pouring rain...gross.
To combat this crummy weather, I need cozy food. Simple, belly-filling meals like Pork Chops with Apple Shallot Pan Sauce. It comes together quickly (leaving you plenty of time to wrap a few Christmas presents), but it still feels special. You could totally serve this to company and look like a rock star.
Why don't we show this dreary darkness who's boss and make some hot dinner.
Let's get cooking!
Erin
Pork Chops with Apple Shallot Pan Sauce
Inspired by Pork Tenderloin with Apples and Shallots
Serves: 2
1/2 tablespoon oil
2 boneless pork chops, 1 1/2" thick
Salt and pepper
1/4 - 1/2 teaspoon dried thyme
1 tablespoon butter
1 medium apple, thinly sliced
1 shallot, peeled and chopped
1/2 cup chicken broth
Heat oil in a skillet over medium-high. Generously season pork chops with salt and pepper and sprinkle with thyme on both sides. Add pork to pan and cook until pork chops are browned and release easily when you try to move them, about 5-7 minutes per side. Remove pork chops to a plate and tent with foil.
Reduce heat to medium and add butter, apple, and shallot to the pan. Cook until the apples begin to soften, about 5-7 minutes.
Stir in chicken broth and scrape up browned bits from the bottom of the pan. Return pork chops and any accumulated juice to the skillet. Reduce heat to medium-low and simmer until the pork is fully cooked. This will just take a few minutes. (Pork should reach an internal temperature of about 145 degrees.) Tent with foil and allow pork to rest for 5 minutes before serving with the apple shallot sauce.
To combat this crummy weather, I need cozy food. Simple, belly-filling meals like Pork Chops with Apple Shallot Pan Sauce. It comes together quickly (leaving you plenty of time to wrap a few Christmas presents), but it still feels special. You could totally serve this to company and look like a rock star.
Why don't we show this dreary darkness who's boss and make some hot dinner.
Let's get cooking!
Erin
Pork Chops with Apple Shallot Pan Sauce
Inspired by Pork Tenderloin with Apples and Shallots
Serves: 2
1/2 tablespoon oil
2 boneless pork chops, 1 1/2" thick
Salt and pepper
1/4 - 1/2 teaspoon dried thyme
1 tablespoon butter
1 medium apple, thinly sliced
1 shallot, peeled and chopped
1/2 cup chicken broth
Heat oil in a skillet over medium-high. Generously season pork chops with salt and pepper and sprinkle with thyme on both sides. Add pork to pan and cook until pork chops are browned and release easily when you try to move them, about 5-7 minutes per side. Remove pork chops to a plate and tent with foil.
Reduce heat to medium and add butter, apple, and shallot to the pan. Cook until the apples begin to soften, about 5-7 minutes.
Stir in chicken broth and scrape up browned bits from the bottom of the pan. Return pork chops and any accumulated juice to the skillet. Reduce heat to medium-low and simmer until the pork is fully cooked. This will just take a few minutes. (Pork should reach an internal temperature of about 145 degrees.) Tent with foil and allow pork to rest for 5 minutes before serving with the apple shallot sauce.
Labels:
apples,
easy,
fall,
pork,
pork chops,
pork chops with apple shallot pan sauce
Friday, October 16, 2015
Apple Cranberry Stuffed Pork Loin
I don't know about you, but I'm reveling in all things autumn. The crisp air, colorful leaves, piles of pumpkins adorning every porch. But the best part? The food.
Autumn food is cozy food. Every meal feels like a warm hug. And Apple Cranberry Stuffed Pork Loin is no exception. Sweet apples and ruby red cranberries are the perfect complement to roast pork loin.
This would be a fabulous meal for guests. Not only does it look impressive, but you can saute the apples and stuff the pork loin ahead of time and bake it just before dinner. That way you can focus on cocktails with your company instead of slaving over the stove. "Another Spiked Cider? Yes, that sounds lovely, thanks."
Let's get cooking!
Erin
Apple Cranberry Stuffed Pork Loin
Adapted from America's Test Kitchen
Serves: 6-8
1 tablespoon butter
3 apples, peeled and chopped into 1/4" pieces
1 onion, finely diced
2 teaspoons honey
1/2 cup low-sodium chicken broth
1/3 cup dried cranberries
1/4 teaspoon herbes de Provence*
Salt and pepper
2-2.5 pound pork loin, butterflied**
Preheat oven to 375 degrees. Grease a 9" x 13" baking dish and set aside.
Heat butter a large skillet over medium-high. Add apples, onion, and honey, and saute until apples and onion are soft and golden, about 15 minutes. Stir in chicken broth, dried cranberries, and herbes de Provence, scraping the bottom of the pan to incorporate browned bits into the sauce. Cook until most of the liquid has evaporated, about 2-3 minutes. Season to taste with salt and pepper.
Season the inside of the pork loin with salt and pepper. Spread stuffing on top of the pork loin (there will be lots!) and roll to close. (It will look like a savory Ho Ho. And I love Ho Hos.) Use kitchen twine to tie the roast in several places to make sure it stays closed. Season the outside of the pork with salt and pepper and place in prepared baking dish.
Roast pork loin for about 1 hour, until the internal temperature reaches 140-145 degrees. Tent with foil and allow to rest for 15-20 minutes. Remove twine and slice before serving.
*Don't have herbes de Provence? Try substituting thyme.
**Ask your friendly butcher to do this for you. It will make your life—and dinner—much easier.
Autumn food is cozy food. Every meal feels like a warm hug. And Apple Cranberry Stuffed Pork Loin is no exception. Sweet apples and ruby red cranberries are the perfect complement to roast pork loin.
This would be a fabulous meal for guests. Not only does it look impressive, but you can saute the apples and stuff the pork loin ahead of time and bake it just before dinner. That way you can focus on cocktails with your company instead of slaving over the stove. "Another Spiked Cider? Yes, that sounds lovely, thanks."
Let's get cooking!
Erin
Apple Cranberry Stuffed Pork Loin
Adapted from America's Test Kitchen
Serves: 6-8
1 tablespoon butter
3 apples, peeled and chopped into 1/4" pieces
1 onion, finely diced
2 teaspoons honey
1/2 cup low-sodium chicken broth
1/3 cup dried cranberries
1/4 teaspoon herbes de Provence*
Salt and pepper
2-2.5 pound pork loin, butterflied**
Preheat oven to 375 degrees. Grease a 9" x 13" baking dish and set aside.
Heat butter a large skillet over medium-high. Add apples, onion, and honey, and saute until apples and onion are soft and golden, about 15 minutes. Stir in chicken broth, dried cranberries, and herbes de Provence, scraping the bottom of the pan to incorporate browned bits into the sauce. Cook until most of the liquid has evaporated, about 2-3 minutes. Season to taste with salt and pepper.
Season the inside of the pork loin with salt and pepper. Spread stuffing on top of the pork loin (there will be lots!) and roll to close. (It will look like a savory Ho Ho. And I love Ho Hos.) Use kitchen twine to tie the roast in several places to make sure it stays closed. Season the outside of the pork with salt and pepper and place in prepared baking dish.
Roast pork loin for about 1 hour, until the internal temperature reaches 140-145 degrees. Tent with foil and allow to rest for 15-20 minutes. Remove twine and slice before serving.
*Don't have herbes de Provence? Try substituting thyme.
**Ask your friendly butcher to do this for you. It will make your life—and dinner—much easier.
Labels:
apples,
cranberries,
dinner,
fall,
main dish,
pork,
pork loin roast
Monday, October 6, 2014
Pumpkin Chocolate Chip Mini Muffins
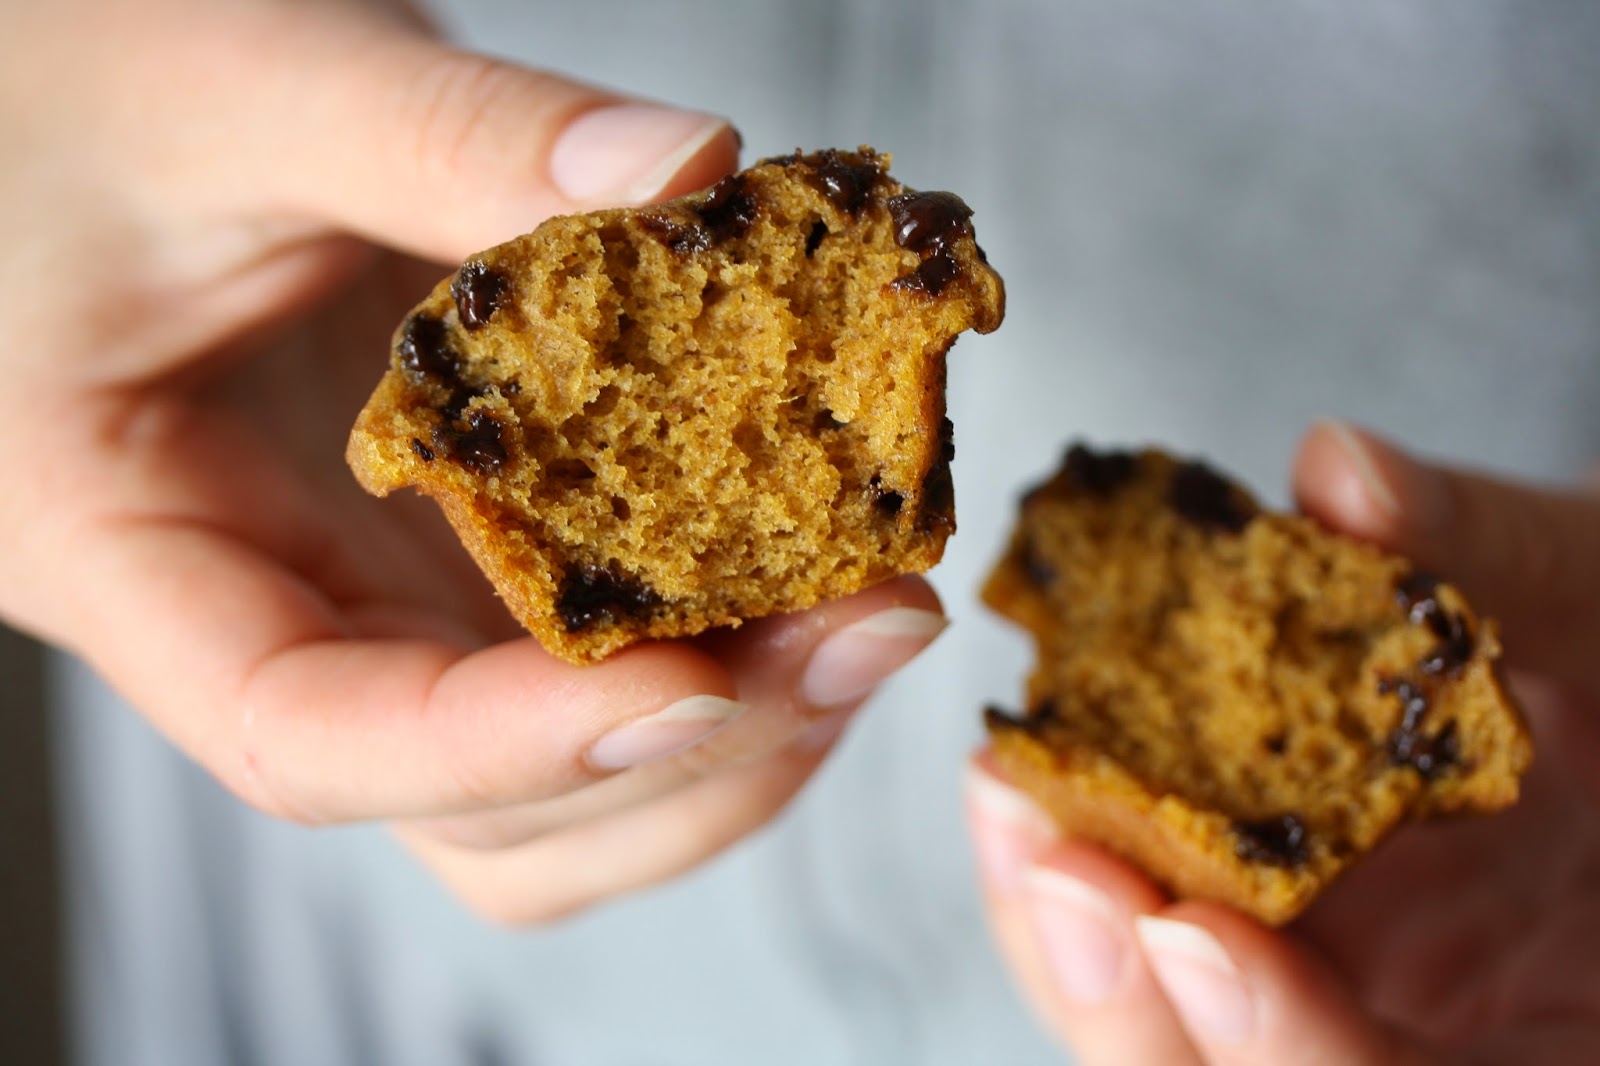
I loved experimenting with pumpkin in a savory recipe when I made Pumpkin Black Bean Chili, but I had to return to my first pumpkin love: pumpkin muffins. Scented with warm spices and studded with mini chocolate chips, these muffins will brighten up even the dreariest fall morning.
And if you haven't reached pumpkin overload yet, check out these pumpkin recipes, too:
Aren't you glad it's pumpkin season?
Pumpkin Chocolate Chip Mini Muffins
Makes 48 mini muffins
Adapted from this pumpkin bread recipe
2 1/3 cups all-purpose flour
1 cup whole wheat pastry flour*
1 tablespoon baking powder
2 teaspoons baking soda
1 teaspoon salt
2 teaspoons cinnamon
1 teaspoon ginger
1/2 teaspoon nutmeg
3/4 cup granulated sugar
1 cup brown sugar
2 eggs
4 egg whites
1/2 cup vegetable oil
1/2 cup vanilla yogurt**
2/3 cup water
1 (15 ounce) can pumpkin
1 cup mini chocolate chips
Preheat the oven to 350 degrees. Grease a mini muffin tin*** and set aside.
In a large bowl, whisk together all-purpose flour, pastry flour, baking powder, baking soda, salt, cinnamon, ginger, and nutmeg. In a separate bowl, stir together sugar, brown sugar, eggs, egg whites, oil, yogurt, water, and pumpkin. Stir the wet ingredients into the dry ingredients. Stir in chocolate chips.
Fill prepared mini muffin tins so each cup is full to the top. Bake for about 14 minutes, until the muffins spring back when you gently press down the top or a toothpick inserted into a muffin comes out clean. Cool for 5 minutes in the tin, then remove to a wire rack to cool completely
Notes:
*If you don't have whole wheat pastry flour, don't let that stop you from making this recipe! You can absolutely substitute all-purpose flour. (Use 3 1/3 cups all-purpose flour.)
**I used non-fat vanilla Greek yogurt because that's what I found in my fridge. Feel free to use regular (non-Greek) yogurt or plain yogurt in place of the vanilla Greek yogurt.
***Not in the mood for mini-muffins? This recipe makes 24 standard muffins or two loaves of bread if you prefer. Bake standard muffins for 23-25 minutes and bread for about 1 hour.
P.S. This recipe is linked on the Archives Friday link party!
And if you haven't reached pumpkin overload yet, check out these pumpkin recipes, too:
- Pumpkin Spice Granola
- Low-Fat Cranberry Pumpkin Bread
- Pumpkin Spice Muffins
- Pumpkin and Ricotta Pasta
- Gooey Pumpkin Bars
- Pumpkin Streusel Cake
Aren't you glad it's pumpkin season?
Pumpkin Chocolate Chip Mini Muffins
Makes 48 mini muffins
Adapted from this pumpkin bread recipe
2 1/3 cups all-purpose flour
1 cup whole wheat pastry flour*
1 tablespoon baking powder
2 teaspoons baking soda
1 teaspoon salt
2 teaspoons cinnamon
1 teaspoon ginger
1/2 teaspoon nutmeg
3/4 cup granulated sugar
1 cup brown sugar
2 eggs
4 egg whites
1/2 cup vegetable oil
1/2 cup vanilla yogurt**
2/3 cup water
1 (15 ounce) can pumpkin
1 cup mini chocolate chips
Preheat the oven to 350 degrees. Grease a mini muffin tin*** and set aside.
In a large bowl, whisk together all-purpose flour, pastry flour, baking powder, baking soda, salt, cinnamon, ginger, and nutmeg. In a separate bowl, stir together sugar, brown sugar, eggs, egg whites, oil, yogurt, water, and pumpkin. Stir the wet ingredients into the dry ingredients. Stir in chocolate chips.
Fill prepared mini muffin tins so each cup is full to the top. Bake for about 14 minutes, until the muffins spring back when you gently press down the top or a toothpick inserted into a muffin comes out clean. Cool for 5 minutes in the tin, then remove to a wire rack to cool completely
Notes:
*If you don't have whole wheat pastry flour, don't let that stop you from making this recipe! You can absolutely substitute all-purpose flour. (Use 3 1/3 cups all-purpose flour.)
**I used non-fat vanilla Greek yogurt because that's what I found in my fridge. Feel free to use regular (non-Greek) yogurt or plain yogurt in place of the vanilla Greek yogurt.
***Not in the mood for mini-muffins? This recipe makes 24 standard muffins or two loaves of bread if you prefer. Bake standard muffins for 23-25 minutes and bread for about 1 hour.
P.S. This recipe is linked on the Archives Friday link party!
Labels:
autumn,
baked goods,
breakfast,
fall,
low fat,
muffins,
pumpkin,
pumpkin bread,
pumpkin spice
Monday, March 31, 2014
Pork Tenderloin with Apples and Shallots
I tend to go through cooking phases. For instance, there was my stir fry phase. I'd make stir fry at least once a week. Pork, chicken, beef... No protein was safe from my skillet. I'd saute slivers of meat with whatever veggies I had on hand and pile it over rice. Et voila. Dinner was served. My stir fry kick went on for too long. One day at dinner I noticed the husband pushing beef & broccoli around his plate. "What's wrong, hon? Don't you like the stir fry?" Always one to be frank, the husband laid it out for me. "It's good, but..." Here he paused, searching for the right words. "I think we've been having a bit too much stir fry."
Apparently weekly stir fry isn't for everyone.
Same situation with pork tenderloin. Since it's delicious, lean, and quick-cooking, I went through a serious pork tenderloin phase. After another honest talk with the husband, I realized I overdid it. So I cut back. And when I made Pork Tenderloin with Apples and Shallots, my judiciousness paid off.
"This is so good!" the husband exclaimed with enthusiasm. "Pork tenderloin is delicious. I really like this."
Is this a sign that I can commence Pork Tenderloin Phase II? I can only hope.
Pork Tenderloin with Apples and Shallots
Adapted from The Chew
Serves: 4
1 (1.25 pound) pork tenderloin
Salt and pepper
1 teaspoon Herbes de Provence, divided
2 tablespoons olive oil, divided
2 apples, peeled and thinly sliced
1 shallot peeled and thinly sliced
2 cloves garlic, peeled and crushed
1/3 cup apple juice
Preheat oven to 350 degrees. Season pork with salt and pepper and 1/2 teaspoon Herbes de Provence. Heat 1 tablespoon oil in a large skillet over medium-high. Sear pork until it's browned on all sides, about 10 minutes total. Remove pork to a plate and cover to keep warm.
Add remaining 1 tablespoon oil to skillet and return to medium-high heat. Add apples, shallot, garlic, and remaining 1/2 teaspoon Herbes de Provence. Cook, stirring, until apples and shallot begin to soften and caramelize, about 3 minutes. Add apple juice and cook for 1 minute, scraping up the browned bits from the bottom of the pan.
Place reserved pork on top of apples. Roast in preheated oven for 15-20 minutes, until pork reaches an internal temperature of 135-140 degrees. Remove from oven, tent with foil, and allow pork to rest for 10 minutes, until it reaches an internal temperature of 145 degrees. Slice pork into medallions and serve with apples and shallots.
Apparently weekly stir fry isn't for everyone.
Same situation with pork tenderloin. Since it's delicious, lean, and quick-cooking, I went through a serious pork tenderloin phase. After another honest talk with the husband, I realized I overdid it. So I cut back. And when I made Pork Tenderloin with Apples and Shallots, my judiciousness paid off.
"This is so good!" the husband exclaimed with enthusiasm. "Pork tenderloin is delicious. I really like this."
Is this a sign that I can commence Pork Tenderloin Phase II? I can only hope.
Pork Tenderloin with Apples and Shallots
Adapted from The Chew
Serves: 4
1 (1.25 pound) pork tenderloin
Salt and pepper
1 teaspoon Herbes de Provence, divided
2 tablespoons olive oil, divided
2 apples, peeled and thinly sliced
1 shallot peeled and thinly sliced
2 cloves garlic, peeled and crushed
1/3 cup apple juice
Preheat oven to 350 degrees. Season pork with salt and pepper and 1/2 teaspoon Herbes de Provence. Heat 1 tablespoon oil in a large skillet over medium-high. Sear pork until it's browned on all sides, about 10 minutes total. Remove pork to a plate and cover to keep warm.
Add remaining 1 tablespoon oil to skillet and return to medium-high heat. Add apples, shallot, garlic, and remaining 1/2 teaspoon Herbes de Provence. Cook, stirring, until apples and shallot begin to soften and caramelize, about 3 minutes. Add apple juice and cook for 1 minute, scraping up the browned bits from the bottom of the pan.
Place reserved pork on top of apples. Roast in preheated oven for 15-20 minutes, until pork reaches an internal temperature of 135-140 degrees. Remove from oven, tent with foil, and allow pork to rest for 10 minutes, until it reaches an internal temperature of 145 degrees. Slice pork into medallions and serve with apples and shallots.
Friday, November 15, 2013
Gooey Pumpkin Bars
Thanksgiving is less than two weeks away. Does this make you feel:
a.) Excited. I love Thanksgiving! I've had my menu planned since July, ordered a heritage bird from the market, and created shopping lists based on the ad flyers from four different stores.
b.) Uncertain. Seriously? Thanksgiving? I'm still recovering from Halloween. I guess I'd better call my mom to make sure she's willing to host again this year.
c.) Terrified. I am not ready for this. I am not ready for this. I am not ready for this...
No matter how you answered, I've got a recipe that will have you shaking your tailfeather at the thought of Thanksgiving. Gooey Pumpkin Bars are delicious, indulgent, and the perfect alternative to pumpkin pie.
Eschew your rolling pin and pull together a tender crust using--get this--cake mix. (I won't tell your mother-in-law.) The rich pumpkin filling is extra creamy from the addition of cream cheese. And perhaps the best part? You only dirty one bowl.
Thanksgiving? We've got this in the bag.
Gooey Pumpkin Bars
Adapted from The Lady & Sons
Crust
1 (18.25 ounce) box yellow cake mix
1 egg
1 stick (1/2 cup) butter, melted
Filling
8 ounces cream cheese, softened
3 eggs
1 (15 ounce) can pumpkin
1 teaspoon vanilla extract
1/2 teaspoon cinnamon*
1/4 teaspoon ground ginger*
1/8 teaspoon ground nutmeg*
Pinch ground cloves*
2 cups powdered sugar
1 stick (1/2 cup) butter, melted
Pecans and whipped cream, for serving (optional)
Preheat oven to 350 degrees. Grease a 13" x 9" baking dish.
In the bowl of an electric mixer, combine cake mix, 1 egg, and 1 stick butter. Mix until well combined. Press into the bottom of prepared baking dish and set aside.
In the same mixing bowl (don't bother washing it), beat cream cheese until smooth and a bit fluffy, 1-2 minutes. Beat in remaining 3 eggs, pumpkin, vanilla, and spices on medium low until everything is well combined. Scrape down the sides and bottom of the bowl to make sure all the cream cheese is incorporated and mix for another few seconds. Add in powdered sugar and beat until it's incorporated. With the mixer running on low speed, slowly pour in remaining 1 stick melted butter and mix well.
Pour filling on top of unbaked crust and spread it out evenly. Bake for about 45 minutes, until the center is just a tiny bit gooey and wiggly. Remove from the oven and cool completely before cutting into squares. If desired, garnish with pecans and whipped cream.
*Feel free to substitute 1 teaspoon pumpkin pie spice for the spices listed here.
a.) Excited. I love Thanksgiving! I've had my menu planned since July, ordered a heritage bird from the market, and created shopping lists based on the ad flyers from four different stores.
b.) Uncertain. Seriously? Thanksgiving? I'm still recovering from Halloween. I guess I'd better call my mom to make sure she's willing to host again this year.
c.) Terrified. I am not ready for this. I am not ready for this. I am not ready for this...
No matter how you answered, I've got a recipe that will have you shaking your tailfeather at the thought of Thanksgiving. Gooey Pumpkin Bars are delicious, indulgent, and the perfect alternative to pumpkin pie.
Eschew your rolling pin and pull together a tender crust using--get this--cake mix. (I won't tell your mother-in-law.) The rich pumpkin filling is extra creamy from the addition of cream cheese. And perhaps the best part? You only dirty one bowl.
Thanksgiving? We've got this in the bag.
Gooey Pumpkin Bars
Adapted from The Lady & Sons
Crust
1 (18.25 ounce) box yellow cake mix
1 egg
1 stick (1/2 cup) butter, melted
Filling
8 ounces cream cheese, softened
3 eggs
1 (15 ounce) can pumpkin
1 teaspoon vanilla extract
1/2 teaspoon cinnamon*
1/4 teaspoon ground ginger*
1/8 teaspoon ground nutmeg*
Pinch ground cloves*
2 cups powdered sugar
1 stick (1/2 cup) butter, melted
Pecans and whipped cream, for serving (optional)
Preheat oven to 350 degrees. Grease a 13" x 9" baking dish.
In the bowl of an electric mixer, combine cake mix, 1 egg, and 1 stick butter. Mix until well combined. Press into the bottom of prepared baking dish and set aside.
In the same mixing bowl (don't bother washing it), beat cream cheese until smooth and a bit fluffy, 1-2 minutes. Beat in remaining 3 eggs, pumpkin, vanilla, and spices on medium low until everything is well combined. Scrape down the sides and bottom of the bowl to make sure all the cream cheese is incorporated and mix for another few seconds. Add in powdered sugar and beat until it's incorporated. With the mixer running on low speed, slowly pour in remaining 1 stick melted butter and mix well.
Pour filling on top of unbaked crust and spread it out evenly. Bake for about 45 minutes, until the center is just a tiny bit gooey and wiggly. Remove from the oven and cool completely before cutting into squares. If desired, garnish with pecans and whipped cream.
*Feel free to substitute 1 teaspoon pumpkin pie spice for the spices listed here.
Friday, November 9, 2012
Fall Salad with Maple Balsamic Vinaigrette
Although I miss the farm stands of summer, I am reveling in the fall. My favorite fruit (apples) and vegetables (any and all winter squash and sweet potatoes) are in season, and I'm packing them into every meal.
This salad is a fresh way to highlight the flavors of fall. Crisp, tangy apples and sweet, crunchy pecans pair perfectly with maple vinaigrette. Sometimes I'm lazy about making dressings--I'm a big fan of just drizzling olive oil and balsamic vinegar over my greens--but it was worth the few extra steps to make this delicious dressing. Not too tangy, not too sweet, just a perfect complement to the rest of the salad.
Fall Salad with Maple Balsamic Vinaigrette
Adapted from The Food Network
Serves: 4-6
Caramelized Pecans*
4 tablespoons butter
4 tablespoons brown sugar
1 1/4 cups pecans
Heat butter and brown sugar in a large, non-stick skillet over medium until it melts. Add pecans and cook, stirring constantly, for 2 minutes. Pour pecans onto wax paper and separate them with a fork. Allow pecans to cool completely.
Maple Balsamic Vinaigrette
1 teaspoon Dijon mustard
3 teaspoons balsamic vinegar
2 teaspoons maple syrup (NOT pancake syrup)
1/4 cup extra virgin olive oil
Salt and pepper
Place mustard, vinegar, maple syrup, and oil in a jar with a tight-fitting lid. Shake vigorously to combine. Season to taste with salt and pepper.
Salad
1 head red leaf lettuce, torn into bite-sized pieces
1 apple, thinly sliced
Place lettuce, apple, and cooled caramelized pecans in a large bowl. Top with vinaigrette to taste. (If you have leftover vinaigrette, save it in the fridge to use another day.)
*This is a generous amount of pecans for this salad, but we realllly like caramelized pecans at our house. If you don't use them all in the salad, they're great to munch straight!
This salad is a fresh way to highlight the flavors of fall. Crisp, tangy apples and sweet, crunchy pecans pair perfectly with maple vinaigrette. Sometimes I'm lazy about making dressings--I'm a big fan of just drizzling olive oil and balsamic vinegar over my greens--but it was worth the few extra steps to make this delicious dressing. Not too tangy, not too sweet, just a perfect complement to the rest of the salad.
Fall Salad with Maple Balsamic Vinaigrette
Adapted from The Food Network
Serves: 4-6
Caramelized Pecans*
4 tablespoons butter
4 tablespoons brown sugar
1 1/4 cups pecans
Heat butter and brown sugar in a large, non-stick skillet over medium until it melts. Add pecans and cook, stirring constantly, for 2 minutes. Pour pecans onto wax paper and separate them with a fork. Allow pecans to cool completely.
Maple Balsamic Vinaigrette
1 teaspoon Dijon mustard
3 teaspoons balsamic vinegar
2 teaspoons maple syrup (NOT pancake syrup)
1/4 cup extra virgin olive oil
Salt and pepper
Place mustard, vinegar, maple syrup, and oil in a jar with a tight-fitting lid. Shake vigorously to combine. Season to taste with salt and pepper.
Salad
1 head red leaf lettuce, torn into bite-sized pieces
1 apple, thinly sliced
Place lettuce, apple, and cooled caramelized pecans in a large bowl. Top with vinaigrette to taste. (If you have leftover vinaigrette, save it in the fridge to use another day.)
*This is a generous amount of pecans for this salad, but we realllly like caramelized pecans at our house. If you don't use them all in the salad, they're great to munch straight!
Friday, September 30, 2011
Mixed Greens with Goat Cheese and Dried Cranberries
The husband introduced me to a phone app called Words with Friends. It's dangerously addictive. One minute you're having a conversation with your spouse, and the next, you're trying to land a "j" on a triple letter score, muttering "mmmhhhmmm" to whatever he's saying.
Although you can't buy it on iTunes, I think cooking with friends is just as good. There are a gaggle of reasons why it's an excellent past-time, dinner-time, party-time...
- It's fun. Another couple joining you for a double date, a few glasses of good wine, someone attempting to use an immersion blender for the first time. It's either a recipe for disaster or hilarity, and it always seems to be the latter.
- It's less work than cooking alone. Hate peeling carrots? Assign that job to a friend while you focus on chopping onions. Or you can be the supervisor and just watch everyone else cook while you sip a cocktail. Someone has to be the coordinator, right?
- It takes the pressure off. Entertaining can be intimidating, especially if you're not terribly comfortable in the kitchen. Cooking with your dinner guests is the best way to remedy that. If your meal doesn't turn out according to plan, it's on everyone's shoulders. And you know my rule; if dinner doesn't work, you can all go to McDonald's.
This salad is one of my favorite things to make when I cook with my friend, Kelly. It's her favorite. Also, it's easy. So we can focus on gabbing and drinking. (See #1 above.)
Mixed Greens with Goat Cheese and Dried Cranberries
A.k.a. Kelly's Favorite Salad
Serves: 4
8 cups mixed greens
2 apples, very thinly sliced (If you're not as obsessed with apples as I am, you could use just one.)
4 ounces goat cheese, crumbled
1/3 cup dried cranberries
1/3 cup toasted, chopped pecans
High-quality balsamic vinegar
High-quality extra virgin olive oil
Salt and pepper
In a large bowl (or on individual plates) combine greens, apples, goat cheese, cranberries, and pecans. Drizzle with vinegar and oil. Season to taste with salt and pepper.
Monday, September 26, 2011
Butternut Squash Soup
Did you know that autumn is my favorite season? I love the crisp air, cozy sweaters, and hearty foods. I start lighting candles that smell too strong and give the husband headaches. I feel all nest-y and start cleaning my house. It's the best. Well, except for the headaches. Poor husband.
Winter squash is one of the many other reasons I love fall. I think I've mentioned my sweet tooth a time or two on HDHH. Squash is a vegetable (read: healthy, chock full of vitamins), but it tastes like candy (read: sweet, delicious, wonderful.) I swoon just thinking about it.
To kick off the first day of fall last week, I made Roast Butternut Squash Soup with Jill and Kelly. With it's creamy texture and rich orange hue, it was the perfect way to start the season. This soup is more savory than other butternut squash soups I've had in the past, and it's flavor made me think about an upcoming fall favorite, Thanksgiving.
Make plenty extra because it reheats well for lunch the next day. Everyone in your lunch room will be jealous.
Three cheers for fall!
Butternut Squash Soup
Serves: 6-8
1 butternut squash (about 3 pounds)
2 tablespoons olive oil
2 carrots, peeled and chopped
3 ribs celery, chopped
1 onion, peeled and chopped
3 cloves garlic, peeled and diced
1/4 cup white wine
2 bay leaves
2-3 cups vegetable broth
The first step is roasting the squash. I'll give you a few methods, and you can pick your favorite depending on how much time you have and how strong your aversion to slicing raw butternut squash is. These techniques are from the trustworthy tome Joy of Cooking.
Roasting Whole Butternut Squash
Preheat oven to 375 degrees. Pierce the squash with a knife in 4-5 places so it doesn't explode. Place squash in a baking dish (so it doesn't ooze it's sugary juices all over your oven and create a sticky, stinky mess) and bake until the flesh is tender when pierced with a knife. Since butternut squash is large, it will take about an hour and a half to cook. Once it's cooked, cut squash in half and scoop out the seeds and strings.
Roasting Pieces of Butternut Squash
Preheat oven to 400 degrees. Cut squash in half and scoop out the seeds and strings. Place cut side down on a rimmed baking sheet. Add 1/4" water to the pan and cover with aluminum foil. Bake until flesh is tender when pierced with a knife, 45 minutes - 1 hour.
While your squash is roasting, add olive oil to a large soup pot over medium heat. Add carrots, celery, onion, and garlic. Saute until vegetables are tender and golden, about 10 minutes. Pour in wine and stir, scraping the bottom to deglaze the pot.
Scoop squash out of the skin and add to the soup pot. Add vegetable broth just to cover and stir in bay leaves. Bring mixture to a boil. Reduce heat to low and simmer for 15 minutes.
Remove bay leaves and puree the soup using an immersion blender. If you don't have an immersion blender, puree the soup in batches in your blender. (Then add an immersion blender to your Christmas list!) If the soup is too thick, slowly add more broth until it reaches the desired consistency. Season with salt and pepper to taste.
Plan-Ahead Tip: Roasting butternut squash takes a long time, but it's totally hands-off. Roast squash the day ahead or while your kiddos are taking a nap, and dinner will be ready in moments!
Winter squash is one of the many other reasons I love fall. I think I've mentioned my sweet tooth a time or two on HDHH. Squash is a vegetable (read: healthy, chock full of vitamins), but it tastes like candy (read: sweet, delicious, wonderful.) I swoon just thinking about it.
To kick off the first day of fall last week, I made Roast Butternut Squash Soup with Jill and Kelly. With it's creamy texture and rich orange hue, it was the perfect way to start the season. This soup is more savory than other butternut squash soups I've had in the past, and it's flavor made me think about an upcoming fall favorite, Thanksgiving.
Make plenty extra because it reheats well for lunch the next day. Everyone in your lunch room will be jealous.
Three cheers for fall!
Butternut Squash Soup
Serves: 6-8
1 butternut squash (about 3 pounds)
2 tablespoons olive oil
2 carrots, peeled and chopped
3 ribs celery, chopped
1 onion, peeled and chopped
3 cloves garlic, peeled and diced
1/4 cup white wine
2 bay leaves
2-3 cups vegetable broth
The first step is roasting the squash. I'll give you a few methods, and you can pick your favorite depending on how much time you have and how strong your aversion to slicing raw butternut squash is. These techniques are from the trustworthy tome Joy of Cooking.
Roasting Whole Butternut Squash
Preheat oven to 375 degrees. Pierce the squash with a knife in 4-5 places so it doesn't explode. Place squash in a baking dish (so it doesn't ooze it's sugary juices all over your oven and create a sticky, stinky mess) and bake until the flesh is tender when pierced with a knife. Since butternut squash is large, it will take about an hour and a half to cook. Once it's cooked, cut squash in half and scoop out the seeds and strings.
Roasting Pieces of Butternut Squash
Preheat oven to 400 degrees. Cut squash in half and scoop out the seeds and strings. Place cut side down on a rimmed baking sheet. Add 1/4" water to the pan and cover with aluminum foil. Bake until flesh is tender when pierced with a knife, 45 minutes - 1 hour.
While your squash is roasting, add olive oil to a large soup pot over medium heat. Add carrots, celery, onion, and garlic. Saute until vegetables are tender and golden, about 10 minutes. Pour in wine and stir, scraping the bottom to deglaze the pot.
Scoop squash out of the skin and add to the soup pot. Add vegetable broth just to cover and stir in bay leaves. Bring mixture to a boil. Reduce heat to low and simmer for 15 minutes.
Remove bay leaves and puree the soup using an immersion blender. If you don't have an immersion blender, puree the soup in batches in your blender. (Then add an immersion blender to your Christmas list!) If the soup is too thick, slowly add more broth until it reaches the desired consistency. Season with salt and pepper to taste.
Plan-Ahead Tip: Roasting butternut squash takes a long time, but it's totally hands-off. Roast squash the day ahead or while your kiddos are taking a nap, and dinner will be ready in moments!
Subscribe to:
Posts (Atom)