Wednesday, April 13, 2011

A Tisket A Tasket by Lady of the House

I'm realizing, now that I'm a mother, I wear a number of hats. I haven't ever appropriately assumed my role as Easter Bunny, but this year I've decided to hop to it. (Sorry, that's the bunny ears getting to me!)

I'm loathe to see the table set Easter morning with one of those ratty, disposable baskets, so I started to wonder... Could all the lovely Easter treats be snuggled inside something that won't end up in the bin? Could the "basket" be re-thought? Could I find Easter cheer in a container that might lend itself elsewhere?

Yes! Turns out, there are endless options once you think outside the basket. (Again, it's the bunny ears talking.) Here are my favorites...

Origin Crafts is one stop shopping for pretty containers, and their wire baskets seem to channel the Easter vibe, if you were perhaps celebrating in Tuscany this year.


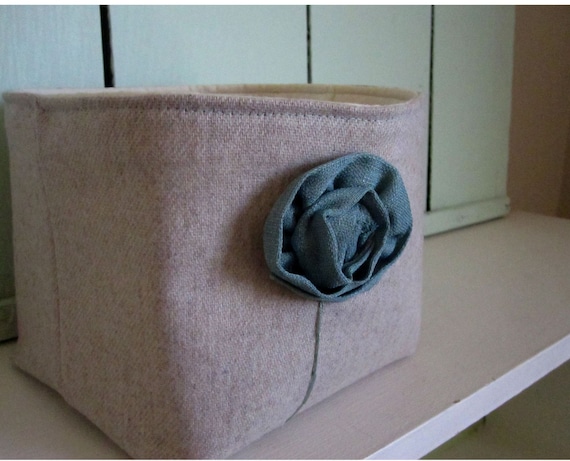
Upcycled and totally charming, Sewing Momma's sweet little fabric bins would be welcome year-round.

Garnet Hill's collapsible bucket is a genius design that would be darling filled with treats for the beach or garden.
And don't these bright enamel pails just scream Spring?

xoxo
{ Lady of the House }
hdhhLady@gmail.com

Monday, April 11, 2011

Warm Spinach Salad with Quinoa and Mushrooms

When people find out I'm from Buffalo, they always want to know which city's weather is worse, my current hometown of Milwaukee or the one I grew up in? In case you've been wondering, Milwaukee is colder (bone-chilling, really), but Buffalo gets (much) more snow. So, which is worse? You decide: Would you pick cold or snow?

Needless to say, in both cities, spring is often chilly and dreary. Lots of clouds, rain, and wind. This weekend, though, the weather in Milwaukee finally took a positive turn. The birds were chirping, the sun was shining, and it was, get this, EIGHTY DEGREES. Yep, 8-0. Glorious.

As the weather warms, my interest in salads always seems to pick up. With that in mind, I'm sharing a hearty salad. Hope you enjoy it as much as I enjoyed reading on my front porch wearing shorts. In other words, lots.

Warm Spinach Salad with Quinoa and Mushrooms
Adapted from Great Food Fast by Everyday Food
Serves: 4

1/4 cup red wine vinegar, plus more for serving
1/4 cup olive oil, plus more for serving
Salt and pepper
2 pounds sliced baby portobello mushrooms*
1.5 cups quinoa
3 cups water
1 pound baby spinach
6 ounces feta cheese, crumbled

Heat the broiler and adjust an oven rack to about 4" from the heat source. In a bowl, whisk together 1/4 cup vinegar and 1/4 cup olive oil. Season to taste with salt and pepper. Toss the mushrooms with the vinaigrette and spread on a large, rimmed baking sheet. Broil, stirring several times, until the mushrooms are tender, about 20 minutes.

Meanwhile, bring quinoa, water, and 1 teaspoon salt to a boil in a medium-sized saucepan. Reduce heat to medium, cover, and simmer until the liquid is absorbed, about 15-20 minutes. If the quinoa is looking too water-logged, remove the lid for the last several minutes of cooking.

Place the spinach in a large bowl and top with hot mushrooms and quinoa. Drizzle with extra olive oil and vinegar to taste. Sprinkle the crumbled feta on top and serve.

*You'll probably be thinking, "There's no way I'll need all these mushrooms." But they shrink waaaaaaay down in size. You'll be glad you used the whole 2 pounds.

Friday, April 8, 2011

Slow Cooker Pot Roast

Yesterday, I (very cruelly) left you hanging. I know you were waiting with bated breath to hear the results of my adventures in slow cooking.

Well, my friends, it was an incredible success!! Fall-apart juicy and delicious, my pot roast was everything I hoped for. And the leftovers? You guessed it. Even better.

Lucky for you, I documented my crock pot journey for your viewing pleasure. It all began on Monday evening...

First, I lined my crock pot with a slow cooker liner. (Genius invention, by the way.)

Then, I chopped stuff up and dumped it into my slow cooker. First onions, then celery.

Then, I slapped a bunch of Montreal steak seasoning all over my roast. And I tossed that in the crock pot, too.

Next came the potatoes. (Doesn't that roast look cozy nestled in there?)

And the carrots and bay leaves.

Then I put the lid on and shoved the crock in my messy fridge until the next morning.

After a lovely night's sleep, I woke up and put on my ratty-yet-comfortable slippers. (Yes, this is important in the making of my pot roast!)

Then I pulled out my crock out of the fridge and dumped a packet of onion soup mix on top of everything else. (Sure, it's full of preservatives, but it tastes so onion-y and good. Don't be a hater.)

And some liquid: Worcestershire sauce, beef broth, and one delicious beer. Then I put the lid on, and set that sucker to cook on low for 10 hours.

Then I took a picture of the clock to prove that it was morning.

And I got ready for work. I wore purple shoes on Monday.

Fast forward through lots of e-mails, conference calls, blah, blah, blah. This is what greeted me when I walked in the door:

Hear that? It's angels singing.

Crock Pot + Erin  = Best Friends 4 Ever

Slow Cooker Pot Roast
Serves: 8

1 large onion, sliced
3 ribs celery, cut into large pieces
3.5 pound beef roast (I used top round roast)
2 teaspoons Montreal steak seasoning
2 pounds potatoes, cut in half (or in quarters, if they're large)
10 carrots peeled and sliced in half or thirds
2 bay leaves
1 packet onion soup mix
1 tablespoon Worcestershire sauce
2 cups beef broth
1 bottle beer
1 tablespoon corn starch

Pat the Montreal steak seasoning on the roast, and dump everything except the corn starch into your crock pot. Cook on low for 10 hours. Place two cups of cooking liquid in a small sauce pan over medium-high heat. Whisk in the corn starch. Allow mixture to simmer for 5 minutes, whisking often, until thickened. Serve the gravy with the pot roast.

Thursday, April 7, 2011

Crock Pot: Friend or Foe?

I'm a workin' girl. So, if what they say is true, I should be BFF with my slow cooker. Well, to put it mildly, I'm not. Every time I use it, I feel like something goes wrong. (Remember this post?)

One of my goals is to conquer kitchen fears. And since Sarah suggested on HDHH's Facebook wall that I bust out my crock pot, I decided to give it a whirl. Although Sarah specifically asked for something besides pot roast, I had a mean hankerin' for a fall-apart chunk of beef with potatoes and carrots and some sort of meaty gravy. So, sorry, Sarah, but I made a pot roast.

On to my adventure in slow cooking...

I was determined to take full advantage of this appliance. I wanted to stick the stuff in there, set it, and forget it. I knew my pot roast would taste better if I browned the meat first, but I just didn't wanna. Was I being stubborn? Lazy? Probably so, but no matter. I refused to do anything but dump stuff into the slow cooker.

So, that's what I did. Chopped stuff up, dumped it in, and turned the thing on. After about 10 hours of commuting, working, and dilly-dallying, I arrived home to find...

Well, I can't let you off that easily! This is a bonus Thursday post. You have to come back tomorrow to find out how it went. (Insert sneaky cackle.)

Wednesday, April 6, 2011

I Just Need Some Air by Lady of the House


Truth be told, I am not a green thumb. Though I adore flowers, know their names, even stop to smell them--I can't seem to keep them alive. My options are limited due to this fact, but even more so now that we're in a north facing flat with no garden. Meanwhile Spring, in all her glory, buds and blooms.

So I went out today in search of some sprig of nature that just might let me at least try and look after it. And after chatting with the nice gals at my local nursery, it was determined that the perfect plant for my type is an air plant. They don't need much, meaning I probably can't screw it up, and they also happen to be wild and wonderful.
I fished out some delicate glass vases my sister gave me ages ago. (CB2 still makes this one!) Then I started by sprinkling a shallow layer of sand into the base of each vase. I added a little reindeer moss for some fluff and color, suspecting the air plant might hinge itself a bit more easily with a little cushion. Then I placed the air plants, strung the vases with twine, and hung them in the kitchen window. I'm delighted to have a bit of the outside in. Now if I can just keep them alive... Wish me luck!

xoxo
{ Lady of the House }
p.s. I just set up an email address, if you'd ever like to drop me a line or ask a question like, "What should I get my sister-in-law for her birthday?" : hdhhLady@gmail.com
p.p.s Oooh! And I'm on Twitter now too: @HDHHLady .Well aren't we fancy!


Monday, April 4, 2011

Brined Pork Chops

As I've mentioned on several occasions, I really like pork. Quick-cooking and lean, it's perfect for busy weeknights at our happy home. One cut of pork that can be tricky to work with, however, is the chop.

Often, my pork chops were turning out dry and tough. I knew the meat itself wasn't to blame; it must be an issue with the way I was cooking it. When porterhouse pork chops went on sale at my local market, I seized the opportunity to conquer the elusive juicy chop.

The Thanksgiving turkey is another culprit in terms of dryness, and brining has been a fabulous method to salvage that particular cut. So, I busted out my salt and sugar and set to brining my pork chops.

After a mere hour in the brine and a quick stint on the grill pan, my dinner was ready. I must admit a bit of performance anxiety as I sliced into my chop, but my fears were quickly allayed. The brined meat was juicy and flavorful.

Next time pork chops are on sale, give brining a shot. I think you'll like it.    

Brined Pork Chops
Serves: 4

Lots of water
3 tablespoons sugar
3 tablespoons salt
4 porterhouse pork chops (or your favorite bone-in cut), about 1.5" thick each
Your favorite dry rub, seasoning, or salt and pepper (to season the pork)
1 tablespoon olive oil

Fill up your largest bowl with water. Stir in 3 tablespoons of sugar and 3 tablespoons of salt until dissolved. Add your pork chops. Cover and refrigerate for one hour.

After your chops have brined for an hour, discard the brine and rinse your pork chops thoroughly. Pat them dry and season them with your favorite dry rub or a hearty sprinkling of salt and pepper.

Heat a grill pan (or skillet) to medium-high and oil the grates. Place your pork chops on the grill pan and allow them to cook until they release easily from the pan, about 6 minutes.

Flip the chops over and cook about 3 minutes. Then, reduce heat to medium and cook until the pork reaches an internal temperature of 135-140 degrees, about 6 more minutes. (If your pork is getting too dark before it's cooked through, pop it in a 350 degree oven for 5-10 minutes until it reaches the appropriate temperature.) Remove the meat to a plate, tent with foil, and allow it to rest for about 10 minutes before serving.

Friday, April 1, 2011

Baked Cheesy Grits

Note: This entire post should be read with a drawl because that's how it sounds in my head. Now you can proceed...

On Monday, I promised you something delicious inspired by my weekend in South Carolina. There was one menu item that came up over and over while I was in the sunny south: cheese grits. But before the recipe, a bit of background about my experience with grits.

Growing up, my family would take an annual road trip to Hilton Head, SC. Mom and Dad would pile us into the minivan with pillows and sticker books, and Dad would shout, "Wagons, ho!" as we pulled out of the driveway. We played I Spy, listened to casette tapes of our favorite children's stories, and biffed each other in the back seat ("I'll turn this car around if you kids don't cut that out!") When my poor parents just couldn't take it any more, Dad would steer the minivan to the closest Cracker Barrel, where he was ensured five minutes peace as the kids explored the gift shop.

Once seated at our wooden booth, I would pour over the southern delicacies listed in the vast Cracker Barrel menu. One of my favorite orders? Grits. "With brown sugar, please." I would smile at the waitress.

The waitress, however, would not smile back. It was a look of horror, confusion, and disgust that I received in return. At 10 years old I didn't appreciate the southern love affair with cheese grits. But after my latest trip, I'm converted.

Cheesy grits are good.

Baked Cheesy Grits
Serves: 6

2 cups low-sodium chicken broth
1 cup water
Salt and pepper
1 cup regular grits (not quick-cooking)
12 ounces shredded cheddar cheese, divided (about 1.5 cups)
1/4 cup milk
2 eggs, beaten
2 tablespoons butter

Preheat oven to 350 degrees. Grease a 2-quart baking dish.

Bring the broth, water, and a pinch of salt and pepper to a boil in a medium saucepan. Stir in the grits and whisk until completely combined. Reduce heat to low, and simmer until the grits are thick, about 8 minutes. (If the grits are starting to look dry, but aren't creamy enough, try adding a few more tablespoons of water and allowing it to cook for another minute.) Stir in about 3/4 of the shredded cheese and the milk.

Season to taste with salt and pepper. Gradually stir in the eggs and butter until combined.

Pour the mixture into the baking dish. Sprinkle the remaining cheese on top.

Bake for about 35 minutes, until the grits are set. Serve warm.