The ingredients here are pretty traditional for a veggie bean soup, but the addition of lemon and olive oil to the broth takes this dish to another level — one the Greeks call Fasolada.
I found the recipe in a Costco member magazine and made 3 big batches all at once, so that I could share it with two other families.
And that's how I ended up tweaking the recipe. Because when I got to making the pot for my house, I ran out of a few things.
The end result is a delicious lunch or dinner. You'll have amazing leftovers or enough to freeze for a second meal.
Mangia! Mangia!
Andrea
Greek Vegetable Bean Soup
Inspired by this recipe from Costco
3 cans white beans (like Northern), rinsed and drained
1/2 cup plus 2 tablespoons olive oil
2 medium-large white onions, diced
4 celery stalks with leaves, diced
4 medium carrots, peeled and chopped into half moons
2-3 garlic cloves, minced
24 ounces diced tomatoes, with juice
6 cups water
1 large lemon, cut in half
2 teaspoons salt
1 teaspoon ground pepper
Juice of 1/2 a large lemon
1/2 cup chopped fresh parsley
Crumbled feta cheese for topping
Place a stock pot or Dutch oven over medium-high heat. Warm 2 tablespoons olive oil. Add onions, celery, carrots and garlic. Sauté until onion is translucent, about 3 to 5 minutes.
Add drained beans, tomatoes, water, olive oil, halved lemon and salt and pepper to pot. Bring to a boil, then lower heat and simmer for 1 hour. Add lemon juice and parsley.
Ladle into bowls and top with feta cheese. Serve with a chunk of crusty bread.
Showing posts with label vegetable. Show all posts
Wednesday, April 25, 2018
Monday, September 25, 2017
Quick Cucumber Salad
Once again we have a bumper crop of cucumbers. They seem to be the only thing we can grow in our tower garden. Time to make cucumber salad, a nice, light side dish to a dinner in which the husband grilled burgers, sausages and chicken (for the week, not just one dinner!)
Even the kids LOVE this cucumber salad. I prefer it to the creamy Hungarian version, but that's good too. Put this on your culinary radar for when you have an abundance of cucumbers.
XOXO,
Amy
Quick Cucumber Salad
2 medium cucumbers, thinly sliced (I used the 1/16" setting on my mandoline.)
1/3 cup vinegar — apple cider or white
1/3 cup water
2 tablespoons sugar
1/2 teaspoon salt
1/8 teaspoon fresh or jarred dill weed or parsley, if desired (I much prefer dill.)
Place sliced cucumbers in small glass or plastic bowl, preferably one that has a lid that fits.
Combine remaining ingredients and pour over the cukes. Cover and refrigerate at least three hours to blend the flavors. Drain cucumbers. Sprinkle with dill weed (or parsley). Serve.
Confession: I have made this when I've only had time to let the cukes sit and marinate for one hour, and nobody could tell as they were too busy stuffing their faces.
Even the kids LOVE this cucumber salad. I prefer it to the creamy Hungarian version, but that's good too. Put this on your culinary radar for when you have an abundance of cucumbers.
XOXO,
Amy
Quick Cucumber Salad
2 medium cucumbers, thinly sliced (I used the 1/16" setting on my mandoline.)
1/3 cup vinegar — apple cider or white
1/3 cup water
2 tablespoons sugar
1/2 teaspoon salt
1/8 teaspoon fresh or jarred dill weed or parsley, if desired (I much prefer dill.)
Place sliced cucumbers in small glass or plastic bowl, preferably one that has a lid that fits.
Combine remaining ingredients and pour over the cukes. Cover and refrigerate at least three hours to blend the flavors. Drain cucumbers. Sprinkle with dill weed (or parsley). Serve.
Confession: I have made this when I've only had time to let the cukes sit and marinate for one hour, and nobody could tell as they were too busy stuffing their faces.
Wednesday, September 20, 2017
Zucchini Bites
It's that time of year when fresh zucchini is still plentiful. When my farmer's market had one of these giant vegetables for just $1, I could not pass it up.
My boys may disagree, but I think zucchini is one of the hardest-working veggies out there. You can use it in so many different recipes, like side dishes such as a simple saute or Zucchini Rice. And you can bake with it for super moist Zucchini Chocolate Cake or Zucchini-Blueberry Bread.
One thing I'd never done with zucchini is wring it out in a towel to squeeze out the moisture before using it in a recipe. Wowza. The process adds just a few extra minutes and it's a great way to get your kids involved in helping out.
Removing the zucchini's extra water led to these amazingly light and fluffy veggie bites. In fact, these will likely replace my go-to Zucchini Pancakes.
I'll be making this recipe again because it is so versatile. You can easily change up the herbs and cheese for variety.
Mangia! Mangia!
Andrea
Zucchini Bites
Inspired by this recipe from Mel's Kitchen Cafe
1 1/2 cups packed, shredded zucchini
1 large egg
3/4 cup shredded cheddar cheese
1/4 cup bread crumbs
1/4 cup chopped fresh cilantro
1/4 cup finely chopped white or yellow onion
1 bunch green onions, diced
Salt and pepper
Preheat oven to 425 degrees. Line a baking sheet with parchment paper lightly coated with cooking spray.
Place the shredded zucchini in a clean dish towel and fold up the edges of the towel. Holding the towel pouch over the sink, twist and squeeze the zucchini and towel to wring out as much excess water as possible. You want the zucchini to be almost dry.
Place zucchini in medium bowl and add remaining ingredients. Mix until combined. If mixture is too wet, add a tablespoon to two of bread crumbs or flour.
Scoop up rounded tablespoons and drop onto prepared baking sheet. Gently flatten mounds with the back of a spoon.
Bake for 15 to 20 minutes, or until the edges are golden brown and the tops are browned in spots.
Remove from oven and let cool for a few minutes before serving. Goes well with plain Greek yogurt or ranch dressing.
My boys may disagree, but I think zucchini is one of the hardest-working veggies out there. You can use it in so many different recipes, like side dishes such as a simple saute or Zucchini Rice. And you can bake with it for super moist Zucchini Chocolate Cake or Zucchini-Blueberry Bread.
One thing I'd never done with zucchini is wring it out in a towel to squeeze out the moisture before using it in a recipe. Wowza. The process adds just a few extra minutes and it's a great way to get your kids involved in helping out.
Removing the zucchini's extra water led to these amazingly light and fluffy veggie bites. In fact, these will likely replace my go-to Zucchini Pancakes.
I'll be making this recipe again because it is so versatile. You can easily change up the herbs and cheese for variety.
Mangia! Mangia!
Andrea
Zucchini Bites
Inspired by this recipe from Mel's Kitchen Cafe
1 1/2 cups packed, shredded zucchini
1 large egg
3/4 cup shredded cheddar cheese
1/4 cup bread crumbs
1/4 cup chopped fresh cilantro
1/4 cup finely chopped white or yellow onion
1 bunch green onions, diced
Salt and pepper
Preheat oven to 425 degrees. Line a baking sheet with parchment paper lightly coated with cooking spray.
Place the shredded zucchini in a clean dish towel and fold up the edges of the towel. Holding the towel pouch over the sink, twist and squeeze the zucchini and towel to wring out as much excess water as possible. You want the zucchini to be almost dry.
Place zucchini in medium bowl and add remaining ingredients. Mix until combined. If mixture is too wet, add a tablespoon to two of bread crumbs or flour.
Scoop up rounded tablespoons and drop onto prepared baking sheet. Gently flatten mounds with the back of a spoon.
Bake for 15 to 20 minutes, or until the edges are golden brown and the tops are browned in spots.
Remove from oven and let cool for a few minutes before serving. Goes well with plain Greek yogurt or ranch dressing.
Monday, August 15, 2016
Slow Cooker Thai Curry Eggplant
A couple weeks ago, I posted this Facebook status update: "I made Thai curry eggplant for dinner. The whole family hates me."
Yeah, it was not a hit with the fam, but I liked it. Unlike the eggplant-hating husband and children, I crave a lighter meal now and then. And the leftovers made for some nice solo lunches and dinners for moi.
I just would cut the eggplant in smaller pieces next time — America's Test Kitchen Health Slow Cooker Revolution advised 1-inch pieces — so they cook down a bit more and are more bite-sized. I'd recommend half-inch hunks.
Several of my eggplant-loving friends responded to my Facebook status asking that I post the recipe. Friends, this one's for you.
XOXO,
Amy
Slow Cooker Thai Curry Eggplant
Adapted from America's Test Kitchen Healthy Slow Cooker Revolution
2 pounds eggplant, cut inot half-inch pieces
4 shallots, minced
3 tablespoons Thai green curry paste
1 tablespoon honey
4 cups chicken broth
2 tablespoons fish sauce — and more for seasoning, if desired
2 tablespoons instant tapioca
1/4 teaspoon salt —and extra salt (and pepper) to taste
1 pound snow peas, strings removed and cut in half
1 red bell pepper, stemmed, seeded, ad cut into 2-inch-long matchsticks
1 (13.5-ounce) can light coconut milk
1/4 cup chopped fresh cilantro
1 tablespoon lime juice — and more for seasoning, if desired
Jasmine rice for serving
Adjust oven rack (if necessary) to be 6 inches from the broiler element and heat broiler. Line rimmed baking sheet with aluminum foil and spray with oil spray.
Toss eggplant, shallots, green curry paste and honey in large bowl. Spread eggplant mixture evenly on cookie sheet and broil until softened and beginning to brown — about 12 minutes — rotating the baking sheet halfway through.
Transfer eggplant mixture to slow cooker. Add in broth, fish sauce, tapioca and 1/4 teaspoon salt. Cover and cook until fragrant and eggplant is softened -- about 4 hours.
Microwave snow peas, bell pepper and a tablespoon of water in a covered bowl, stirring occasionally, until tender but yet a little crisp. This will take 4 to 6 minutes. Drain vegetables and stir into curry.
Microwave coconut milk until hot — about 2 minutes. Stir into curry and let sit until heated through, about 5 minutes. Stir in cilantro and lime juice. Season as desired with salt, pepper, and extra fish sauce and lime juice. Serve over jasmine rice.
Yeah, it was not a hit with the fam, but I liked it. Unlike the eggplant-hating husband and children, I crave a lighter meal now and then. And the leftovers made for some nice solo lunches and dinners for moi.
I just would cut the eggplant in smaller pieces next time — America's Test Kitchen Health Slow Cooker Revolution advised 1-inch pieces — so they cook down a bit more and are more bite-sized. I'd recommend half-inch hunks.
Several of my eggplant-loving friends responded to my Facebook status asking that I post the recipe. Friends, this one's for you.
XOXO,
Amy
Slow Cooker Thai Curry Eggplant
Adapted from America's Test Kitchen Healthy Slow Cooker Revolution
2 pounds eggplant, cut inot half-inch pieces
4 shallots, minced
3 tablespoons Thai green curry paste
1 tablespoon honey
4 cups chicken broth
2 tablespoons fish sauce — and more for seasoning, if desired
2 tablespoons instant tapioca
1/4 teaspoon salt —and extra salt (and pepper) to taste
1 pound snow peas, strings removed and cut in half
1 red bell pepper, stemmed, seeded, ad cut into 2-inch-long matchsticks
1 (13.5-ounce) can light coconut milk
1/4 cup chopped fresh cilantro
1 tablespoon lime juice — and more for seasoning, if desired
Jasmine rice for serving
Adjust oven rack (if necessary) to be 6 inches from the broiler element and heat broiler. Line rimmed baking sheet with aluminum foil and spray with oil spray.
Toss eggplant, shallots, green curry paste and honey in large bowl. Spread eggplant mixture evenly on cookie sheet and broil until softened and beginning to brown — about 12 minutes — rotating the baking sheet halfway through.
Transfer eggplant mixture to slow cooker. Add in broth, fish sauce, tapioca and 1/4 teaspoon salt. Cover and cook until fragrant and eggplant is softened -- about 4 hours.
Microwave snow peas, bell pepper and a tablespoon of water in a covered bowl, stirring occasionally, until tender but yet a little crisp. This will take 4 to 6 minutes. Drain vegetables and stir into curry.
Microwave coconut milk until hot — about 2 minutes. Stir into curry and let sit until heated through, about 5 minutes. Stir in cilantro and lime juice. Season as desired with salt, pepper, and extra fish sauce and lime juice. Serve over jasmine rice.
Labels:
crockpot,
curry,
dinner,
eggplant,
main course,
main dish,
slow cooker,
stew,
Thai,
vegetable,
vegetables
Wednesday, May 11, 2016
Vegetable Bean Soup
In an effort to ignore the dreary spring rains outside, I'm making vegetable soup to brighten things up inside.
It's a meal I used to make all the time, and I'd forgotten how forgiving a vegetable soup can be, especially when you just start tossing in whatever vegetables are in the fridge. All you need is some good stock or broth and a big pot. Add a few spices and dinner is served.
This time around I added a bunch of mixed dried beans, to give the soup a bit of heartiness.
Mangia! Mangia!
Andrea
Vegetable Bean Soup
1 tablespoon unsalted butter
1 tablespoon olive oil
1 large shallot, peeled, quartered and thinly sliced
1/2 of a large red onion, finely diced
1 tablespoon minced garlic
4 stalks celery, diced
1 pound carrots, cut into 1/4 inch pieces (I used a bag of baby carrots and cut each piece in thirds)
2 yellow bell peppers diced
10-12 cups vegetable or chicken stock
1 pint cherry tomatoes
1 medium yellow squash, diced
1 medium zucchini, diced
1 medium yellow squash, diced
1 medium zucchini, diced
1 1/2 cups mixed dried beans, cleaned and prepared according to package directions (mine was a blend of beans, peas and lentils)
3-4 large rainbow chard (or substitute kale) leaves, stems removed and cut into 1-inch pieces
Salt and pepper to taste
Italian parsley, roughly chopped
In a Dutch oven or large pot, melt butter and heat oil over a medium high flame.
Add shallot and onion and cook, stirring frequently until shallot becomes translucent, about 5 minutes. Add garlic and stir, cook for 1 minute.
Add celery, carrots and bell pepper and cook and stir until vegetables begin to soften, about 5 to 8 minutes. Add 8 cups of stock, and scrape bottom of pot with wooden spoon to loosen any browned bits. Add salt and pepper, tomatoes and beans and bring to a boil.
Let boil for 5 minutes, then reduce heat to a simmer. Partially cover pot with lid and simmer for 90 minutes or more. Check soup after 1 hour. If it has become too thick, add more broth or stock, 1 cup at a time. Return to a boil, then back to a simmer to continue cooking until beans are tender and no longer tough.
Add chard or kale and stir until greens are wilted. Ladle into bowls and top with chopped parsley. Serve with a chunk of crusty bread.
Friday, February 26, 2016
Roast Acorn Squash
I'm a big fan of acorn squash. Usually I just pop it in the microwave whole and mash it up with plenty of brown sugar and butter. But this year the acorn squash hasn't been as sweet and tasty as usual, so I've been avoiding it at the grocery store.
That is until I had Roast Acorn Squash at a friend's house. It was divine! Roasting it brought out the squash's natural sweetness. In the past I worried that leaving the skin on the squash might taste weird, but it was SO GOOD. Plus you don't have to peel it. You guys know I'm all about making my life easier in the kitchen.
Roast Acorn Squash is totally my new go-to veggie. Give it a try and let us know what you think!
Let's get cooking!
Erin
Roast Acorn Squash
Serves: 3
1 large acorn squash
2 tablespoons dark brown sugar
1 1/2 tablespoons olive oil
Salt and paper
Preheat oven to 400 degrees. Slice squash in half and scoop out the seeds. Slice squash into 1" half moons and place in a single layer on a large rimmed baking sheet.
Sprinkle dark brown sugar, oil, salt, and pepper over squash and toss to coat. Bake in preheated oven for about 15 minutes. Take a peek at the bottom to see if the squash is caramelized and browned. (If it's not, pop it back in for 5 more minutes.) Once it's caramelized, flip the squash and cook for another 5-10 minutes, until squash is tender.
That is until I had Roast Acorn Squash at a friend's house. It was divine! Roasting it brought out the squash's natural sweetness. In the past I worried that leaving the skin on the squash might taste weird, but it was SO GOOD. Plus you don't have to peel it. You guys know I'm all about making my life easier in the kitchen.
Roast Acorn Squash is totally my new go-to veggie. Give it a try and let us know what you think!
Let's get cooking!
Erin
Roast Acorn Squash
Serves: 3
1 large acorn squash
2 tablespoons dark brown sugar
1 1/2 tablespoons olive oil
Salt and paper
Preheat oven to 400 degrees. Slice squash in half and scoop out the seeds. Slice squash into 1" half moons and place in a single layer on a large rimmed baking sheet.
Sprinkle dark brown sugar, oil, salt, and pepper over squash and toss to coat. Bake in preheated oven for about 15 minutes. Take a peek at the bottom to see if the squash is caramelized and browned. (If it's not, pop it back in for 5 more minutes.) Once it's caramelized, flip the squash and cook for another 5-10 minutes, until squash is tender.
Labels:
acorn squash,
easy,
healthy,
roast acorn squash,
roast vegetable,
roasting,
side dish,
squash,
vegetable
Monday, February 1, 2016
Carolina Collard Greens
My younger daughter -- and the more adventuresome eater of my two girls -- turns 7 tomorrow. We celebrated on Saturday with a home cooked early birthday dinner. Penny's taste buds were set on having collard greens.
Yes, my child is weird. A child of the South and a weird collard craving, blue cheese nibbling, quinoa salad lunching kid. But finally someone else in my house other than me appreciates collards, so I happily fixed a big mess of greens.
Here are some Southern inspired dishes that would go well with collards: Family Cornbread, Slow Cooker Pulled Pork, Tangy Slow Cooker Pork with Onion Jam, Slow Cooker Chicken & Biscuits, Pecan-Crusted Chicken Breasts and a Deviled Egg Sampler.
However, our birthday dinner was a little more eclectic. We had Parmesan and Yogurt Crusted Chicken, scalloped potatoes and a nearly flourless French chocolate cake.
Penny, by the way, had two helpings of collards.
XOXO,
Amy
PS: I call these Carolina Collard Greens in honor of Cam Newton, QB1 for the Super Bowl 50-bound Carolina Panthers. In an interview following the Panthers' NFC Championship win, Cam compared "instant grits" to "slow cooked collard greens" when asked to talk about what's happened to him since being drafted. Go, Panthers! Keep pounding!
PPS: You might recall that Erin is bringing you grits following the Seattle Seahawks' playoff loss to the Panthers. Grits are coming later this week.
Carolina Collard Greens
2 pounds of collard greens, each leaf cut in half to completely remove center stem/vein and torn into 2-inch pieces
1 tablespoon olive oil
4 pieces bacon
2 onions, chopped
2 garlic cloves, minced
Pinch or two of crushed red pepper
4 cups chicken broth
1 tablespoon red or white wine vinegar
Rinse prepared collard pieces under cold water and set aside.
In your largest pot -- like a pasta or lobster pot -- heat olive oil over medium heat. (Trust me, the collards cook way down.)
Add bacon and cook for a minute. Add onions and cook until softened, about four minutes. Add garlic and red pepper and cook until fragrant, about one minute.
Remove bacon and cut into pieces and return to pot. (Or you can do what I do, which is use kitchen scissors to cut bacon while it is still in the pot.) Add collards and stir to incorporate with other ingredients the best you can. Add broth and vinegar.
Bring pot to a boil and then cover and reduce to a simmer for at least 45 minutes.
Use slotted spoon to serve.
Yes, my child is weird. A child of the South and a weird collard craving, blue cheese nibbling, quinoa salad lunching kid. But finally someone else in my house other than me appreciates collards, so I happily fixed a big mess of greens.
Here are some Southern inspired dishes that would go well with collards: Family Cornbread, Slow Cooker Pulled Pork, Tangy Slow Cooker Pork with Onion Jam, Slow Cooker Chicken & Biscuits, Pecan-Crusted Chicken Breasts and a Deviled Egg Sampler.
However, our birthday dinner was a little more eclectic. We had Parmesan and Yogurt Crusted Chicken, scalloped potatoes and a nearly flourless French chocolate cake.
Penny, by the way, had two helpings of collards.
XOXO,
Amy
PS: I call these Carolina Collard Greens in honor of Cam Newton, QB1 for the Super Bowl 50-bound Carolina Panthers. In an interview following the Panthers' NFC Championship win, Cam compared "instant grits" to "slow cooked collard greens" when asked to talk about what's happened to him since being drafted. Go, Panthers! Keep pounding!
PPS: You might recall that Erin is bringing you grits following the Seattle Seahawks' playoff loss to the Panthers. Grits are coming later this week.
Carolina Collard Greens
2 pounds of collard greens, each leaf cut in half to completely remove center stem/vein and torn into 2-inch pieces
1 tablespoon olive oil
4 pieces bacon
2 onions, chopped
2 garlic cloves, minced
Pinch or two of crushed red pepper
4 cups chicken broth
1 tablespoon red or white wine vinegar
Rinse prepared collard pieces under cold water and set aside.
In your largest pot -- like a pasta or lobster pot -- heat olive oil over medium heat. (Trust me, the collards cook way down.)
Add bacon and cook for a minute. Add onions and cook until softened, about four minutes. Add garlic and red pepper and cook until fragrant, about one minute.
Remove bacon and cut into pieces and return to pot. (Or you can do what I do, which is use kitchen scissors to cut bacon while it is still in the pot.) Add collards and stir to incorporate with other ingredients the best you can. Add broth and vinegar.
Bring pot to a boil and then cover and reduce to a simmer for at least 45 minutes.
Use slotted spoon to serve.
Labels:
side,
side dish,
side dishes,
Southern,
southern food,
vegetable,
vegetables
Wednesday, January 27, 2016
Pressure Cooker Potato Soup
I'm trying to perfect my mom's soupy potatoes -- that's what she calls this dish. It's a work in progress and a goal I don't think I will ever quite achieve. Some things just taste better when someone else prepares them for you. Like Mom's soup and tuna salad. Like my husband's vodka gimlet.
Anyhow, in this rendition of soupy potatoes, I use the pressure cooker, so I get to enjoy my soup right away. I also added pancetta for a little more flavor. It hit the spot. My husband and our two daughters enjoyed it with the girls asking for it in the next day's lunch -- and that's quite the achievement, let me tell you.
XOXO,
Amy
PS: This isn't the first of Mom's soups I've done in the pressure cooker. Check out my Midwestern Vegetable-Beef Soup.
Pressure Cooker Potato Soup
4 ounces pancetta
2 medium to large onions, finely chopped
2 cloves garlic, minced
1 to 1/2 teaspoons dried thyme (or oregano)
1/2 teaspoon dried parsley
5 pounds potatoes (russet, Yukon gold, red), peeled and diced into 1/2-inch cubes
8 cups vegetable or chicken broth
Salt and pepper to taste
Sautee pancetta, onion, thyme and parsley inside pressure cooker for a couple minutes, until fragrant. Deglaze inside of pressure cooker with some of the broth, scraping pan of crunchy bits of onion and pancetta. Add potatoes and remaining broth. Cook under high pressure for six minutes and do a quick release when time is up.
Note: You could cut the ingredients in half. I like to make a lot so we can eat soup for days and share with our neighbors.
Anyhow, in this rendition of soupy potatoes, I use the pressure cooker, so I get to enjoy my soup right away. I also added pancetta for a little more flavor. It hit the spot. My husband and our two daughters enjoyed it with the girls asking for it in the next day's lunch -- and that's quite the achievement, let me tell you.
XOXO,
Amy
PS: This isn't the first of Mom's soups I've done in the pressure cooker. Check out my Midwestern Vegetable-Beef Soup.
Pressure Cooker Potato Soup
4 ounces pancetta
2 medium to large onions, finely chopped
2 cloves garlic, minced
1 to 1/2 teaspoons dried thyme (or oregano)
1/2 teaspoon dried parsley
5 pounds potatoes (russet, Yukon gold, red), peeled and diced into 1/2-inch cubes
8 cups vegetable or chicken broth
Salt and pepper to taste
Sautee pancetta, onion, thyme and parsley inside pressure cooker for a couple minutes, until fragrant. Deglaze inside of pressure cooker with some of the broth, scraping pan of crunchy bits of onion and pancetta. Add potatoes and remaining broth. Cook under high pressure for six minutes and do a quick release when time is up.
Note: You could cut the ingredients in half. I like to make a lot so we can eat soup for days and share with our neighbors.
Labels:
comfort food,
dinner,
easy,
lunch,
main course,
main dish,
potato,
pressure cooker,
soup,
vegetable
Monday, November 16, 2015
Prosciutto-Wrapped Asparagus Spears
You know what goes nicely with Andrea's Buttermilk Spoonbread? You know what would make a tasty appetizer?
Prosciutto-Wrapped Asparagus Spears.
Cooking really can be that simple, my friends.
I made this combo for dinner the other night and it reminded me of a grown-up version of breakfast for dinner. Truthfully, my husband hates breakfast for dinner (a.k.a. brinner), so this was a genius move on my part.
XOXO,
Amy
Prosciutto-Wrapped Asparagus Spears
Equal number of asparagus spears and prosciutto slices
Melted butter or olive oil, couple tablespoons
Preheat oven to 375 degrees.
Trim asparagus. My mom has a friend who taught her how to trim the right amount and I think of Mom's friend every time I make asparagus. So with your sharp knife start at the very bottom of the asparagus and tap your way toward the top until you feel a slight give. When you feel the give, that's where you cut.
Wrap one piece of prosciutto around each stalk.
Brush each stalk with melted butter or olive oil.
Place in oven until asparagus is roasted and prosciutto is crispy, about five minutes.
Prosciutto-Wrapped Asparagus Spears.
Cooking really can be that simple, my friends.
I made this combo for dinner the other night and it reminded me of a grown-up version of breakfast for dinner. Truthfully, my husband hates breakfast for dinner (a.k.a. brinner), so this was a genius move on my part.
XOXO,
Amy
Prosciutto-Wrapped Asparagus Spears
Equal number of asparagus spears and prosciutto slices
Melted butter or olive oil, couple tablespoons
Preheat oven to 375 degrees.
Trim asparagus. My mom has a friend who taught her how to trim the right amount and I think of Mom's friend every time I make asparagus. So with your sharp knife start at the very bottom of the asparagus and tap your way toward the top until you feel a slight give. When you feel the give, that's where you cut.
Wrap one piece of prosciutto around each stalk.
Brush each stalk with melted butter or olive oil.
Place in oven until asparagus is roasted and prosciutto is crispy, about five minutes.
Labels:
appetizer,
appetizers,
easy,
ham,
pork,
side,
side dish,
side dishes,
sides,
vegetable,
vegetables
Wednesday, September 23, 2015
Grilled Cabbage with Thai Dressing
If you need a speedy way to spice up your menu, this grilled cabbage will do the trick.
I don't usually cook cabbage, but my husband and oldest son love it. When I get in a rut, they remind me that I haven't made cabbage in awhile.
In fact, I had not whipped up this side dish in more than a year. Thank goodness for those Facebook flashbacks to remind us of what we were doing so many months ago. This little gem popped up on my feed. Thank goodness.
Everyone in our house gobbled this up, and my boys even had seconds —which hardly ever happens with a vegetable. We enjoyed the cabbage with a roasted chicken. It makes the perfect lunch all by itself the next day.
The folks over at The Kitchn get all the credit here, and their notes about grilling the cabbage ahead of time are perfect. These cabbage steaks hold up beautifully in the fridge. Just warm them up in the microwave and you are good to go.
I recommend doubling the dressing, because it tastes so good you'll want some leftover for the next time you have salad.
Mangia! Mangia!
Andrea
Grilled Cabbage with Thai Dressing
Inspired by this recipe from The Kitchn.
For the dressing:
1/4 cup fresh lime juice (bottled is OK, too)
1/4 cup extra virgin olive oil
1 teaspoon fish sauce
1 to 2 teaspoons minced garlic
1/3 cup fresh cilantro (Leaves and thin stems. Remove thicker, tougher stems)
1/2 teaspoon salt
1/2 teaspoon black pepper
1/2 teaspoon sugar
Place all ingredients in a blender and mix until smooth. Give it a taste. You might want add a bit more lime juice or fish sauce, depending on your taste. The dressing will have an orangey-green hue.
For the cabbage:
1 head green cabbage
Vegetable oil
Preheat your gas grill to medium-high. If you are using a charcoal grill, you'll want low flames. You can also use a grill pan and cook up the cabbage on the stovetop.
Slice cabbage into wedges that are about 1 inch thick. You should get at least eight and you might end up with more, depending on how large the cabbage is. Brush both sides of each cabbage slice with oil.
Grill cabbage for about 6 minutes or until the edges are charred. Flip over and cook for another 5 to 6 minutes, again grilling until the outer leaves acquire some black char.
Remove from grill, top with dressing, garnish with slices of lime and serve warm.
To warm up leftover cabbage (or if you did your grilling in advance,) place cabbage slices on a microwave safe plate, cover with plastic wrap or wax paper and heat for about 45 seconds a slice.
Labels:
black pepper,
cabbage,
cilantro,
dressing,
fish sauce,
garlic,
grill,
grilled,
lime,
side dish,
Thai,
vegetable
Wednesday, September 16, 2015
Chocolate Zucchini Cake
My mom used to make this cake when I was a kid and my brother and sister and I could not stop eating it. Super moist and chocolate-y, this is now a favorite snack or dessert at my house, too.
The chocolate hides all the zucchini inside, so it's a nice way to get the kids to eat extra vegetables. (And just like the Blueberry Zucchini Bread, you won't taste the squash.) The cloves add something a little unexpected to the taste.
I like to use a 9 x 13 pan and cut it into brownie-sized pieces. But you can easily use a bundt pan or muffin tins with this batter. Just adjust the baking time accordingly.
If there are any leftovers, this cake freezes perfectly.
Mangia! Mangia!
Andrea
Chocolate Zucchini Cake
Inspired by my Mom
2 cups all purpose flour (or 1 cup all purpose and 1 cup whole wheat flour)
1 cup white sugar or Splenda
3/4 cup unsweetened cocoa powder
2 teaspoons baking soda
1 teaspoon baking powder
1/2 teaspoon salt
1 teaspoon ground cinnamon
1/4 teaspoon ground cloves
4 eggs
1 cup applesauce
1/2 cup vegetable oil
3 cups grated zucchini
1 cup chocolate chips
1/2 cup mini chocolate chips
Preheat over to 350 degrees. Grease and flour a 9x13x2 inch pan.
In a large bowl, whisk together flour, sugar, cocoa powder, baking soda, baking powder, salt, cinnamon and cloves. Add the eggs and oil and mix until everything is well combined.
Add zucchini, stirring well. Fold in chocolate chips.
Pour batter into pan. Sprinkle top with mini chocolate chips.
Bake for 50 minutes to 1 hour, or until a toothpick inserted into the center of the cake comes out clean.
Let cake cool in pan on a wire rack before cutting. Garnish with raspberries or strawberries.
As you can see in the photo above, this cake remains very moist.
The chocolate hides all the zucchini inside, so it's a nice way to get the kids to eat extra vegetables. (And just like the Blueberry Zucchini Bread, you won't taste the squash.) The cloves add something a little unexpected to the taste.
I like to use a 9 x 13 pan and cut it into brownie-sized pieces. But you can easily use a bundt pan or muffin tins with this batter. Just adjust the baking time accordingly.
If there are any leftovers, this cake freezes perfectly.
Mangia! Mangia!
Andrea
Chocolate Zucchini Cake
Inspired by my Mom
2 cups all purpose flour (or 1 cup all purpose and 1 cup whole wheat flour)
1 cup white sugar or Splenda
3/4 cup unsweetened cocoa powder
2 teaspoons baking soda
1 teaspoon baking powder
1/2 teaspoon salt
1 teaspoon ground cinnamon
1/4 teaspoon ground cloves
4 eggs
1 cup applesauce
1/2 cup vegetable oil
3 cups grated zucchini
1 cup chocolate chips
1/2 cup mini chocolate chips
Preheat over to 350 degrees. Grease and flour a 9x13x2 inch pan.
In a large bowl, whisk together flour, sugar, cocoa powder, baking soda, baking powder, salt, cinnamon and cloves. Add the eggs and oil and mix until everything is well combined.
Add zucchini, stirring well. Fold in chocolate chips.
Pour batter into pan. Sprinkle top with mini chocolate chips.
Bake for 50 minutes to 1 hour, or until a toothpick inserted into the center of the cake comes out clean.
Let cake cool in pan on a wire rack before cutting. Garnish with raspberries or strawberries.
As you can see in the photo above, this cake remains very moist.
Friday, September 11, 2015
Microwaved Corn on the Cob
With a brand new baby and all, I'm looking for any and every possible shortcut. Have you ever seen the episode of Seinfeld where Kramer installs a garbage disposal in his shower so he can multi-task? Yeah...I'm totally there.
So when I read an article by The Kitchn about microwaving corn on the cob, I was alllll over it. With late-summer corn filling the farmers market and grocery store, it's the perfect super-speedy side dish.
Let's get cooking!
Erin
Microwaved Corn on the Cob
Serves: 2
Technique from The Kitchn*
2 ears corn on the cob, still in the husk
Butter, for serving
Salt, for serving
First...DO NOT SHUCK THE CORN. Put the entire corn on the cob in the microwave and cook for 3 minutes on high. Allow the corn to cool for a few minutes so you don't burn your fingers off. Shuck the cooked corn and marvel at how easily all that pesky silk comes off. Ask yourself why you haven't always cooked corn in the microwave. Serve with plenty of butter and salt.
*Check out The Kitchn's tutorial here.
Monday, August 31, 2015
Hungarian Sour Cream Cucumber Salad
We grew cucumbers! It only took two and a half months from seeds to cukes, but we did it!
Just before we harvested our first cukes from our Tower Garden, I asked friends on Facebook for their favorite recipes. My friend Brian suggested a sour cream cucumber salad and several friends backed that up. Apparently, this is a quintessential Southern summertime dish. While I have lived in Charlotte for the past 12 years and have also lived in Birmingham, Alabama, and Lexington, Kentucky, I had no idea! Definitely making this again!
XOXO,
Amy
PS: I added Hungarian to the name, because I saw other versions of this salad use that in the recipe phrase AND the hubby and I just visited -- and loved -- Budapest!
Hungarian Sour Cream Cucumber Salad
Inspired by Tasteofhome.com
1/2 cup sour cream (I use light)
3 tablespoons white vinegar
1 tablespoon white sugar
Ground pepper to taste
3-4 cucumbers, peeled (if desired) and thinly sliced
1 small sweet onion or 1/2 Vidalia onion, thinly sliced
Dill to taste
In a large bowl, whisk together the sour cream, vinegar, sugar and pepper. Add the cucumbers and onion, tossing to coat. Cover and refrigerate for at least four hours. Top with dill and serve.
Note: When preparing this for a dinner party Chez George, I forgot to read the recipe sufficiently in advance, so I didn't know about the fridge time. The salad was able to sit in the fridge for only about an hour. It still tasted good, but it was definitely better the next day. Sometimes things just have to marinate.
Here is my younger daughter Penny, who harvested our first cucumbers from our Tower Garden.
Just before we harvested our first cukes from our Tower Garden, I asked friends on Facebook for their favorite recipes. My friend Brian suggested a sour cream cucumber salad and several friends backed that up. Apparently, this is a quintessential Southern summertime dish. While I have lived in Charlotte for the past 12 years and have also lived in Birmingham, Alabama, and Lexington, Kentucky, I had no idea! Definitely making this again!
XOXO,
Amy
PS: I added Hungarian to the name, because I saw other versions of this salad use that in the recipe phrase AND the hubby and I just visited -- and loved -- Budapest!
Hungarian Sour Cream Cucumber Salad
Inspired by Tasteofhome.com
1/2 cup sour cream (I use light)
3 tablespoons white vinegar
1 tablespoon white sugar
Ground pepper to taste
3-4 cucumbers, peeled (if desired) and thinly sliced
1 small sweet onion or 1/2 Vidalia onion, thinly sliced
Dill to taste
In a large bowl, whisk together the sour cream, vinegar, sugar and pepper. Add the cucumbers and onion, tossing to coat. Cover and refrigerate for at least four hours. Top with dill and serve.
Note: When preparing this for a dinner party Chez George, I forgot to read the recipe sufficiently in advance, so I didn't know about the fridge time. The salad was able to sit in the fridge for only about an hour. It still tasted good, but it was definitely better the next day. Sometimes things just have to marinate.
Here is my younger daughter Penny, who harvested our first cucumbers from our Tower Garden.
Labels:
appetizer,
appetizers,
cucumber,
garden,
gardening,
salad,
salads,
side,
side dish,
side dishes,
sides,
vegetable
Friday, July 31, 2015
Honey Roasted Carrots with Tarragon
Recently the husband and I attended a very grown-up party. The buffet table was piled with swanky things like miniature pieces of rye bread with herbed cream cheese and smoked salmon, teeny tiny crab cakes, and a crudites platter that included three—yes, THREE—colors of carrots. Orange, purple, and yellow. What the what!? I didn't even know carrots came in that many colors. So of course I created a little taste test for myself to see which was my favorite.
Although I won't turn down carrots of any hue, I determined that my preference is the yellow variety. They tasted just a little bit sweeter and milder than the traditional orange carrots—almost like a carrot crossed with a parsnip. They were delicious.
So you could imagine my glee when I stumbled upon yellow carrots at the farmers market. It seemed like a no-brainer to roast them with a drizzle of honey to bring out their natural sweetness. A little bit of tarragon added an herbal note that took these babies to the next level. The husband and I were fighting for the last carrot. (I let him have it because I'm a good wife. Or maybe it was because I knew I'd already eaten way more than he had. We'll never know.)
Let's get cooking!
Erin
Honey Roasted Carrots with Tarragon
Serves: 4
2 small bunches of carrots*, trimmed, peeled, and sliced 1/4"-1/2" thick (about 3 cups sliced)
1 tablespoon olive oil
1 tablespoon honey
1/2 teaspoon salt
1/2 teaspoon dried** tarragon leaf
Preheat oven to 425 degrees and line a rimmed baking sheet with parchment paper. (Since we're using honey in this recipe, the parchment will make clean-up easier. The honey tends to stick to the pan once it's cooked, and I don't want to spend all night scrubbing it off.)
Toss together carrots, oil, honey, salt, and tarragon so the carrots are evenly coated. Spread the carrots into a single layer on the prepared baking sheet. Roast for 15-20 minutes, stirring halfway through, until carrots are tender and caramelized on the edges.
*If you can find yellow carrots, I heartily recommend giving them a try!
**If you happen to have fresh tarragon growing in your garden, by all means, use it here. Just keep in mind that you may need to use more when you're cooking with the fresh stuff.
Although I won't turn down carrots of any hue, I determined that my preference is the yellow variety. They tasted just a little bit sweeter and milder than the traditional orange carrots—almost like a carrot crossed with a parsnip. They were delicious.
So you could imagine my glee when I stumbled upon yellow carrots at the farmers market. It seemed like a no-brainer to roast them with a drizzle of honey to bring out their natural sweetness. A little bit of tarragon added an herbal note that took these babies to the next level. The husband and I were fighting for the last carrot. (I let him have it because I'm a good wife. Or maybe it was because I knew I'd already eaten way more than he had. We'll never know.)
Let's get cooking!
Erin
Honey Roasted Carrots with Tarragon
Serves: 4
2 small bunches of carrots*, trimmed, peeled, and sliced 1/4"-1/2" thick (about 3 cups sliced)
1 tablespoon olive oil
1 tablespoon honey
1/2 teaspoon salt
1/2 teaspoon dried** tarragon leaf
Preheat oven to 425 degrees and line a rimmed baking sheet with parchment paper. (Since we're using honey in this recipe, the parchment will make clean-up easier. The honey tends to stick to the pan once it's cooked, and I don't want to spend all night scrubbing it off.)
Toss together carrots, oil, honey, salt, and tarragon so the carrots are evenly coated. Spread the carrots into a single layer on the prepared baking sheet. Roast for 15-20 minutes, stirring halfway through, until carrots are tender and caramelized on the edges.
*If you can find yellow carrots, I heartily recommend giving them a try!
**If you happen to have fresh tarragon growing in your garden, by all means, use it here. Just keep in mind that you may need to use more when you're cooking with the fresh stuff.
Friday, July 24, 2015
Corn, Avocado & Tomato Salad
When the farmer's markets and grocery stores are bursting with fresh summer produce, this salad is pure perfection. Sweet corn, juicy tomatoes, and creamy avocado...what could be better?
And here's a plan-ahead tip. Next time you're making corn on the cob, cook up a few extra ears and make this salad with the leftovers. You won't regret it.
Let's get cooking!
Erin
Corn, Avocado & Tomato Salad
Inspired by Therese's Corn & Tomato Salad
Serves: 4
4 ears corn (or substitute 2 cups frozen corn, thawed)
2 avocados, diced
1 large tomato, diced (or substitute 1 1/2 cups halved grape tomatoes)
2 tablespoons chopped fresh basil
2 teaspoons extra virgin olive oil
2 teaspoons apple cider vinegar
Salt and pepper
Bring a large skillet of water to a boil. Add corn and cook for about 4 minutes, until it's just tender. Allow corn to cool and cut kernels off the cob.
In a large bowl, combine corn kernels, avocado, tomato, and basil. Drizzle with olive oil and vinegar and season to taste with salt and pepper. Stir gently to combine. Serve immediately.
P.S. Sometimes I have help taking pictures for the blog.
And here's a plan-ahead tip. Next time you're making corn on the cob, cook up a few extra ears and make this salad with the leftovers. You won't regret it.
Let's get cooking!
Erin
Corn, Avocado & Tomato Salad
Inspired by Therese's Corn & Tomato Salad
Serves: 4
4 ears corn (or substitute 2 cups frozen corn, thawed)
2 avocados, diced
1 large tomato, diced (or substitute 1 1/2 cups halved grape tomatoes)
2 tablespoons chopped fresh basil
2 teaspoons extra virgin olive oil
2 teaspoons apple cider vinegar
Salt and pepper
Bring a large skillet of water to a boil. Add corn and cook for about 4 minutes, until it's just tender. Allow corn to cool and cut kernels off the cob.
In a large bowl, combine corn kernels, avocado, tomato, and basil. Drizzle with olive oil and vinegar and season to taste with salt and pepper. Stir gently to combine. Serve immediately.
P.S. Sometimes I have help taking pictures for the blog.
Monday, July 13, 2015
Open-Grill Brussels Sprouts
You know how I mentioned in last week's post on Chili Lime Corn Salad how we Georges are eating simply -- because of our kitchen renovation? Well, the kitchen work continues and so do our challenges putting dinner on the table. But thank goodness it's summer and we can grill. So the other day the hubby was again grilling sausages and I whipped up these Brussels sprouts based on what I had on hand that was also easily accessible (i.e. not packed up in some box stacked in the dining room).
The results? Delicious. The hubby and I were fighting over the grilled onions, which weren't even the main event in this yummy side dish.
Also, BTW, I tend to make Brussels sprouts entirely on the fly. For example, check out my Roasted (Kitchen Sink) Brussels Sprouts.
XOXO,
Amy
Open-Grill Brussels Sprouts
16 ounces Brussels sprouts trimmed
1 red onion, cut into big hunks
2 tablespoons olive oil
1 tablespoon honey
Juice of 1 lemon
Salt and ground pepper, to taste
Toss all ingredients and then put veggies into grill basket. Grill over open flame for about 10 minutes. Shake occasionally. Veggies are done and ready to be removed from grill when Brussels sprouts are browned on some sides and onions are turning translucent.
The results? Delicious. The hubby and I were fighting over the grilled onions, which weren't even the main event in this yummy side dish.
Also, BTW, I tend to make Brussels sprouts entirely on the fly. For example, check out my Roasted (Kitchen Sink) Brussels Sprouts.
XOXO,
Amy
Open-Grill Brussels Sprouts
16 ounces Brussels sprouts trimmed
1 red onion, cut into big hunks
2 tablespoons olive oil
1 tablespoon honey
Juice of 1 lemon
Salt and ground pepper, to taste
Toss all ingredients and then put veggies into grill basket. Grill over open flame for about 10 minutes. Shake occasionally. Veggies are done and ready to be removed from grill when Brussels sprouts are browned on some sides and onions are turning translucent.
PS: I've mentioned grilling sausages in my last two posts. If you live in Northern Ohio, check out Hasselbach Meats in Fremont. When visiting my family at Lake Erie, we stop by the award-winning family-owned Hasselbach meat shop and fill up a cooler of brats, Italian sausages and what are called "fresh sausages" to bring home to Charlotte. Below is a pic of our grill with Brussels sprouts and Hasselbach's fresh sausages.
Labels:
Brussels sprouts,
easy,
grilled vegetable,
grilled vegetables,
side,
side dish,
sides,
vegan,
vegetable,
vegetables,
vegetarian
Monday, July 6, 2015
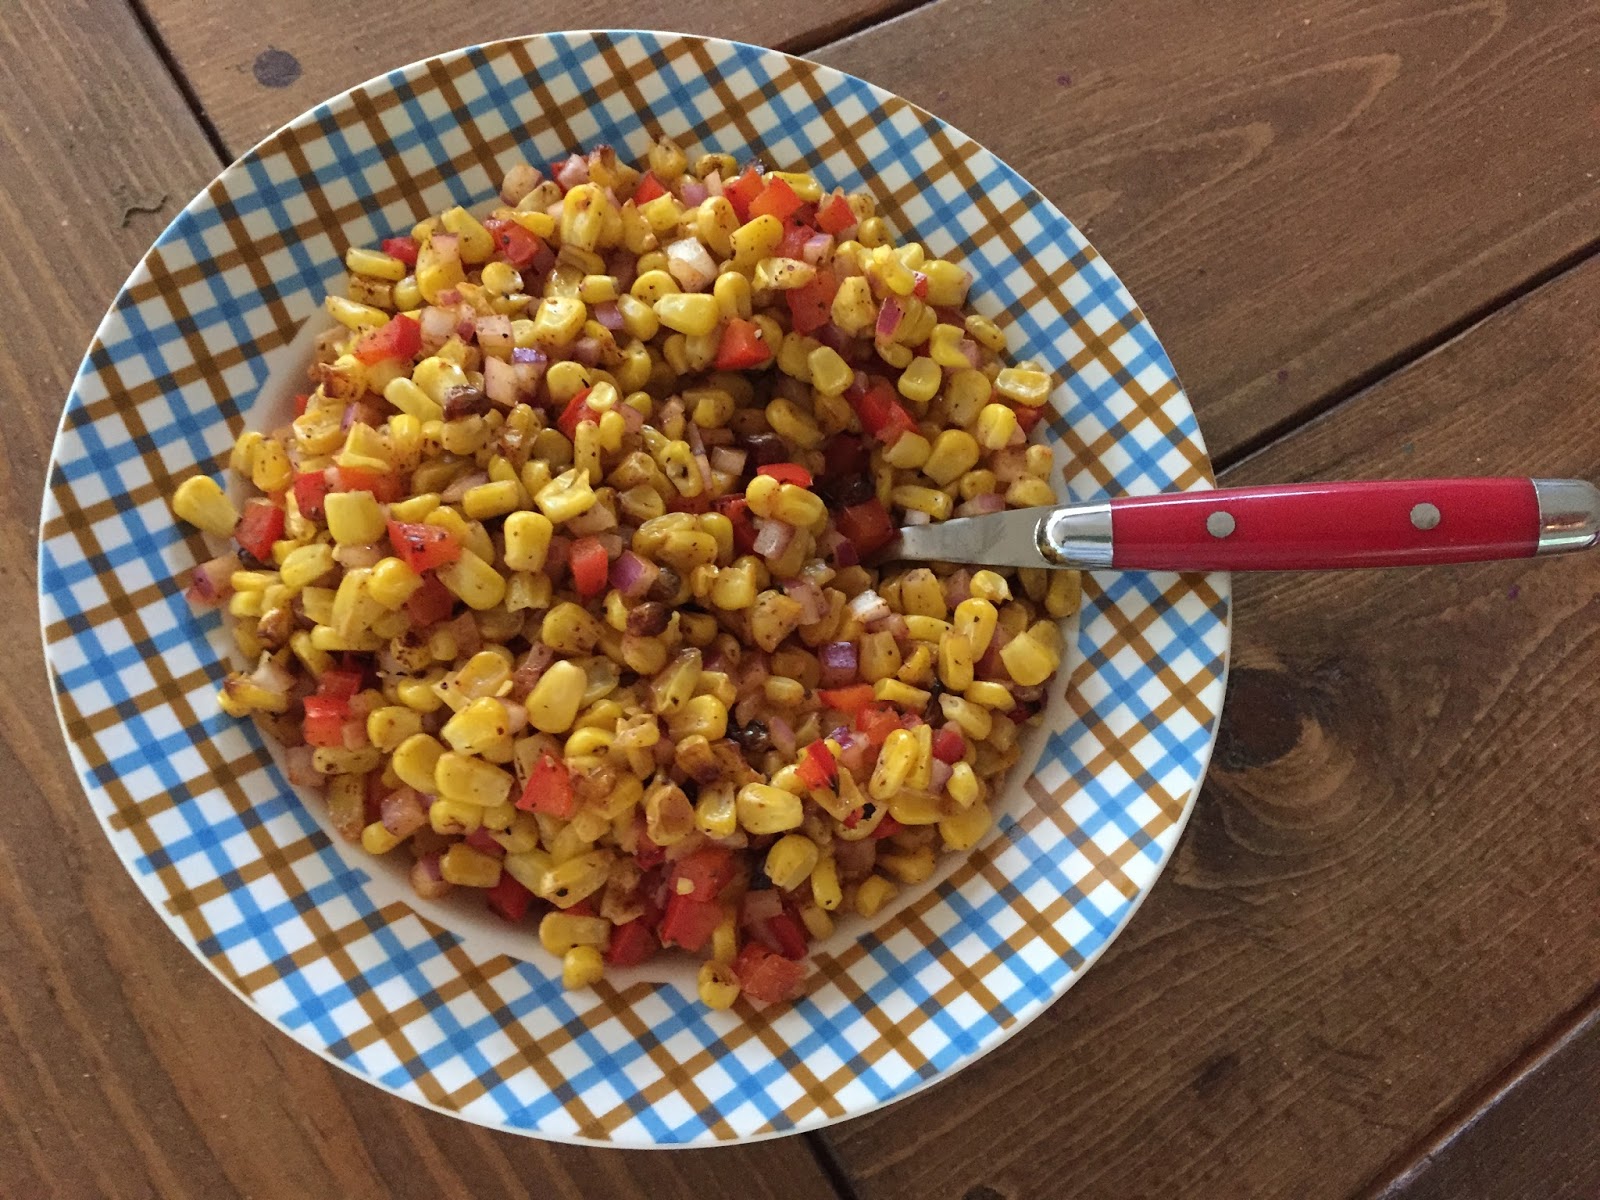
Chili Lime Corn Salad
We have been eating pretty simply this summer -- when we've been eating at home, that is. You see, we are remodeling our kitchen. It is exciting. It is stressful. In our upstairs main kitchen, we have use of our new dual-fuel range, but no sink. Luckily, we have a partial kitchen downstairs with a sink. At least I'm getting a workout while I cook.
So, anyhow, the other night while the hubby grilled sausages, the kids and I whipped up this corn salad that I just made up in my head as we went along. (For their part, the kids gathered the ingredients, spread the corn and peppers on the cookie sheet and, otherwise, just kept me company.)
The kids were so-so on the dish, but hubby and I enjoyed it. I will make it again and will plan ahead to have fresh cilantro on hand. Cilantro would be a nice finishing touch -- taste wise and visually.
XOXO,
Amy
Chili Lime Corn Salad
16 ounces of corn (fresh or frozen)
1 red pepper, diced
1 tablespoon olive oil
Salt, pepper
1/4 medium to large red onion, diced finely
1 lime
1 teaspoon chili powder
Fresh cilantro, to taste (optional)
Spread corn and diced red pepper on a cookie sheet. Sprinkle the olive oil over the corn and peppers. Give the pan a light coat of salt and ground pepper. Roast at 400 degrees for about 20 minutes, or until some kernels change to a nice caramel brown.
Combine into one bowl the corn, peppers and onion. Stir in the juice of one lime and one teaspoon of chili powder. Top with fresh cilantro if desired.
So, anyhow, the other night while the hubby grilled sausages, the kids and I whipped up this corn salad that I just made up in my head as we went along. (For their part, the kids gathered the ingredients, spread the corn and peppers on the cookie sheet and, otherwise, just kept me company.)
The kids were so-so on the dish, but hubby and I enjoyed it. I will make it again and will plan ahead to have fresh cilantro on hand. Cilantro would be a nice finishing touch -- taste wise and visually.
XOXO,
Amy
Chili Lime Corn Salad
16 ounces of corn (fresh or frozen)
1 red pepper, diced
1 tablespoon olive oil
Salt, pepper
1/4 medium to large red onion, diced finely
1 lime
1 teaspoon chili powder
Fresh cilantro, to taste (optional)
Spread corn and diced red pepper on a cookie sheet. Sprinkle the olive oil over the corn and peppers. Give the pan a light coat of salt and ground pepper. Roast at 400 degrees for about 20 minutes, or until some kernels change to a nice caramel brown.
Combine into one bowl the corn, peppers and onion. Stir in the juice of one lime and one teaspoon of chili powder. Top with fresh cilantro if desired.
Friday, June 19, 2015
Zucchini Rice
I found Zucchini Rice on Pinterest forever ago, and I'm kicking myself for not trying this simple and delicious recipe sooner. It's incredibly flavorful, but still versatile enough to pair with just about anything. Pork chops, grilled steak, teriyaki salmon...My friends, you have found your side dish.
In addition to being tasty, Zucchini Rice is healthy! It's the perfect way to sneak an extra veggie into your meal. Your kids might not even know they're eating zucchini. And I won't tell them. Your secret's safe here, folks.
Let's get cooking!
Erin
Zucchini Rice
Adapted from: Dishing with Leslie
Serves: 6
1 tablespoon butter
1 cup rice
2 cups chicken broth or vegetable broth
1/2 cup shredded Parmesan cheese
1 large zucchini, grated (about 2 1/2 cups)
Salt and pepper
Melt butter in a large skillet over medium. Stir in rice and allow it to toast until golden brown, about 5 minutes, stirring occasionally. Stir in broth and bring to a boil. Reduce heat to low, cover, and allow rice to cook until tender, about 15-20 minutes. (It's okay if the liquid isn't totally absorbed. Just make sure the rice is tender.)
Stir in Parmesan, grated zucchini, and salt and pepper to taste. Cover skillet and allow to sit for 5 more minutes. Stir again and serve.
In addition to being tasty, Zucchini Rice is healthy! It's the perfect way to sneak an extra veggie into your meal. Your kids might not even know they're eating zucchini. And I won't tell them. Your secret's safe here, folks.
Let's get cooking!
Erin
Zucchini Rice
Adapted from: Dishing with Leslie
Serves: 6
1 tablespoon butter
1 cup rice
2 cups chicken broth or vegetable broth
1/2 cup shredded Parmesan cheese
1 large zucchini, grated (about 2 1/2 cups)
Salt and pepper
Melt butter in a large skillet over medium. Stir in rice and allow it to toast until golden brown, about 5 minutes, stirring occasionally. Stir in broth and bring to a boil. Reduce heat to low, cover, and allow rice to cook until tender, about 15-20 minutes. (It's okay if the liquid isn't totally absorbed. Just make sure the rice is tender.)
Stir in Parmesan, grated zucchini, and salt and pepper to taste. Cover skillet and allow to sit for 5 more minutes. Stir again and serve.
Friday, June 12, 2015
Sauteed Zucchini with Corn
We've been talking about supermarket shortcuts quite a bit lately, and today's post is no exception. As busy moms, Amy, Andrea, and I are always looking for ways to shave five minutes off dinner prep time so we can spend more time with our husbands, kids, or Mint Juleps.
I know it's summer, and corn on the cob is popping up at farmers markets and it's darn cheap at the grocery store. But sometimes my kid wants to snuggle while I make dinner, and wielding a sharp knife with a squirmy toddler on my hip just isn't the best choice. Or, let's be honest, maybe I'm feeling hangry and my growling stomach can't wait for me to cut kernels off the cob. And that's when I turn to frozen corn.
A note about my new favorite frozen corn: the other day, my boy and I were shopping at Whole Foods, and I popped a bag of their 365 Everyday Value frozen corn in my cart. Sure it was more expensive than the stuff I usually buy at Publix, but whatever. I wasn't about to swing by another grocery store to save $1 on veggies from the freezer section.
When I opened the bag to make dinner that night, I snuck a few frozen kernels before I tossed them in the pan. Holy moly! It tasted just like corn I painstakingly cut from the cob myself in the heat of summer! I kept nibbling. And nibbling. And decided I'm a total convert. It was worth every extra cent I spent.
By the way, Whole Foods has no idea who I am. (Unless it's "the lady whose kid is trying to pilfer M&Ms from the trail mix bar." Sometimes we make a scene at the grocery store. Oy.) I was just surprised and super pumped to discover their most delicious corn, and I thought I'd share the tip with you.
That said, let's use whatever corn we happen to have in our freezer to make this ridiculously tasty side dish. Even the husband raved about it, and he doesn't even like zucchini! Now that's a vote of confidence.
Let's get cooking!
Erin
P.S. Looking for other grocery store shortcuts? I use pre-made mashed potatoes in my Shepherd's Pie, prepared pesto in these Savory Pesto Palmiers, and refrigerated biscuits for Slow Cooker Chicken and Biscuits. You've gotta get dinner on the table somehow!
Sauteed Zucchini with Corn
Adapted from Damn Delicious
Serves: 4
1 tablespoon butter
2 zucchini or yellow squash, halved or quartered if large and sliced 1/4" thick
3/4 cup corn (frozen or fresh)
1 tablespoon chopped fresh basil
2 tablespoons grated Parmesan cheese
Salt and pepper
Heat the butter in a large skillet over medium-high. Add zucchini and corn and cook, stirring occasionally, until vegetables are tender and spotty brown, about 7-8 minutes. (Don't stir constantly; allow the veggies to sit in the pan and sizzle a bit. The contact with the hot skillet allow those delicious brown spots to form.) Stir in basil, cheese, and salt and pepper to taste. Serve hot.
I know it's summer, and corn on the cob is popping up at farmers markets and it's darn cheap at the grocery store. But sometimes my kid wants to snuggle while I make dinner, and wielding a sharp knife with a squirmy toddler on my hip just isn't the best choice. Or, let's be honest, maybe I'm feeling hangry and my growling stomach can't wait for me to cut kernels off the cob. And that's when I turn to frozen corn.
A note about my new favorite frozen corn: the other day, my boy and I were shopping at Whole Foods, and I popped a bag of their 365 Everyday Value frozen corn in my cart. Sure it was more expensive than the stuff I usually buy at Publix, but whatever. I wasn't about to swing by another grocery store to save $1 on veggies from the freezer section.
When I opened the bag to make dinner that night, I snuck a few frozen kernels before I tossed them in the pan. Holy moly! It tasted just like corn I painstakingly cut from the cob myself in the heat of summer! I kept nibbling. And nibbling. And decided I'm a total convert. It was worth every extra cent I spent.
By the way, Whole Foods has no idea who I am. (Unless it's "the lady whose kid is trying to pilfer M&Ms from the trail mix bar." Sometimes we make a scene at the grocery store. Oy.) I was just surprised and super pumped to discover their most delicious corn, and I thought I'd share the tip with you.
That said, let's use whatever corn we happen to have in our freezer to make this ridiculously tasty side dish. Even the husband raved about it, and he doesn't even like zucchini! Now that's a vote of confidence.
Let's get cooking!
Erin
P.S. Looking for other grocery store shortcuts? I use pre-made mashed potatoes in my Shepherd's Pie, prepared pesto in these Savory Pesto Palmiers, and refrigerated biscuits for Slow Cooker Chicken and Biscuits. You've gotta get dinner on the table somehow!
Sauteed Zucchini with Corn
Adapted from Damn Delicious
Serves: 4
1 tablespoon butter
2 zucchini or yellow squash, halved or quartered if large and sliced 1/4" thick
3/4 cup corn (frozen or fresh)
1 tablespoon chopped fresh basil
2 tablespoons grated Parmesan cheese
Salt and pepper
Heat the butter in a large skillet over medium-high. Add zucchini and corn and cook, stirring occasionally, until vegetables are tender and spotty brown, about 7-8 minutes. (Don't stir constantly; allow the veggies to sit in the pan and sizzle a bit. The contact with the hot skillet allow those delicious brown spots to form.) Stir in basil, cheese, and salt and pepper to taste. Serve hot.
Friday, May 8, 2015
Sauteed Green Beans with Lemon
Spring is here, and the weather in Charlotte has been gorgeous. With the temperature rising, I haven't been in the mood to roast my vegetables. This may come as a shock to those of you who've been reading this blog for a long time and know how much I adore roasted veggies. From asparagus to radicchio, I have roasted it.
But now my taste buds are craving something lighter and fresher. So I set out to find a way to cook green beans that was as simple and delicious as roasting.
Well, you guys, I think I found my new warm weather go-to: Sauteed Green Beans with Lemon.
Let's get cooking!
Erin
Sauteed Green Beans with Lemon
Serves: 4
1 tablespoon butter
1 pound green beans, stem ends trimmed
1/4 cup water
1 teaspoon lemon juice
1/4 teaspoon lemon pepper
Salt
Melt butter in a large skillet over medium high heat. Add green beans and cook until they get brown spots, about 5 minutes, stirring occasionally. Add water and cover skillet. Allow beans to cook until they're bright green and beginning to soften, about 2 minutes. Uncover skillet and continue to cook until beans are crisp-tender and liquid has evaporated, another minute or two. Turn off the heat and stir in lemon juice, lemon pepper, and salt to taste.
But now my taste buds are craving something lighter and fresher. So I set out to find a way to cook green beans that was as simple and delicious as roasting.
Well, you guys, I think I found my new warm weather go-to: Sauteed Green Beans with Lemon.
Let's get cooking!
Erin
Sauteed Green Beans with Lemon
Serves: 4
1 tablespoon butter
1 pound green beans, stem ends trimmed
1/4 cup water
1 teaspoon lemon juice
1/4 teaspoon lemon pepper
Salt
Melt butter in a large skillet over medium high heat. Add green beans and cook until they get brown spots, about 5 minutes, stirring occasionally. Add water and cover skillet. Allow beans to cook until they're bright green and beginning to soften, about 2 minutes. Uncover skillet and continue to cook until beans are crisp-tender and liquid has evaporated, another minute or two. Turn off the heat and stir in lemon juice, lemon pepper, and salt to taste.
Subscribe to:
Posts (Atom)