Showing posts with label snack. Show all posts

Wednesday, May 16, 2018

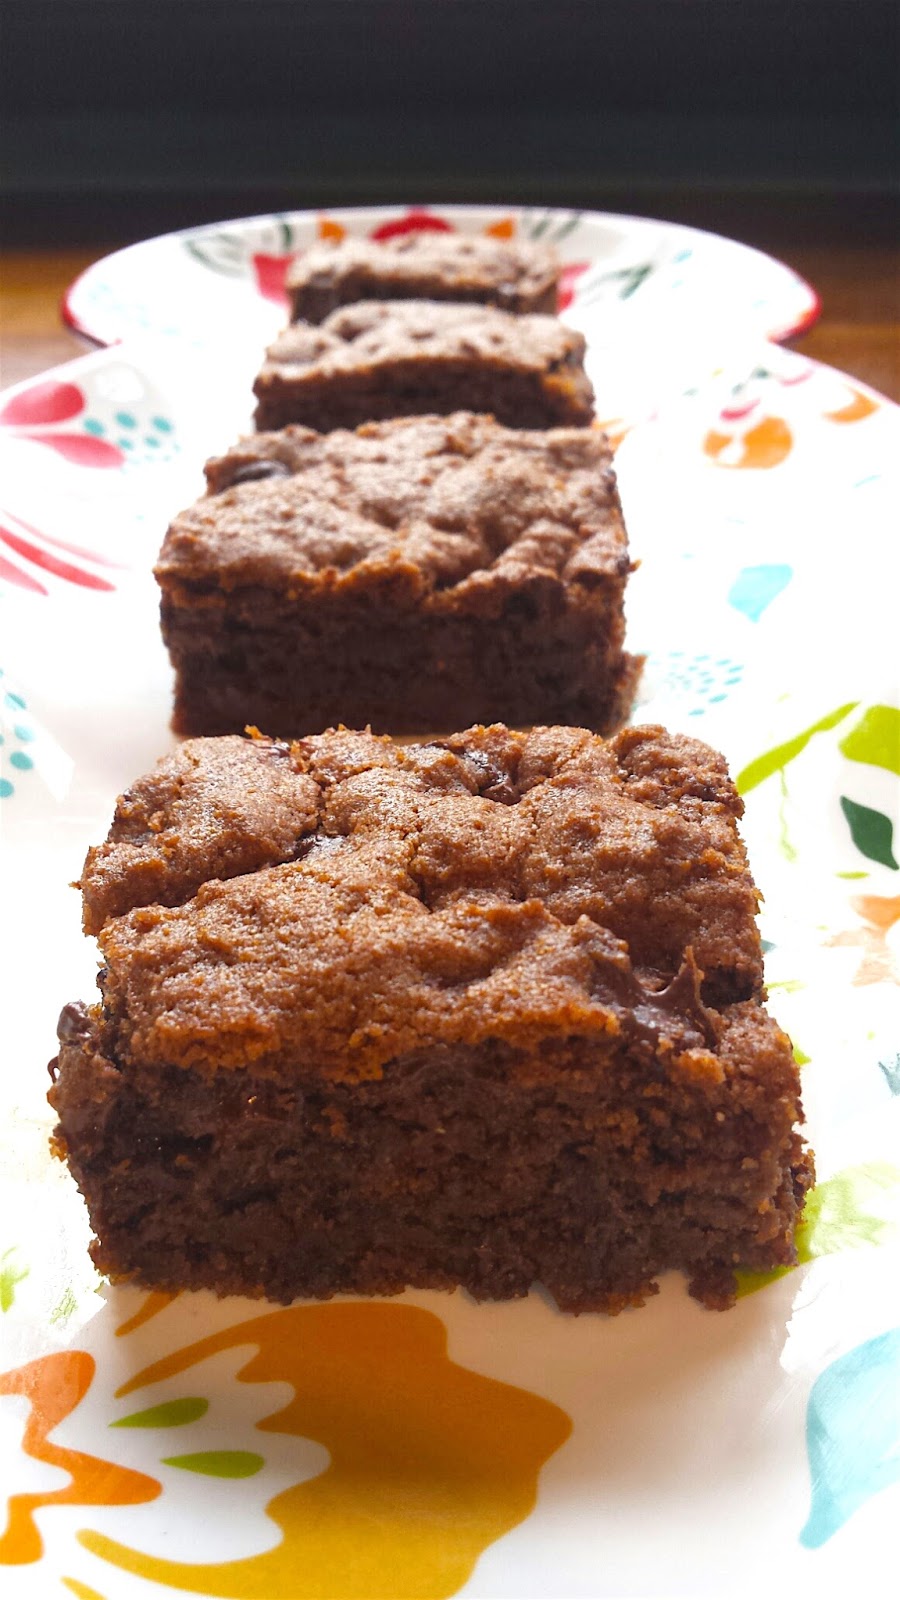
Fudgy Greek Yogurt Brownies

When we have a large container of plain Greek yogurt sitting in the fridge, I usually put it in smoothies for my kids to use it up.

Recently I started looking around for other ways to use Greek yogurt. Thankfully, Bon Appetit has compiled a round-up of easy dessert recipes with yogurt.

I haven't made brownies from scratch in a while, so that's what I decided to try. These are dense, chocolatey and well worth the little bit of effort the recipe requires. Bonus: Your kids will tell you they love you when you present them as an after-school snack.

Need more brownie inspiration? Try our Double Peanut Butter Cup Brownies or Mo's ROLO-ver and Die Good Brownies.

Mangia! Mangia!
Andrea


Fudgy Greek Yogurt Brownies
Inspired by a recipe from Bon Appetit

1 cup all-purpose flour
1/2 teaspoon baking powder
1/4 teaspoon salt
1 cup semisweet, dark or milk chocolate chips, divided
6 tablespoons unsalted butter
1 cup sugar
1/2 cup cocoa powder
1 teaspoon vanilla extract
1 cup plain Greek yogurt

Preheat oven to 350 degrees. Butter and flour a 9x9x2-inch metal baking pan.

In a large bowl, whisk together flour, baking powder and salt.

Set a saucepan of water to simmer on the stove. Combine butter and 1/2 cup chocolate chips in a medium stainless steel bowl. Place the bowl on top of the saucepan and stir the butter and chocolate until melted and smooth.

Remove bowl from heat. Whisk in sugar, cocoa, vanilla and yogurt until smooth.

Add wet ingredients to the bowl of flour and fold in until incorporated. Add remaining chocolate chips and stir to combine.

Pour mixture into prepared pan and bake for about 25 minutes, or until a toothpick inserted into center of browning comes out with just a few moist crumbs attached.

Let cool completely before cutting into squares.


Wednesday, May 2, 2018

One Bowl Banana Chip Muffins

If you like to bake with your kiddos as much as I do, you know how nice it can be to use a recipe that only needs one bowl and a wooden mixing spoon.

My boys and I came up with this recipe to satisfy their craving for a "good snack" (i.e., something with chocolate in it) after school and to meet my goal of giving them something healthier than store-bought granola bars.

These muffins use apple sauce instead of oil or butter. After a few positive in-home tests, I decided to see what the middle school students we work with through the Junior League of Peoria's Kids in the Kitchen program thought of these treats.

The goal of Kids in the Kitchen is to empower kids to make healthy meals and snacks on their own, like these sweet potatoes topped with black bean and tomato salad. So a bowl and a spoon was as complicated as we wanted to get with our foray into baking.

As you guys know, I love to bake with bananas and I knew the pre-teens in our cooking group liked banana bread. This recipe was a hit with them. You can read more about it and see photos here.

The muffins are moist and flavorful and they freeze well.

Mangia! Mangia!
Andrea


One Bowl Banana Chip Muffins

2 medium ripe bananas
1 cup apple sauce
2 teaspoons vanilla
1/2 teaspoon cinnamon
2 large eggs
1 cup sugar
2 cups flour
2 teaspoons baking powder
Pinch of salt
1 cup chocolate chips

Preheat oven to 350 degrees. Line a muffin pan with liners or coat with cooking spray.

In a large bowl, mash the banana with a fork. Add applesauce, vanilla, cinnamon and egg. Mix until smooth.

Add sugar, flour, baking powder and salt. Stir to combine. Add chocolate chips and mix well to incorporate.

Using a 1/4 cup measuring up, scoop mixture into muffin cups.

Bake for 15 minutes or until muffins rise and are golden brown on top. You also can test for doneness by using a toothpick inserted into the center of a muffin. It should come out clean.

Remove muffins from oven and let cool 15 minutes before eating.


Wednesday, April 4, 2018

Connor's Chocolate Chip Muffins

My sister and her family are visiting this week and my nephew Connor needs at least one breakfast with chocolate chip muffins. And there can be no banana mixed into the muffins.

So Connor and my niece Layne helped me whip up a big batch of buttermilk chocolate chip muffins. We made large ones and some mini muffins, so that everyone could taste-test them.

Layne made a list to make sure everyone got a sample. Her Uncle Bob tried to refuse, but eventually ate 3 of them.

My boys, Layne and Connor say these muffins go great with bacon, hard boiled eggs and fruit for breakfast. Connor, who last appeared here when he inspired this cucumber salad recipe, also likes these muffins for dessert.

What's your favorite chocolate chip muffin recipe? Let us know!

Mangia! Mangia!
Andrea


Connor's Chocolate Chip Muffins
Inspired by this recipe from LittleSweetBaker.com

2 /12 cups all purpose flour
1 tablespoon baking powder
1 teaspoon baking soda
1/2 teaspoon salt
1 1/2 cups milk or semi-sweet chocolate chips (mini or regular size)
1/2 cup melted butter, cooled
1 cup sugar
2 large eggs
1 cup buttermilk
1 tablespoon vanilla extract

Preheat oven to 425 degrees. Line a large 12-cup muffin tin with paper liners or spread with coking spray. (This recipe makes a bit more than 12 muffins, unless you use an extra large muffin tray.)

Melt the butter in a microwave-safe dish and set aside to cool.

In a large bowl, whisk together the flour, baking power, baking soda, salt and chocolate chips. Set aside.

In a medium bowl, combine the melted butter, sugar, eggs, buttermilk and vanilla.

Make a well in the middle of the flour mixture in the large bowl. Slowly pour the wet mixture into the dry flour and gently stir to combine.

Divide the batter evenly into the muffin tins. Fill about 3/4 of the way to the top.

Layne filling the muffin cups.
Bake at 425 degrees for 5 minutes. Then lower the heat and bake for about 12-14 minutes or until the muffins are browned on top and a toothpick inserted into the center comes out clean. Mini muffins will cook faster.

Mini muffins.
Remove from oven and let cool for 15 minutes before enjoying with cousins for breakfast, lunch, dinner, a snack or dessert!

Connor tested and approved.


Wednesday, October 25, 2017

Halloween Snacks

My youngest, Sam, loves to be in the kitchen, so we recently took a snack prep class at a local grocery store. (Thanks, Hyvee and dietitian Katrina!) It was great to spend some time together and he enjoyed being crafty with food.

He's become more of a picky eater. I was hoping if he made some new treats on his own, and they looked silly or goofy, he would actually eat them. Sam only devoured one snack.

Can you guess which one?

Mangia! Mangia!
Andrea


Owl Snack

  • Large or medium round crackers (like Ritz)
  • Small round crackers 
  • Plain cream cheese
  • Sliced almonds
  • Whole almonds
  • Raisins or dried cranberries

Spread cream cheese on a large round cracker. Add two small round crackers at top for eyes. Use a dab of cream cheese on each to attach the raisins for pupils.

Press on an almond beak and almond-slice feathers.


Tombstone Pudding Cups

  • Cool whip
  • Chocolate yogurt
  • Crushed chocolate sandwich cookies
  • Milano cookies
  • Candy corn pumpkins and candy corn
  • Chocolate icing

In a clear plastic cup, gently mix cool whip and yogurt. Top with crushed chocolate cookies. Stand a Milano cookie up along edge to be a tombstone. Use a toothpick dipped into icing to write R.I.P. or another saying on the gravestone.

Place candy corn pumpkins and other candies to decorate.

Celery Mummies

  • Veggie cream cheese
  • Celery sticks
  • Ham slices, cut into thin strips
  • Dried cranberries, cut into pieces

Spread or pipe cream cheese into celery piece. Place or wrap ham pieces in a criss-cross pattern over celery, so that it looks like bandages. Add two dried cranberry eyes between bandages.


Apple Bites

  • Large apple slice or two smaller apple slices
  • Your favorite jam, nut butter or sunflower butter 
  • Slivered almonds or pumpkin seeds

Slice large apple slice down middle, while keeping intact. Or, place two apple slices together to resemble a mouth. Spread on jam or nut butter for the tongue. Add slivered almonds for teeth.

P.S. The pudding cup was Sam's favorite.

Wednesday, September 27, 2017

Banana Muffins with Nutella Swirl

My son Sam truly loves to be in the kitchen — almost as much as he loves Nutella. I need more ways to get him to eat more bananas.

Say hello to banana muffins with Nutella. You can use your favorite banana bread or banana muffin recipe here. The chocolate-hazelnut topping makes these treats special for breakfast or a snack.

Kids can help by swirling the Nutella into the muffin batter.

Mangia! Mangia!
Andrea


Banana Muffins with Nutella Swirl
Inspired by this recipe from MyRecipes.

1 cup all purpose flour
1 cup whole wheat flour
2 teaspoons baking powder
1/2 teaspoon salt
1 stick unsalted butter at room temperature
3/4 cup sugar
2 large eggs
3 ripe bananas, mashed
1 teaspoon vanilla extract
1/2 cup Nutella

Preheat oven to 350 degrees. Coat a 12-muffin tin with cooking spray.

In a medium bowl, whisk together flours, baking powder and salt. In a second bowl, beat butter and sugar until fluffy, about 3 minutes. Add eggs, banana and vanilla and beat until smooth.

Add flour mixture in batches, beating to incorporate after each addition. Use a spatula to scrape down the side of the bowl.

Divide batter among the muffin tins. Top each muffin with a heaping teaspoon of Nutella. Using a toothpick, swirl Nutella into muffin batter.

Bake until golden brown, about 20 minutes. Remove from oven and let cool.


Wednesday, September 13, 2017

Cherry Berry Bars

If you ever find yourself with a mess of berries and cherries that need be consumed quickly, this recipe is your new best friend.

After buying more berries than my family could eat, I decided to cook them in a saucepan to make a compote to serve with yogurt or ice cream. When my oldest son started asking for a cherry pie, I improvised.

These dessert bars were delicious, with a dough that reminds me of shortbread. My kids put them in their school lunches and ate them for after school snacks. They disappeared from my kitchen in just a few days.

Mangia! Mangia!
Andrea


Cherry Berry Bars
Inspired by this recipe from the Kitchn

7 to 8 cups of berries (blackberries, strawberries, raspberries) and cherries, hulled or pitted, and halved
1/2 cup granulated sugar
1 tablespoon lemon juice
1 tablespoon corn starch
1 tablespoon water
3 cups all purpose flour
3/4 cup granulated sugar
1/2 teaspoon baking powder
1/4 teaspoon salt
2 large egg yolks
2 teaspoons almond extract
2 sticks cold, unsalted butter, cut into cubes
1 tablespoon melted butter
1 tablespoon course sugar

Preheat oven to 350 degrees. Coat a 9 x 13 inch baking pan with cooking spray.

Place berries, cherries and 1/2 cup sugar in a medium saucepan over medium heat. Cook until berries break down and release their juices, stirring frequently to avoid burning and lowering the flame if needed.

In a small bowl, mix corn starch with water until dissolved. Stir into berries. Continue to cook until berries thicken. Remove from heat and stir in lemon juice. Set aside to cool.

Insert the blade attachment on your food processor. Add flour, sugar, baking powder, and salt and pulse to combine. Add egg yolks, almond extract and butter. Pulse in short intervals until dough comes together (about 1 minute). The dough will be crumbly and soft.

Transfer about 2/3 of the dough to the baking pan. Use your fingers to press the dough into the bottom of the pan. Spread the cherry mixture evenly over the dough.

Scoop tablespoons of the remaining dough into your hand and flatten them into an oval shape, then place on top of berry mixture. Repeat until you use all of the dough, evenly spacing the dough ovals on top of the fruit. The berries will not be completely covered.


Brush the dough pieces with the melted butter, then sprinkle with the coarse sugar.

Bake until the dough is light brown and the fruit is bubbling, about 40 minutes. Cool completely in the pan before cutting into bars.


Wednesday, July 19, 2017

Mini Cherry Pies

Nothing says summer like cherry pie, so here you go!

If your family likes cherries, these sweet little tarts will hit the spot for dessert or a hearty snack.

And if you don't have a cherry pitter, I recommend investing in one. I found a model that pits 6 cherries at a time for under $20. My son Sam gets great satisfaction out of using it; I love having a helper in the kitchen.

This recipe calls for a homemade crust, and I recommend taking the small amount of extra time needed to make it. So yummy.

Mangia! Mangia!
Andrea


Mini Cherry Pies
Inspired by this recipe from Cooking Light

1 cup unbleached all-purpose flour
1/2 cup whole wheat flour
1/2 teaspoon kosher salt, divided
4 1/12 tablespoons chilled, unsalted butter, cut in chunks
1/4 cup ice water
2 tablespoons chilled vodka
5 tablespoons, plus 2 teaspoons turbinado sugar, divided
2 tablespoons corn starch
5 cups fresh cherries, pitted and halved
2 teaspoons fresh lemon juice
Optional: 1 large egg white, lightly beaten

Items you will need:

  • Baking sheet lined with parchment paper. 
  • Six 4-inch tart pans. 

No tiny tart pans? Use mini foil pie dishes instead.

Place flour and salt in a food processor and pulse to combine. Add butter and pulse a few times until mixture looks crumbly. Add 1/4 cup water and vodka. Pulse about 6 times or until the dough comes together.

Place dough on lightly floured surface and knead 2-3 times. Divide dough into 12 equal-sized balls.

Roll each ball of dough out into a roughly 4-inch cycle. Arrange on the lined baking sheet. Cover with parchment or plastic wrap and chill for 1 our or until firm.

Preheat over to 375 degrees. Move oven rack to middle position.

Combine remaining 1/4 teaspoon salt, 5 tablespoons sugar and cornstarch in a large bowl. Add cherries and lemon juice, gently mix to combine.

Divide pie filling among the 6 tart or pie pans. Top each with second pie crust, or let your kids cut out fun dough shapes and use those instead.


Brush top crust, if using, with egg white. Sprinkle remaining sugar over crust or dough cut-outs.

Line a baking sheet with foil. Place tarts on baking sheet and bake for 35 to 40 minutes or until mini pies are golden and bubbly. Remove from oven and cool 10 minutes.

Take pies out of pans to cool completely.

Serve warm or at room temperature. My boys liked these with ice cream on top.

Wrap and refrigerate leftovers.


Friday, January 13, 2017

No Sugar Granola Bars

I've mentioned a time or twenty that my son is a picky eater. Selective, they say in some circles. One food that he is usually willing to eat is granola bars. His absolute favorite are iced oatmeal cookie-flavored Clif Zbars, but when I get my act together (wait...that never actually happens), we love to make homemade granola bars together.

Some of our favorites are these No Bake Granola Bars. They are crazy good, but I wanted to come up with a version that had less sugar. I was having a hard time getting my new bars to stick together, so I turned to you, friends, for help! Thanks to your comments and suggestions on Facebook, we came up with a winning recipe.

Dates add sweetness, stickiness, and a hearty helping of fiber. Peanut butter contributes protein and more holding power so these bars don't crumble. Oatmeal means you'll be full all the way to lunch time. Ground flaxseed boosts the healthy omega-3 fatty acids. I did include mini chocolate chips on top, but this is an optional ingredient. There's no way my kid will touch a granola bar without chocolate chips, so it's a non-negotiable in my house. With mostly healthy ingredients, a little bit of chocolate can't hurt, right?

One thing I do know: when it comes to granola bars, crowd sourcing for the win!

Let's get cooking!
Erin


No Sugar Granola Bars

25 pitted dates
2 cups old fashioned oats
1 cup peanut butter
1/2 cup pecans
1/4 cup ground flaxseed
3 tablespoons honey
1 teaspoon vanilla
1/4 teaspoon salt
1/3 cup mini chocolate chips (optional)

Pulse all ingredients except chocolate chips in a food processor until combined. Press evenly into a foil-lined 8" square pan. Sprinkle with chocolate chips and press them into the bars. Refrigerate 1 hour before removing the foil and slicing into bars. Store granola bars in the refrigerator.

Wednesday, December 14, 2016

Stuffed Bread

This time of year it's nice to get cooking with the kids in the kitchen. My brother Greg visited last weekend and we made stuffed bread (aka, pizza rolls).

I used to make these in my pre-kid days, when the husband and I spent our weekends watching various sporting events with friends.

The rolls are easy to prepare and they make for a quick dinner that goes nicely with a salad. These also make great appetizers, snacks and party or lunch-box fare.

Our favorite part? You can dress them up or down, make them sweet or savory and really use any kind of filling you want. We made three stuffed breads: pepperoni, sausage supreme and taco. Other ideas: brie, cranberry and nut; peanut butter and jelly, etc.

Just remember not to overstuff the bread, or you'll end up with the filling exploding out of the bread and onto the pan (which might even happen anyway.)

Mangia! Mangia!
Andrea

P.S. If you like this recipe, check out more of my brother's creations by searching #gregssundaydinner on Instagram and Facebook.


Pepperoni Stuffed Bread

1 package refrigerated pizza dough (not thin crust)
1/2 to 3/4 cup tomato sauce, plus more for dotting on top
6 slices provolone cheese
Pepperoni slices (about 1/2 a package)
1/2 cup shredded mozzarella cheese

Pre-heat oven to 400 degrees.

Line a baking sheet with parchment paper.

Unroll pizza dough onto parchment and gently spread it out to a rectangle shape.

Spread tomato sauce in a thin layer on the dough. Top with the provolone slices. Add the pepperoni slices.

My son Sam and my brother Greg working on the pepperoni roll.
Top with shredded mozzarella. Dot with small dabs of additional tomato sauce.


Starting with a short side of the dough, gently roll the dough up. Smooth out and seal the opposite end of the dough. Pinch the ends together and tuck them under the roll.


Reduce oven heat to 375. Bake stuffed bread for about 30 to 40 minutes, or until the bread is golden brown on top.
As you can see, some of the filling escaped from one of our stuffed breads.
Let stuffed bread cool a bit before cutting.

Sausage Supreme Stuffed Bread

1 package refrigerated pizza dough (not thin crust)
1/2 to 3/4 cup tomato sauce, plus more for dotting on top
6 slices provolone cheese
3/4 cup scant cooked sausage crumbles
1/2 cup thinly sliced bell pepper
1/2 of a small onion, thinly sliced
1/2 cup shredded mozzarella cheese

Pre-heat oven to 400 degrees.

Line a baking sheet with parchment paper.

Unroll pizza dough onto parchment and gently spread it out to a rectangle shape.

Spread tomato sauce in a thin layer on the dough. Top with the provolone slices. Add the sausage crumbles, pepper and onion slices. Top with shredded mozzarella. Dot with small dabs of additional tomato sauce.

Starting with a short side of the dough, gently roll the dough up. Smooth out and seal the opposite end of the dough. Pinch the ends together and tuck them under the roll.

Reduce oven heat to 375. Bake stuffed bread for about 30 to 40 minutes, or until the bread is golden brown on top. Let cool a bit before cutting.

Taco Stuffed Bread

1 package refrigerated pizza dough (not thin crust)
1/2 to 3/4 cup salsa or taco sauce, plus more for dotting on top
6 slices cheddar cheese
3/4 cup scant cooked taco meat (use your favorite)
1/2 cup thinly sliced bell pepper
1/2 of a small onion, thinly sliced
1/2 cup shredded cheddar cheese

Pre-heat oven to 400 degrees.

Line a baking sheet with parchment paper.

Unroll pizza dough onto parchment and gently spread it out to a rectangle shape.

Spread taco sauce or salsa in a thin layer on the dough. Top with the cheddar slices. Add the taco meat. Top with shredded cheddar. Dot with small dabs of additional taco sauce or salsa.

Starting with a short side of the dough, gently roll the dough up. Smooth out and seal the opposite end of the dough. Pinch the ends together and tuck them under the roll.

Reduce oven heat to 375. Bake stuffed bread for about 30 to 40 minutes, or until the bread is golden brown on top. Let cool a bit before cutting.

Not to be left out, our dog Trixie also tried to get in on the action of making stuffed bread!


Friday, December 9, 2016

Savory Pesto Palmiers

I love to cook. But, here's the thing; appetizers are hard for me. And they're really, really hard if I need to bring that appetizer to a party. I have to come up with something that travels well, is still tasty at room temperature, and is easy to make because...life. Sigh.

Recently I had to bring an appetizer to a Christmas party, so I dug into the HDHH archives for inspiration. Way back in 2011 I posted a recipe for Savory Pesto Palmiers. They met all of my appetizer requirements: travels well, tasty, and easy. Plus it was high time I took some updated photos. (I'm no photographer, but I thought I could do better than this.)

As I said in my original post, today's recipe is absolutely perfect for the shin-digs filling up your social calendar during the holiday season. And they sound as classy as you'll look in your hipster skinny tie. Savory Palmiers. You can prepare them ahead and pop them in the oven just before your guests arrive. Or bring them to the party already cooked. Although they're sublime straight from the oven, these palmiers are also delicious at room temperature.

Party on, dudes.

Let's get cooking!
Erin


Savory Pesto Palmiers
From The Barefoot Contessa. Originally posted November 2011.
Makes 50-60 appetizers

1 package frozen puff pastry, defrosted
1/4 cup prepared pesto
2/3 cup crumbled goat cheese
1/4 cup finely chopped sundried tomatoes
1/4 cup toasted pine nuts
Salt

Unfold one of the puff pastry sheets onto a lightly floured board or parchment paper. Roll it out slightly using a rolling pin until the pastry is about 9.5" x 11.5". (Mine was a bit bigger than this, and it worked just fine.)

Spread half of the pesto over the pastry. Sprinkle with half the goat cheese, half the tomatoes, and half the pine nuts. Season with salt.

Starting at the short end of the pastry, roll each end halfway toward the center. Then fold each end toward the center again until the folded edges almost touch. Fold one side over the other and press together gently. Transfer to a parchment lined baking sheet. Repeat the process with the second sheet of puff pastry and the remaining ingredients. Cover the puff pastry with plastic wrap and refrigerate for at least 45 minutes.

Preheat the oven to 400 degrees. Cut the rolls of puff pastry into 1/4" thick slices.

Place the palmiers face up on baking sheets lined with parchment paper. Bake for 14 minutes until the palmiers are puffed and golden. This makes about 60 appetizers, so you might need to bake them in batches. If you bake two trays of palmiers at once, make sure you rotate them halfway through so they cook evenly. Serve warm or at room temperature.

P.S. You can reheat Savory Palmiers at 350 degrees for about 7 minutes.

P.P.S. I can't help but share when my kids come to "help" when I'm taking blog pictures. Palmiers are officially toddler approved.

Wednesday, September 21, 2016

Oatmeal Chip Squares

Say hello to a stand-by afternoon snack at our house. Crispy on the outside and chewy on the inside, these bar cookies are packed with enough fiber and sweetness to fill those empty after-school bellies.

(These squares hold up well inside the lunch box, too.)

I like to add dried cherries or cranberries or raisins to these, depending on what my boys will tolerate.

The ease of getting bar cookies into the oven makes me a big fan, but you can easily use this recipe to make drop cookies if you prefer.

My son Sam says the only bad thing about these oatmeal chippers is that he wants to eat them all day long. (Love that kid!)

Mangia! Mangia!
Andrea


Oatmeal Chip Squares
(Inspired by recipes from Quaker Oats and Ocean Spray)

3/4 cup packed brown sugar
1/2 cup white sugar
1 stick plus 6 tablespoons softened butter
2 eggs
1 teaspoon vanilla
1 1/2 cups flour
1 teaspoon baking soda
1 teaspoon cinnamon
3 cups old fashioned oats
1 cup chocolate chips
1 cup white chocolate chips
1 cup dried fruit (cherries, cranberries, raisins, etc.)
1/4 cup mini chocolate chips

Preheat oven to 350 degrees. Line a 9 x 13 inch baking pan with parchment paper so that paper hang over each end.

With an electric or stand mixer, beat butter and sugars until fluffy. Add eggs and vanilla and beat well.

Add flour, baking soda and cinnamon and mix well.

Add oats and mix. Add dried fruit and mix with a wooden spoon. Be sure to scrape the sides and bottom of the bowl to incorporate all dry ingredients into the wet ingredients.

Transfer cookie dough to baking pan. Use a spatula to evenly spread dough in pan. Smooth the top and sprinkle with mini chocolate chips.

Bake for about 30 minutes or until the top is lightly browned and a toothpick inserted in center comes out clean. Cool completely.

Use edges of parchment paper to lift bar cookie out of pan. Set on cutting board and cut into squares.

Goes well with a cold glass of milk!

Wednesday, August 10, 2016

Katrina's Gazpacho

A few weeks ago my boys and I took a trip to New York to visit family and friends. It's been a few years since I was last in my old stomping grounds and it was nice to see how some things have changed – or not.

We took a trip into Queens to see two of my friends from high school and their families. Anne and Katrina are the kinds of friends I know I'll have for life. We spent our formative teen years together. Even if many months go by between visits, we easily pick up where we left off whenever we do see each other.

My boys were super excited to see how people live in the city. They couldn't imagine living in an apartment. They were pleasantly surprised by Katrina's Jackson Heights home, complete with a large outdoor courtyard that provided plenty of room to play — you guessed it — baseball.

Katrina went all out and made a delicious lunch, including this amazing gazpacho. People, this is one of the best things I've eaten. The cold soup is more like summer in a drink and it is just perfect for a hot day.

Lucky for me, one of my boys didn't want his serving so of course I couldn't let it go to waste! Katrina kindly shared her recipe. She started with this New York Times version and tweaked it to her liking. I made it as soon as we were back in Peoria. I was going to bring it to a gathering of girlfriends, but the husband and I slurped it down ourselves instead.

I think the key to making this recipe work is good tomatoes, preferably homegrown or locally farm grown. It's perfect for a midday meal, dinner or a snack.

Katrina's version was less pulpy than mine. I think this is because she used a small mesh strainer to painstakingly remove all of the solids from the soup. I used a larger non-mesh strainer. It definitely removed a lot of the solids, but some still made it into the final product.  If you have a mesh strainer or cheese cloth, I recommend one of those methods.

Mangia! Mangia!
Andrea


Katrina's Gazpacho

2 pounds of  ripe red tomatoes, cored and cut into chunks
1 cucumber (about 8 inches long) peeled and cut into chunks 
1 small yellow or white onion, peeled and cut into chunks
1 or 2 garlic cloves
1 long, light green pepper, cored, seeded and cut into large pieces (Adjust your choice based on your preferred spice level: Try an Anaheim or cubanelle. I used a Hungarian wax pepper.)
2 teaspoons sherry vinegar, plus more to taste
2 teaspoons salt
1/8 to 1/4 cup extra virgin olive oil, plus more for drizzling

Add tomatoes, cucumber, onion, garlic and pepper to a blender or food processor (you may need to work in batches.) Blend at high speed until very smooth, between 2 and 5 minutes. Stop blending and scrape down the sides as needed.

Add vinegar and salt and continue to blend. With the motor running, drizzle in the olive oil. The mixture should become an orange or pink color. It should transform into a smooth texture like a salad dressing. If the mixture is watery, add more oil until it achieves a creamy consistency.

Strain mixture into a large bowl to remove solids. Use a rubber spatula to push the liquid through. Discard solids. 

Pour gazpacho into a large pitcher (glass is preferred) and cover top with plastic wrap. Chill overnight (or for at least 6 hours.) Pour into cups or bowls and drizzle with olive oil before serving.

Gazpacho is great for sharing with friends.


Friday, July 15, 2016

Coconut Crunch Granola

I've made a bunch of granola recipes. There's Autumn Spice Granola with the warmth of cinnamon, ginger, and nutmeg. Low-Fat Granola when you're on a health kick and No-Stir Granola when you're feeling lazy. Tropical Almond Granola is perfect when you're ready for a Hawaiian vacation but you're firmly rooted on the mainland.

But this Coconut Crunch Granola, you guys? This one is my new fav.

It's extra rich with layers of coconut flavor from unsweetened coconut and coconut oil. And somehow the vanilla extract makes everything taste more coconut-y. Oats, almonds, hemp seeds, chia seeds, and ground flax keep you full until lunchtime. And maple syrup lends a subtle sweetness that will make even your pickiest eaters happy.

Next time you're looking to mix up your breakfast routine or add a new snack to the mix, give Coconut Crunch Granola a try!

Let's get cooking!
Erin


Coconut Crunch Granola

5 cups old fashioned oats
1 cup unsweetened coconut
1 cup slivered almonds
1/2 cup chia seeds
1/2 cup ground flax seeds
1/4 cup hemp seeds
1/2 cup coconut oil, melted
1/2 cup maple syrup (I'm talking pure maple syrup here, not pancake syrup.)
1 teaspoon vanilla extract
1 teaspoon salt
1/2 teaspoon cinnamon

Preheat oven to 325 degrees.

In a large bowl combine oats, coconut, almonds, chia seeds, flax, and hemp seeds. In a separate small bowl combine coconut oil, maple syrup, vanilla, salt, and cinnamon. Pour the liquid ingredients into the dry ingredients and stir until everything is evenly coated.

Pour the granola onto two very large rimmed baking sheets. (Two half sheet pans would work well.) Bake for 40-45 minutes, stirring thoroughly a couple times, until granola is fragrant and toasted to a golden brown. Allow to cool to room temperature. Granola keeps well in a sealed container for a couple weeks.

Monday, June 27, 2016

Watermelon Pizza

We had friends over for dinner last week. The moms and four girls went to the pool first. Between pool time and it being nearly 100 degrees out, my goal was to keep it easy and to turn up the heat as little possible in the kitchen. So, Jeff smoked a beautiful salmon. I threw together a salad and pulled out the pasta salad I'd made the night before. For dessert, I thought it would be fun for Lucy and Penny and their friends Hannah and Sophie to make the watermelon pizza I'd seen in my latest Good Housekeeping magazine.

Aren't they all adorbs?

From left to right: Penny, Hannah, Lucy and Sophie hard at work making watermelon pizzas.


The girls loved making their "pizzas," but didn't love eating them so much. The "sauce" — made of cream cheese, ricotta and honey — was weird and I tended to agree. But they liked the berries and the watermelon itself, of course. In the future, I'd turn this into a fruit salad, cutting the watermelon into bite-sized chunks and mixing in the berries and a little mint. I bet they'd gobble it up.

Still, it was fun to watch and a great way to get kids involved in the kitchen.

XOXO,
Amy


Watermelon Pizza
Adapted from Good Housekeeping

1 seedless watermelon, cut into four rounds
8 ounces cream cheese, softened
16 ounces ricotta cheese
2 tablespoons honey
Couple handfuls of coconut, toasted
Variety of berries of your choosing -- blueberries, strawberries, raspberries, blackberries
Kiwi, optional but could serve as your "pepperoni"
1 bunch of mint, roughly chopped

Mix cream cheese, ricotta and honey together. Spread this "sauce" on your watermelon rounds. Next, sprinkle toasted coconut and top with berries and fruit. Sprinkle chopped mint.

Cut each round into quarters. Enjoy!

Friday, June 17, 2016

Banana Breakfast Cookies

Danny and I made No-Bake Granola Bars last week. We sat at the kitchen table, shoveling them down like there was no tomorrow (Danny ate four in one sitting. FOUR.), and Elaine looked on glumly as she pushed her Cheerios around her tray. Poor little Elaine wanted a granola bar, too. Lame-o Cheerios ain't gonna cut it when everyone else is eating something as wonderful as a No-Bake Granola Bar. But the bars have honey in them. And since Elaine isn't one year old yet, honey is off limits.

So I set out on a mission to find a tasty and healthy treat that both my kids could enjoy. I've pinned a million recipes for breakfast cookies, and I had a pile of overripe bananas to use up. Inspiration struck.

Elaine went bananas (no pun intended) over these Breakfast Cookies. She ate two for snack and two more for breakfast the next day! Mission accomplished.

Let's get cooking!
Erin


Banana Breakfast Cookies
Adapted from With Salt and Wit
Makes 12 cookies

3 small, very ripe bananas
2 teaspoons vanilla extract
1 1/2 teaspoons cinnamon
1/4 teaspoon salt
2 cups oats*
3 tablespoons ground flax
2 tablespoons chia seeds
1/4 cup mini chocolate chips (optional, but encouraged!)

Preheat oven to 350 degrees. Line a large baking sheet with parchment paper or grease with cooking spray. Set aside.

In a medium bowl, mash bananas as thoroughly as possible. Stir in vanilla, cinnamon, and salt until everything is evenly incorporated. Stir in oats, flax, chia seeds, and chocolate chips.

Form dough into 12 balls (they'll be slightly bigger than golf balls) and place on prepared baking sheet. Use the bottom of a greased glass to gently press each ball into a cookie shape. Bake for about 13 minutes, until cookies are set, but soft to the touch in the center. Cool on the baking sheet for 5 minutes before removing to a wire rack to cool completely. Store cookies in the fridge.

*I used old fashioned oats because my son is a fan of the hearty oat texture. If your family doesn't like the texture of old fashioned oats, try quick cooking oats.

Wednesday, May 25, 2016

Pudding Mix Brownies

My kids love brownies. When I promised to make some for an after school snack, I didn't realize I was out of cocoa powder. Not wanting to run to the store, I decided to try using pudding mix instead.

Adding pudding mix to cakes and breads delivers moist baked goods, something I learned while experimenting with Amish friendship bread starter.

My boys agree that it works just as well in brownies.

Mangia! Mangia!
Andrea


Pudding Mix Brownies
Inspired by this recipe from Food.com

1 cup unsalted butter, softened
1 tablespoon vegetable oil
3/4 cup dark or light brown sugar
1/4 cup white sugar
2 eggs
1 teaspoon vanilla
1 3.9 ounce package, plus 2 tablespoons chocolate instant pudding mix (change the flavor to whatever you prefer)
2 1/4 cups white whole wheat flour
1 teaspoon baking soda
1 to 3 tablespoons water
2 cups chocolate chips

Preheat oven to 375 degrees. Spray a 9 by 13 inch baking pan with nonstick cooking spray. Set aside.

In a large bowl, combine butter, oil and sugar. Beat in eggs, vanilla and pudding mix with an electric mixer.

Add flour and baking soda and mix together by hand or with an electric mixer. If batter is too dry, add up to 3 tablespoons of water, one at a time, until all dry ingredients are combined. Batter should be moist, but not wet.

Add chocolate chips and mix well.

Pour brownie batter into prepared pan. Bake for 20 to 30 minutes, or until a toothpick inserted in the middle of the pan comes out clean.

Let cool, then cut into squares and enjoy!


Friday, April 29, 2016

Banana Zucchini Toddler Muffins

Elaine is eight months old, and she loves eating solid food. (Insert the cliche...she's growing up so fast!! Sniffle.) I've been making some purees, buying some jarred baby food, and feeding her bits from the table. I'm trying to keep it low pressure and fun for all of us.

Elaine is much more into self-feeding than Danny was. It's still pretty tricky for her to get food into her mouth, but she's persistent! I've been trying to figure out healthy foods that are easy for her to eat herself...things that aren't too slippery or crunchy. It dawned on me that muffins might be just the ticket. She can hold them in her little fists and chomp them up with her two tiny teeth.

My pal Therese directed me to her favorite healthy toddler muffin recipe that was full of fruit and veggies. I tweaked it a little, and I was thrilled with the results. So were my kids.

Let's get cooking!
Erin

P.S. Want more baby food recipes? Check out this post about some of my favorite homemade purees, including sweet potato and chicken baby food.


Banana Zucchini Toddler Muffins
Adapted from A Song of Sixpence
Makes about 28 mini muffins

1/4 cup vegetable oil
1/4 cup unsweetened applesauce
1/4 cup brown sugar*
2 very ripe bananas, mashed
2 eggs
1 teaspoon vanilla extract
3 zucchini, shredded
1 cup flour
1/4 cup chia seeds
1/4 cup quick oats
1 teaspoon baking soda
1 teaspoon cinnamon
1/2 teaspoon salt

Preheat oven to 375 degrees. Grease a mini muffin pan and set aside.

Stir together oil, applesauce, brown sugar, bananas, eggs, and vanilla extract until combined. Stir in zucchini.

In a separate bowl, whisk together flour, chia seeds, oats, baking soda, cinnamon, and salt. Stir the wet ingredients into the dry ingredients.

Fill mini muffin cups with batter. (I filled mine almost to the top.) Bake for about 15-17 minutes, until muffins spring back when touched and a toothpick inserted into the center comes out clean. Cool in the pan for 5 minutes, then remove to a wire rack to cool completely.


*This is not a lot of sugar, so these muffins have just a hint of sweetness. This is perfect for the baby, but just know that this isn't your standard sweet muffin. If you're looking for that, you might want to check out Coconut Carrot Muffins or Blueberry Zucchini Bread.

Wednesday, April 13, 2016

Chia Seed Pudding

Chia seeds are rocking my world these days.

After finding a warehouse-club sized tub of them in my pantry, I needed to find a way to use them up. My husband was adding the nutritious seeds to smoothies for awhile, but lately this jar was just taking up space.

Not anymore.

A Facebook post from a friend was the first I'd heard about chia pudding and I was definitely curious. I had no idea that chia seeds bloom into a tapioca-like concoction when soaked in almond or coconut milk. Food & Wine magazine dishes up lots of chia seed recipes, so I got to experimenting.

The longer the pudding sets, the thicker it will get. Do let it chill for at least 3 or 4 hours. The pudding keeps well for about 3 days in the refrigerator.

Chia seed pudding makes a filling breakfast or snack and a yummy sweet dessert. Chia seeds are packed with fiber, protein and calcium, too.

My favorite is the simplest: chia seeds, light vanilla almond milk and honey.

You can definitely get creative here. Please let us know how you do chia seed pudding.

Mangia! Mangia!
Andrea

P.S. Need other ideas for cooking with chia seeds? They taste great in these no-bake granola bars, too.

P.S.S. Be sure to use almond milk that does not contain carrageenan, a thickening agent which can irritate digestion in some people.


Chai Spiced Chia Seed Pudding
1 1/4 cups coconut milk (light or full fat) or almond milk
1/2 cup water
1/2 cup chia seeds
1 teaspoon vanilla
1/4 teaspoon ground cardamom
1/4 teaspoon cinnamon
1/8 teaspoon ground cloves
1/8 teaspoon ground ginger
1 teaspoon maple syrup

Combine all ingredients in a bowl. Mix well. Cover with an air tight lid or transfer to bowl with an air tight lid. Refrigerate at least 4 hours to overnight, stirring occasionally.

Serve chilled with blackberries and a drizzle of maple syrup. Granola would be nice on top, too.


Vanilla Chia Seed Pudding
2 cups almond milk (any variety. I use light vanilla)
1/2 cup chia seeds
3 tablespoons honey or agave nectar
1 teaspoon vanilla

Add all ingredients to medium bowl. Stir to combine.  Cover with an air tight lid or transfer to bowl with an air tight lid. Refrigerate at least 4 hours to overnight, stirring occasionally.

Top with fruit and/or nuts. I used dried cranberries and candied walnuts.


Pumpkin Pie Chia Seed Pudding
2 cups almond milk (any variety. I use light vanilla)
1 cup pumpkin puree
3 tablespoons maple syrup
1 teaspoon vanilla extract
1/2 cup chia seeds
2 teaspoons cinnamon
1/4 teaspoon nutmeg
1/8 teaspoon ginger
1/8 teaspoon kosher salt

Mix all ingredients together in a bowl. Cover with an air tight lid or transfer to bowl with an air tight lid. Refrigerate at least 4 hours to overnight, stirring occasionally.

Serve chilled with pecans and a sprinkle of cinnamon. A dollop of whipped cream wouldn't hurt, either!


Monday, April 4, 2016

Three Ways to Bake with Bananas

Ripe bananas are regular residents on my kitchen counter – and in my freezer – and I'm always on the lookout for new ways to put the fruit to work in our daily diets.

We love banana bread, but I wanted to jazz up our snack and breakfast routine, and find ways to add more fiber and vitamins to my boys' between-meal munchies.

So I've been recipe testing. I've hit on three yummy ways to turn those sweet bananas into something special – in the form of cookies, blondies and muffins.

My boys and their friends tried these treats and gave them a thumbs up. They're also approved by several moms and a few dads, too!

Mangia! Mangia!
Andrea


Oatmeal, Banana, Date & Chocolate Chunk Cookies
Inspired by this recipe from the Food Network.

Note: I made a few batches of these cookies. The kids didn't really like the original recipe (above). Adding banana and putting chocolate chunks on top made them a hit with the kiddos.

2 cups of rolled oats
2/3 cup packed dark brown sugar
8 tablespoons (1 stick) of unsalted butter at room temperature
1 large egg
2 medium to large bananas
2 teaspoons of vanilla extract
1 cup whole wheat pastry flour or white whole wheat flour
3/4 teaspoon baking powder
3/4 teaspoon cinnamon
1/4 plus 1/8 teaspoon fine salt
1 cup pitted dates, chopped
1 cup chocolate chunks or chips, divided

Preheat oven to 350 degrees.

Spread oats on a baking sheet and bake in oven until golden brown, about 10 to 12 minutes. Turn or mix once during cooking time. Transfer toasted oats to a bowl to cool. Wait until you taste the nutty flavor the toasted oats add to the cookies!

Line two cookie sheets with parchment paper and set aside.

Beat sugar and butter on medium high speed until the mixture is slightly fluffy, about 5 minutes. Scrape down the sides as needed. Add egg and vanilla and beat until very fluffy, about another 2 to 3 minutes. Add one banana and bet until fully combined. Set aside.

Add the flour, cinnamon, baking powder and salt to the mixing bowl with the oats. Whisk or stir to combine. Add flour mixture to butter mixture and beat until just combined. Mash the second banana and stir it into the cookie dough with a wooden spoon. Add dates and 1/2 cup chocolate chunks or chips and mix by hand.

Drop level tablespoons of cookie dough on the baking sheet. Leave about 1 inch between cookies. (You should get 28 to 30 cookies out of this recipe.)

Top each cookie with 2 or 3 chocolate chunks.

Bake for about 12 minutes or just until cookies are a light golden color. Let cookies cool on a wire rack and enjoy!


Chocolate-Bottom Banana Blondies
Inspired by this recipe from the New York Times.

Note: There seemed to be too many cookie crumbs and not enough butter the first time I made these blondies, so I tweaked the recipe a bit. I also left out the nuts because my boys won't eat them.

3 sticks unsalted butter, plus more to grease pan
2 1/2 to 3 cups chocolate graham cracker crumbs (you can make your own in a food processor.)
1/4 cup light brown sugar
1/2 teaspoon fine salt
2 ripe bananas, mashed
2 large eggs
2 1/2 cups dark brown sugar
2 teaspoons vanilla extract
1 cup white whole wheat flour
Flaky sea salt for sprinkling on top

Heat oven to 375 degrees. Line a 9-by-13 inch pan with parchment paper and grease with butter.

Melt 1 1/2 sticks (12 tablespoons) of butter in the microwave or in a saucepan.

In a food processor, combine 2 1/2 cups cookie crumbs, melted butter, light brown sugar and a pinch of salt. Process until the mixture is like damp sand. If the mixture is too wet, add the rest of the cookie crumbs.

Dump cookie crumb mixture into prepared baking pan and spread out evenly. Press crumbs down into an even layer. Bake for 7 to 10 minutes until the surface is firm. Remove from oven and set aside.

Reduce oven temperature to 350 degrees.

In a medium saucepan over medium heat, melt 1 1/2 sticks (12 tablespoons) of butter and let cook until foamy. Stir and continue to cook until the foam goes away and the melted butter turns a nutty brown color. (Hint: Use a metal or light colored pan so that you can see the color change when it happens.) Remove browned butter from heat and let it cool.

In a large bowl, whisk together bananas, brown sugar and vanilla. Add browned butter and whisk until incorporated. Add flour and salt and stir to combine. Pour mixture over the prepared crust and spread out evenly. Sprinkle with flaky sea salt if using.

Place pan in pre-heated oven and bake until tooth pick inserted in center comes out clean, or whiter just a few crumbs attached, about 45 to 55 minutes. Transfer pan to a wire rack to cool.

Lift blondies out of pan using the edges of the parchment paper. Cut into squares (about 24) and indulge.


Healthy Banana Oat Muffins
From this Food Network recipe.

Note: These muffins were delicious the first time, but they seemed to dry out as they cooled, so I added more banana to keep them moist.

1 stick (8 tablespoons) unsalted butter
1 1/2 cups white whole wheat flour
1/2 cup plus 2 tablespoons rolled (old fashioned) oats
1 teaspoon baking powder
1/2 teaspoon fine salt
1/4 teaspoon baking soda
1/2 cup reduced fat sour cream
1/2 cup packed dark brown sugar
1 teaspoon vanilla extract
2 large eggs
2 medium bananas and 1 smaller banana, mashed

Preheat oven to 350 degrees. Line a 12-cup muffin pan with muffin liners.

Melt the butter in a small pan over medium heat and cook until it gets foamy. Continue cooking while stirring until the foam goes away and brown specks start to appear. Pour into mixing bowl and let cool.

In a large bowl combine flour, 1/2 cup of oats, baking powder, salt and baking soda. Set aside.

To the browned butter, add sour cream, sugar and vanilla. Whisk to combine. Add the eggs and whisk. Fold wet ingredients into dry ingredients and mix until just combined. Add bananas and mix. A few lumps are OK.

Divide batter evenly among the muffins cups. Sprinkle remaining oats on top.

Bake until golden brown on top and when a toothpick inserted in center comes out clean – about 20 to 24 minutes. Cool in pan. Enjoy as a snack or for breakfast.


Friday, April 1, 2016

No-Bake Granola Bars (Kid-Approved!)

My 3-year-old son loves granola bars. Loves them. Unfortunately, his favorites are enrobed in a thick casing of chocolate. Delicious, yes, but not the healthiest treat. So I set out to make a granola bar that he would find just as tasty, but would fill his belly with healthier ingredients.

I'm always looking for ways to sneak protein and fiber into Danny's meals. These granola bars feature oats, peanut butter, almonds, and chia seeds to add nutritional punch. A sprinkling of mini chocolate chips, and he overlooks the healthy stuff. That's a win in my book.

And since my boy enjoys a cooking project, we got to make this snack together. Full bellies? Check. Mother-son bonding? Double-check.

Let's get cooking!
Erin


No-Bake Granola Bars
Adapted from Two Peas and Their Pod

2 cups quick oats*
1 cup Rice Krispies
1/2 cup sliced almonds
3 tablespoons chia seeds
4 tablespoons butter
1/2 cup peanut butter
Scant 1/4 cup brown sugar, loosely packed
1/4 cup honey
1/4 teaspoon salt
1 teaspoon vanilla
1/4 cup mini chocolate chips

Line a 9" square baking dish with aluminum foil. (I'm sure an 8" dish would work just fine, too. Your bars will just be slightly thicker.) The non-shiny side of the foil is non-stick, so make sure the shiny side is down so the non-shiny side will be touching the granola bars.

In a large bowl, stir together oats, Rice Krispies, almonds, and chia seeds. Set aside.

Combine butter, peanut butter, brown sugar, honey, and salt in a small saucepan over medium-low heat. Bring mixture to a boil. Allow it to boil for two minutes, stirring constantly, then remove from the heat. Stir in vanilla.

Very carefully pour melted peanut butter mixture over oat mixture and stir until everything is completely combined. Place into prepared baking dish and press granola bar mixture into the bottom of the pan. Sprinkle with chocolate chips and gently press so they adhere.

Refrigerate for 30 minutes. Slice into bars that are the best size for your family. I cut mine into 18 bars, and that seemed just right. (Although Danny could eat two per serving!) Store in the fridge.


*Since I didn't cook these granola bars, I used quick oats. I think old fashioned oats would be too chewy. But let me know how they turn out if you make a substitution!