Showing posts with label sides. Show all posts

Monday, August 1, 2016

Amy's Pimento Cheese

I have loved and craved pimento cheese, a Southern staple, since I was pregnant with Lucy, who is 9 1/2. Fortunately, in Charlotte it's not hard to find good pimento cheese in restaurants and grocery stores, not to mention at get-togethers with friends. I just can't believe it took me this long to make my own.


On crackers or pita chips, plain or in a sandwich, I really love pimento cheese. My girls like to take pimento cheese in their school lunches. Bless their little Southern hearts. If you have never had a grilled pimento cheese sandwich ... well, get on that.


You might also consider making pimento cheese a day or two ahead of when you want to serve it. I noticed mine tasted better after it sat for a few days in the fridge; it was less mayonnaise-y than the very first day. My N.C.-born and bred friend Ashley came over several days after I made my pimento and declared, "This is very good."

XOXO,
Amy

PS: Pimento cheese joins my other Southern dishes — collards, cornbread, deviled eggs and low country boil.

Amy's Pimento Cheese

16-ounce block of extra-sharp cheddar cheese, shredded
8 ounces cream cheese softened
Scant 1/2 cup mayonnaise
1/4 teaspoon garlic powder
1/4 teaspoon onion powder — or extremely finely grated onion
1/4 teaspoon cayenne pepper (optional)
4-ounce jar of diced pimento, drained
Salt and pepper to taste

First, make sure to buy a block of extra-sharp cheddar cheese and shred it yourself, using the side of the grater that make larger shreds. Pre-shredded cheese that you buy at the store has been dusted with cellulose to keep the shreds from sticking together, which doesn't make for good pimento. And now that I know this I may never buy pre-shredded cheese again.

Place cream cheese in large bowl of electric mixer and mix at medium speed until lighter and no big chunks remain. Add in remaining ingredients and mix on medium, occasionally stopping to use a spatula to turn the mixture by hand so that all is blended together.

Refrigerate in an air-tight container a couple hours before eating. Can last a week or more in the fridge.

Don't forget to make some grilled pimento cheese sandwiches!

Monday, June 6, 2016

Oven-Roasted Kohlrabi Medley

I recently came into some kohlrabi -- when the Friday cycle instructor brought in some grown by her budding farmer son, owner of Old Sol Produce. I'd heard of kohlrabi, but wasn't sure what to with it. First, let me explain that  kohlrabi is in the cabbage family and is a popular vegetable in German fare in and today's farm-to-table restaurants. The taste is like a cross between cabbage and the sweeter broccoli stems. I think it's delicious.


So, anyhow, I found a bunch of cool recipes online for things like kohlrabi fritters and even a kind of salad with radishes (kohlrabi can be eaten cooked or raw), but in the end I didn't have time to do anything fancy, so I just roasted it with a bunch of other vegetables -- carrot, parsnip, eggplant and red onion.


BTW, here is a great guide from the kitchn on How To Roast Any Vegetable. I love the roasting times by vegetable type.

I recommend giving kohlrabi a try -- at home or when you're at a farm-to-table restaurant.

XOXO,
Amy

Oven-Roasted Kohlrabi Medley

2 kohlrabi, trimmed, outer later peeled/removed and cut into 1/4" to 1/2" slices
A variety of vegetables cut and trimmed. Use whatever you like or have on hand.
Cooking spray
Salt, pepper and seasoning to taste
1-2 table spoons olive oil

Preheat oven to 425 degrees. Prepare vegetables. Spray pan, baking dish or sheet with cooking spray. Place vegetable in a single layer and top with salt and pepper and seasoning of your choice. (I used Penzeys Sunny Paris seasoning.)

Place in oven and check  every 15 minutes until veggies are roasted sufficiently -- to your taste. If you are roasting softer vegetables (i.e. tomatoes, yellow squash) with root veggies (i.e. carrots, parsnips, kohrabi), you might want to add those later in the roasting process as they won't take as long. Again, consult the kitchn's guide above.

The fork is piercing a piece of kohlrabi.


Monday, November 23, 2015

Spiced Cranberry Sauce

Growing up I always liked cranberry sauce at Thanksgiving, even though all my family ever did was open up a can of Ocean Spray. Imagine my surprise when many years later, I discovered the awesomeness of homemade cranberry sauce.

At Thanksgiving 2006, I found my forever cranberry sauce -- the kind I have been making every year since and will contine to make for ... well forever. That year, my editor Mike and his wife Alison invited us to celebrate the holiday at their house. I was three weeks away from having my first baby, so you can imagine how relieved I was not to be cooking. I had nothing else to do but stuff my face. What I remember the most: the cranberry sauce, spiced with cloves. I liked the cranberry sauce so much that Alison kindly shared the recipe, which she'd gotten from Mike's mom.

I've shared my forever cranberry sauce recipe with so many friends and  now with you, dear readers. Enjoy and have a very happy Thanksgiving!

XOXO,
Amy

PS: Check out Erin's Thanksgiving Round-Up, in which she offers up Citrus and Ginger Cranberry Sauce a la her mother-in-law.


Spiced Cranberry Sauce
1 cup sugar
1/4 teaspoon allspice
1/4 teaspoon nutmeg
1/2 teaspoon cinnamon
1/4 teaspoon cloves
1 pound fresh cranberries
1 cup pineapple juice

Combine all items in a sauce pan and bring to a boil. Adjust heat down to medium or medium high and cook for 10-15 minutes. Serve hot or cold. This cranberry sauce can be kept in the refrigerator for several weeks or frozen, too.

One final thing: I always double this recipe so that there's enough for Thanksgiving leftovers and even some for Christmas. It's easy to do since the recipe calls for a pound of cranberries but Ocean Spray packages berries in 12 ounce bags; just buy three bags of berries to double.

Monday, November 16, 2015

Prosciutto-Wrapped Asparagus Spears

You know what goes nicely with Andrea's Buttermilk Spoonbread? You know what would make a tasty appetizer?

Prosciutto-Wrapped Asparagus Spears.

Cooking really can be that simple, my friends.

I made this combo for dinner the other night and it reminded me of a grown-up version of breakfast for dinner. Truthfully, my husband hates breakfast for dinner (a.k.a. brinner), so this was a genius move on my part.

XOXO,
Amy


Prosciutto-Wrapped Asparagus Spears

Equal number of asparagus spears and prosciutto slices
Melted butter or olive oil, couple tablespoons

Preheat oven to 375 degrees.

Trim asparagus. My mom has a friend who taught her how to trim the right amount and I think of Mom's friend every time I make asparagus. So with your sharp knife start at the very bottom of the asparagus and tap your way toward the top until you feel a slight give. When you feel the give, that's where you cut.

Wrap one piece of prosciutto around each stalk.

Brush each stalk with melted butter or olive oil.

Place in oven until asparagus is roasted and prosciutto is crispy, about five minutes.

Tuesday, September 8, 2015

Greek Salad Quinoa Salad

I eat quinoa every day. Every day. Usually, it's my Tomato-Avocado Quinoa Salad. But recently I needed to shake up my quinoa routine, so I created this yummy Greek Salad Quinoa Salad, using ingredients that I just happened to have on hand and that would normally go into a Greek salad.

Readers, I have found a new favorite quinoa salad.

PS: If you loved Erin's Bulgar Salad with Tomatoes and Cucumbers, you will love this, too.


Greek Salad Quinoa Salad

3 cups cooked quinoa
1 cucumber, seeded and diced
1 red pepper, seeded and diced
Heaping 1/4 cup red onion, finely chopped
3/4 cup feta cheese, crumbled
Ground pepper and sea salt to taste
Cherry tomatoes (if desired), cut in half, for serving
Greek olives (if desired), for serving
Fresh basil (if desired), for serving
Olive oil (if desired), for serving (FYI: I put a 1/2 tablespoon on the above serving.)

Combine quinoa, cucumber, red pepper, red onion, pepper and salt. When serving, add whatever combination of the "if desired" ingredients suits your fancy. Or maybe you can think of other toppings to make this dish your own. On the day I created this yumminess, I didn't have any fresh basil or Greek olives on hand.

BTW, the reason I add the tomatoes at the end is because I think the salad will keep better in the fridge and not get soggy.

Also, you can totally adjust the ratio of ingredients to suit your taste buds.

Finally, fyi, just as with the Hungarian Sour Cream Cucumber Salad, I got to use a cucumber grown on my Tower Garden!

Monday, August 31, 2015

Hungarian Sour Cream Cucumber Salad

We grew cucumbers! It only took two and a half months from seeds to cukes, but we did it!

Just before we harvested our first cukes from our Tower Garden, I asked friends on Facebook for their favorite recipes. My friend Brian suggested a sour cream cucumber salad and several friends backed that up. Apparently, this is a quintessential Southern summertime dish. While I have lived in Charlotte for the past 12 years and have also lived in Birmingham, Alabama, and Lexington, Kentucky, I had no idea! Definitely making this again!

XOXO,
Amy

PS: I added Hungarian to the name, because I saw other versions of this salad use that in the recipe phrase AND the hubby and I just visited -- and loved -- Budapest!


Hungarian Sour Cream Cucumber Salad
Inspired by Tasteofhome.com

1/2 cup sour cream (I use light)
3 tablespoons white vinegar
1 tablespoon white sugar
Ground pepper to taste
3-4 cucumbers, peeled (if desired) and thinly sliced
1 small sweet onion or 1/2 Vidalia onion, thinly sliced
Dill to taste

In a large bowl, whisk together the sour cream, vinegar, sugar and pepper. Add the cucumbers and onion, tossing to coat. Cover and refrigerate for at least four hours. Top with dill and serve.

Note: When preparing this for a dinner party Chez George, I forgot to read the recipe sufficiently in advance, so I didn't know about the fridge time. The salad was able to sit in the fridge for only about an hour. It still tasted good, but it was definitely better the next day. Sometimes things just have to marinate.

Here is my younger daughter Penny, who harvested our first cucumbers from our Tower Garden.


Monday, August 17, 2015

Blue Cheese Corn on the Cob

One summer, years ago, Jeff and I attended a party at a reporter friend's lake house. Our friend Dan could cook and grill as well as he could write. Now he owns his own barbecue catering company and he's written a cookbook or two. Dan, you are living the dream!

Anyhow, Dan made this blue cheese corn on the cob that I have literally (and I don't use that word lightly) been thinking about every summer since. He pulled back and tied the husk to form a handle and then he dipped each ear into a vat of melted butter and blue cheese and he grilled it until the kernels turned a nice caramel color. I believe he brushed more butter and cheese over the ears in the grilling process.

This past weekend, I came up with a less messy, indoor version of Dan's corn on the cob. It's also a little kinder on the arteries, but, man, was Dan's corn the best.

XOXO,
Amy


Blue Cheese Corn on the Cob

Corn on the cob, cleaned  and husked
Soft or melted butter
Salt
Pepper
Blue cheese crumbles, about 1 ounce per ear of corn

Preheat oven to 425 degrees.

Place ears of corn on cookie sheet.

Brush each ear with butter. (BTW, I just invested in a French-style butter crock that allows me to keep soft butter on the counter top instead of the fridge. Should have done this years ago. Love it.)

Salt and pepper each ear.

Bake for 20 minutes, turning halfway through.

After 20 minutes or when a few kernels have started to turn a nice caramel color, remove corn from oven and top with blue cheese. Return corn to oven and cook for 2-4 minutes or until cheese is melted and bubbly.

Note that some of the yummy cheese will have slid off the ears and onto the cookie sheet. It would be a sin to let that stuff go to waste. Roll the ears of corn over that goodness or take a knife and spread it onto the corn.

Eat immediately.


Monday, July 20, 2015

Deviled Egg Sampler

I recently overbought on the egg front. What to do? Make deviled eggs, of course. Plenty of other good reasons to whip up deviled eggs, too. I love using my pretty deviled egg plate. Plus, my older daughter Lucy recently discovered a love of deviled eggs; she ate like six at a wedding reception.

What's better than deviled eggs? A deviled egg sampler, of course. In mine: traditional, poppy seed and curried.

Mmm. Mmm. Mmm.


At top: curried. On right: traditional. On left: poppy seed.


My favorite in this sampler: the curried. Anyone who knows me and my love of Indian food would  not be shocked. Lucy plopped two of the traditional style in her mouth in about five seconds. Penny went for poppy seed. The hubby tried them all and remains a traditionalist at heart.

I bet you will come up with varieties we haven't even thought of.

XOXO,
Amy

Deviled Egg Sampler
8 eggs, hard boiled (See directions below)
Salt
1 teaspoon ground mustard, divided in half
1/2 teaspoon curry powder
1/2 teaspoon poppy seeds
3 tablespoons mayonnaise, divided in thirds

First, prepare the hard boiled eggs with this fool-proof method.

Take eggs out of fridge, so they start to come closer to room temperature. Add salt to a pot of water and boil. When water is boiling rapidly, use a slotted spoon to place each egg in the pot. Reduce to a moderate boil and cook eggs for 10 minutes. This timing is what ensures that the eggs are not overcooked; the yellow part of the eggs stays yellow and doesn't turn that gross green color around the edges.

Just before the egg time is up, fill a bowl with ice and cold water. When time is up, use a slotted spoon to gently remove each egg from the hot water and place in the bowl of ice and cold water. This last step ensures that  the eggs will stay nicely intact when you peel them.

Peel eggs immediately or drain water and place in fridge until you are ready to make your deviled eggs. I get better results if I peel immediately. I always make eight eggs to yield 12 deviled egg halves. By making eight eggs, I have enough eggs yolks to fill 12 halves and if I wreck two of the egg whites it's no big deal.

After you peel the eggs, slice in half and scoop out the insides. Divide the yolks evenly into three bowls. Add a bit of salt (to taste) to each bowl.

For traditional deviled eggs, add half a teaspoon of ground mustard and one tablespoon of mayonnaise to one bowl with egg yolk and salt. Combine/mash with a fork. Fill four eggs and top with paprika.

For poppy seed deviled eggs, prepare the a bowl as you did for traditional eggs and add half a teaspoon of poppy seeds. Combine ingredients. Fill four eggs.

For curried deviled eggs, add half a teaspoon of curry powder and a tablespoon of mayonnaise to  the third bowl with egg yolks and salt. Combine ingredients. Fill  four eggs and top with garam masala.

Eat immediately.

PS: A word on the mayonnaise. If you are using store-bought and you live in the South, you use Duke's. All other brands are lame.

Monday, July 13, 2015

Open-Grill Brussels Sprouts

You know how I mentioned in last week's post on Chili Lime Corn Salad how we Georges are eating simply -- because of our kitchen renovation? Well, the kitchen work continues and so do our challenges putting dinner on the table. But thank goodness it's summer and we can grill. So the other day the hubby was again grilling sausages and I whipped up these Brussels sprouts based on what I had on hand that was also easily accessible (i.e. not packed up in some box stacked in the dining room).

The results? Delicious. The hubby and I were fighting over the grilled onions, which weren't even the main event in this yummy side dish.


Also, BTW, I tend to make Brussels sprouts entirely on the fly. For example, check out my Roasted (Kitchen Sink) Brussels Sprouts.

XOXO,
Amy


Open-Grill Brussels Sprouts
16 ounces Brussels sprouts trimmed
1 red onion, cut into big hunks
2 tablespoons olive oil
1 tablespoon honey
Juice of 1 lemon
Salt and ground pepper, to taste


Toss all ingredients and then put veggies into grill basket. Grill over open flame for about 10 minutes. Shake occasionally. Veggies are done and ready to be removed from grill when Brussels sprouts are browned on some sides and  onions are turning translucent.


PS: I've mentioned grilling sausages in my last two posts. If you live in Northern Ohio,  check out Hasselbach Meats in Fremont. When visiting my family at Lake Erie, we stop by the award-winning family-owned Hasselbach meat shop and  fill up a cooler of brats, Italian sausages and what are called "fresh sausages" to bring home to Charlotte. Below is a pic of our grill with Brussels sprouts and Hasselbach's fresh sausages.


Monday, July 6, 2015

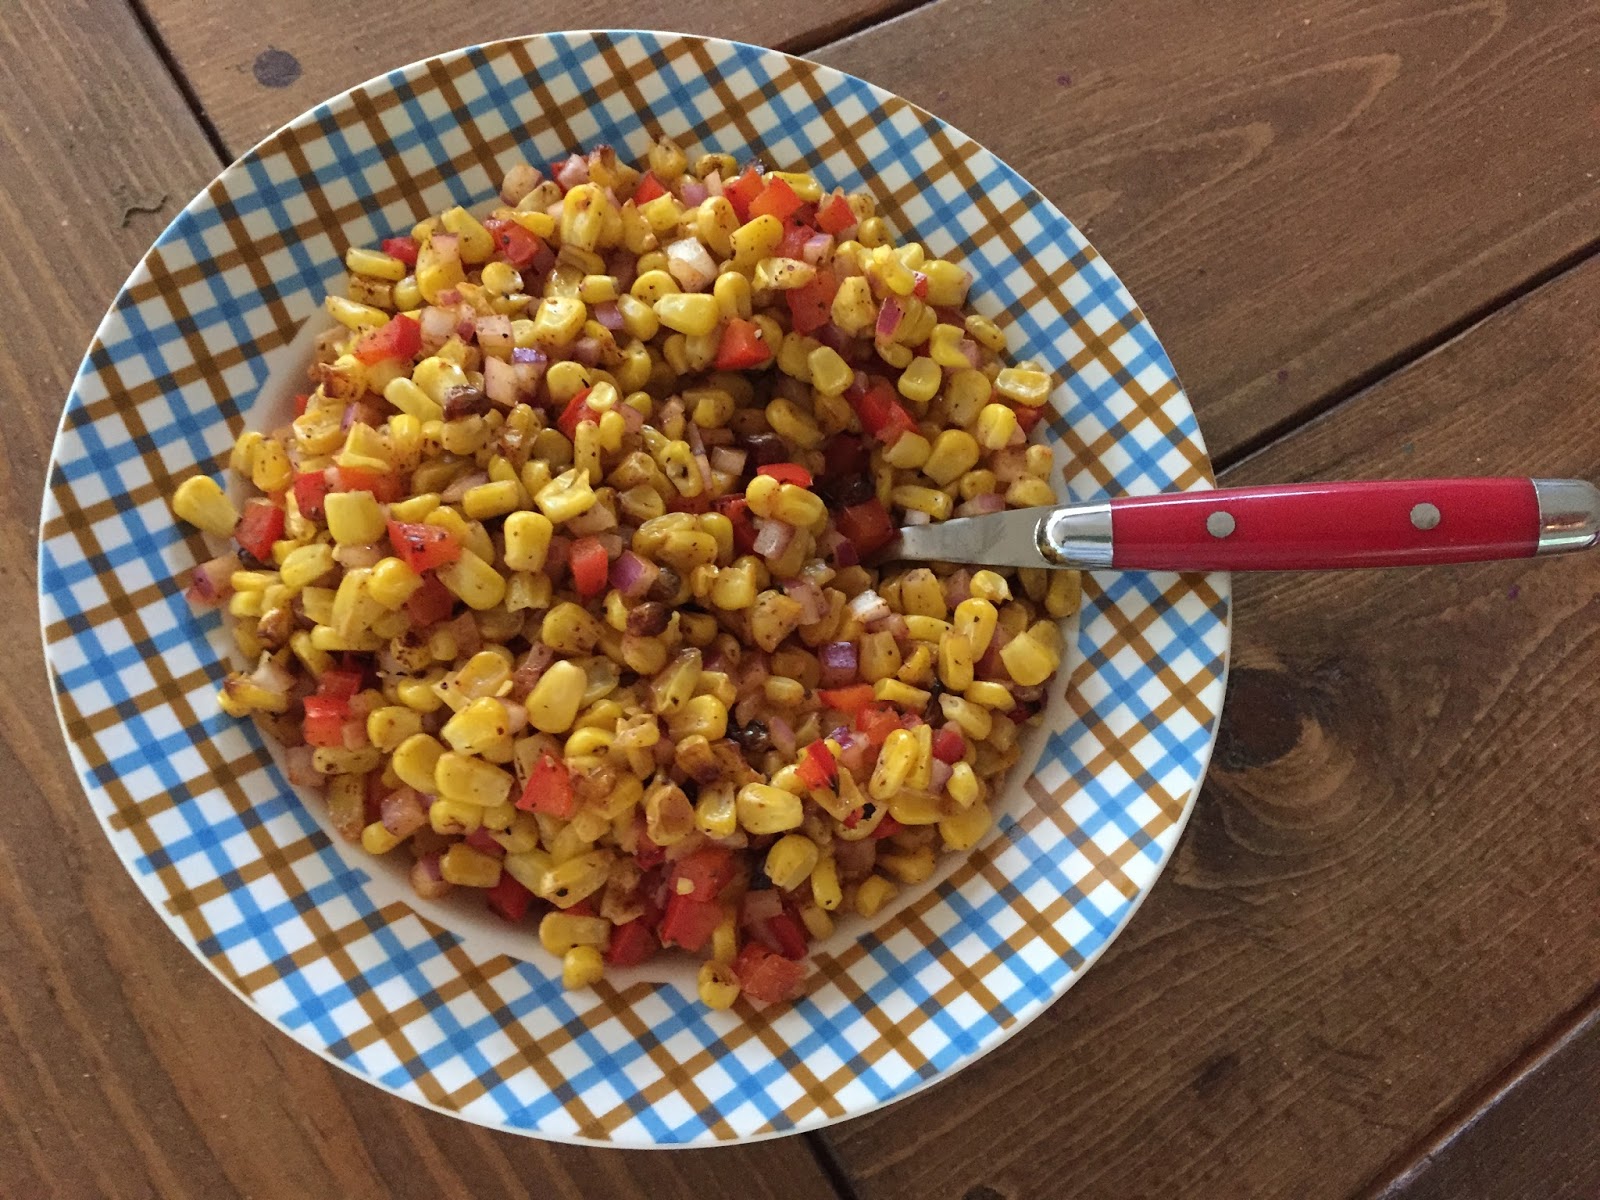
Chili Lime Corn Salad

We have been eating pretty simply this summer -- when we've been eating at home, that is. You see, we are remodeling our kitchen. It is exciting. It is stressful. In our upstairs main kitchen, we have use of our new dual-fuel range, but no sink. Luckily, we have a partial kitchen downstairs with a sink. At least I'm getting a workout while I cook.

So, anyhow, the other night while the hubby grilled sausages, the kids and I whipped up this corn salad that I just made up in my head as we went along. (For their part, the kids gathered the ingredients, spread  the corn and peppers on the cookie sheet and, otherwise, just kept me company.)

The kids were so-so on the dish, but hubby and I enjoyed it. I will make it again and will plan ahead to have fresh cilantro on hand. Cilantro would be a nice finishing touch -- taste wise and visually.

XOXO,
Amy


Chili Lime Corn Salad

16 ounces of corn (fresh or frozen)
1 red pepper, diced
1 tablespoon olive oil
Salt, pepper
1/4 medium to large red onion, diced finely
1 lime
1 teaspoon chili powder
Fresh cilantro, to taste (optional)

Spread corn and diced red pepper on a cookie sheet. Sprinkle the olive oil over the corn and peppers. Give the pan a light coat of salt and ground pepper. Roast at 400 degrees for about 20 minutes, or until some kernels change to a nice caramel brown.

Combine into one bowl the corn, peppers and onion. Stir in the juice of one lime and one teaspoon of chili powder. Top with fresh cilantro if desired.

Monday, June 1, 2015

Family Cornbread

Growing up I don't think I ever knew you could make cornbread from a Jiffy box or that some "cornbread" is sweet. Now I'm more than all grown  up and here to tell you that cornbread should never come from a box or taste sweet.

My family always made homemade savory cornbread. That's why I call this Family Cornbread. My Ohio-born mom learned how to make it after marrying my Tennessee-born dad. Cornbread and homemade banana pudding with scratch-made (no box!) vanilla pudding.

Growing up we'd have Family Cornbread and beans for dinner. My grandma would make it to use in her cornbread stuffing, which also featured hard boiled eggs, the neck of the turkey and sage. (Note to self: Make grandma's stuffing.)

I serve Family Cornbread with all kinds of meals: beans, pulled pork, brisket -- to name a few. My BFF Andrea serves it with her Turkey, Black Bean & Sweet Potato Chili.

And while I don't keep  boxes of cornbread mix in my pantry, I do keep Ziploc bags of Family Cornbread mix. It's a trick I learned from Mom. Get an assembly line of bags going in your kitchen and add enough dry ingredients to each to make one cornbread. Smart.

XOXO,
Amy


Family Cornbread

3/4 cup all purpose flour
1 1/4 cup yellow or white cornmeal
1 tablespoon sugar
1/4 teaspoon baking soda
3/4 teaspoon baking powder
1 beaten egg
4 tablespoons melted shortening (Mom and I just use olive oil.)
1 1/2 cup buttermilk (Mom and I use light buttermilk.)

Preheat oven to 425 degrees. Grease bottom and sides of 9-inch cast iron skillet; I use Crisco.

Combine ingredients -- dry first and then wet -- and pour into prepared skillet. Bake for 25 minutes or until golden brown at the edges and pulling away from the pan. Remove from oven and immediately flip the cornbread onto a plate. Cut into wedges and serve with butter. Enjoy!