Showing posts with label main dish. Show all posts

Wednesday, March 14, 2018

Cheesy Spinach & Bacon Triangles

Spinach is often on our dinner table and I am forever trying to find ways to get my kids to eat the leafy vegetable.

Who wouldn't like spinach with cheese and bacon? My boys — of course.

The good news: My husband and I loved this side dish, and since there were lots of leftovers, my main course for lunch the next day was good to go.

You can tailor this to your tastes by using your favorite type of cheese or leaving out the bacon.

Mangia! Mangia!
Andrea


Cheesy Spinach & Bacon Triangles
Inspired by this recipe from Family Circle

Cooking spray
3 10 ounce packages of frozen chopped spinach, thawed
8-9 slices of thick-cut bacon, chopped
1 cup whole wheat flour
4 eggs
1 cup milk
1 teaspoon baking powder
1 teaspoon salt
1/2 teaspoon ground black pepper
4 to 6 green onions, sliced
1 cup shredded mozzarella cheese
1 cup shredded cheddar cheese
1/4 cup shredded Parmesan cheese

Heat oven to 375 degrees. Generously spray bottom and sides of a 13-by-9 inch baking dish.

Wrap spinach in a clean kitchen towel. Holding towel over the sink, squeeze out as much water as you can.

Heat a skillet or Dutch oven over medium heat and cook bacon until crispy. Transfer bacon to a dish lined with paper towels. Reserve 1 tablespoon bacon drippings.

In a large bowl, mix 1 tablespoon bacon fat with flour, eggs, milk, baking powder and salt and pepper. Add spinach, cheese, bacon and green onions and stir until well combined.

Spread mixture into prepared baking dish. Bake for 30 minutes or until top starts to turn light brown in spots.

Remove from oven and cool slightly. Cut into triangles.

Serve warm or at room temperature.


Monday, January 29, 2018

Beef Stir Fry with Broccolini and Red Peppers

Like Chinese take-out, but the greasiness and saltiness not so much? Yeah, me too. I like to cook dishes that remind me of all that I love about Chinese take-out but in a healthier way. Like Sriracha Pork Noodles and now this dish, Beef Stir Fry with Broccolini and Red Peppers.

Pleased to report it was a George family crowd pleaser, though one child would have preferred it with broccoli over broccolini. BTW, that would be a fine substitution if you can't get broccolini at your market or if you know it will be met with certain resistance.

XOXO,
Amy


Beef Stir Fry with Broccolini and Red Peppers
1 cup long-grain white rice
3 tablespoons toasted sesame oil, divided
1 1/4 to 1 3/4 pounds flank steak, thinly sliced against the grain
1 pound broccolini, trimmed and cut into 2-inch pieces
1 red pepper, sliced into thin strips
4 cloves garlic, thinly sliced
1 bunch of green onions, sliced thin to the dark green parts
1 1/2 cups unsalted beef broth
3 tablespoons soy sauce
1 1/2 tablespoons light brown sugar
2 teaspoons cornstarch

Cook rice according to package directions.

Meanwhile, heat 1 tablespoon oil in large skillet over high heat. Add beef and cook, tossing often, until only slight pink — about 3 to 4 minutes. Transfer to bowl. Note that the beef will continue to cook through after you remove it from the heat, so you don't want to overcook it on the stove. Dump liquid left in the skillet into the sink.

Add broccolini, peppers and remaining 2 tablespoons oil to skillet. Cover and cook, uncovering to toss halfway through, for 4 minutes. Uncover and cook for 2 more minutes, stirring often. Add garlic and green onions and cook until fragrant — about 1 minute. Transfer to bowl with beef and toss gently to combine.

Whisk together broth, soy sauce, sugar and cornstarch. Add to skillet and bring to a boil; cook until thickened and glossy — about 1 minute. Serve veggies and beef over rice and drizzle sauce on top.


Monday, October 2, 2017

Singapore Noodles

Singapore noodles is like the original Asian fusion dish. First of all, they originated in Hong Kong, not Singapore. Plus, there's a little bit of China (soy sauce), a little bit of Thai (rice noodles) and a little bit of India (curry).

I've been meaning to try this recipe from Cook's Illustrated for years and finally got around to doing it one weekend night recently. It's involved with a lot of steps, making it not suitable for a weeknight week, in my opinion. While this dish was perfectly good the night I made it, it tasted even better as leftovers.

XOXO,
Amy


Singapore Noodles
Based largely upon Cook's Illustrated
4 tablespoons plus 1 teaspoon vegetable oil or olive oil
2 tablespoons curry powder
1/8 teaspoon cayenne pepper (optional)
6-8 ounces rice vermicelli
2 tablespoons soy sauce
1 teaspoon sugar
12 ounces large shrimp (ideally 26 to 30 per pound), peeled and deveined, cut into 1/2 inch pieces, OR smaller shrimp (36 to 40 per pound, peeled and deveined and left whole
4 large eggs, lightly beaten
1/4 teaspoon salt, and extra for serving, as needed
3 garlic cloves, minced
1 teaspoon grated fresh ginger
1 red bell pepper, stemmed, seeded and cut into 2-inch-long matchsticks
2 large shallots, sliced thin
2/3 cup chicken broth
4 ounces (2 cups) bean sprouts (optional) (I hate bean sprouts, so no way)
4 scallons, finely cut
2 tablespoons lime juice, plus lime wedges for serving

Heat 3 tablespoons oil, curry powder and cayenne, if using, in 12-inch nonstick skillet over medium-low heat, stirring occasionally until fragrant, about 3-4 minutes.

Bring 1 1/2 quarts of water to boil. Place noodles in large bowl. Pour boiling water over noodles and soak noodles until flexible, but not soft, about 3 minutes. Drain noodles and transfer to cutting board. Using a chef's knife cut pile of noodles roughly into thirds. Return noodles to bowl, add curry mixture, soy sauce and sugar; use tongs to toss until well combined. Set aside.

Wipe out skillet with paper towels. Heat 2 teaspoons oil into skillet over medium-high heat until shimmering. add shrimp in even layer and cook without moving them until bottoms are browned, about 90 seconds. Push shrimp to one side of skillet. Add 1 teaspoon oil to empty side of skillet. Add eggs and sprinkle with 1/4 teaspoon salt. Using rubber spatula, stir eggs gently until set but still wet, about 1 minute. Stir eggs into shrimp and continue to cook, breaking up big pieces of egg, until eggs fully cooked — about 30 seconds longer. Transfer shrimp-egg mixture to second large bowl.

Reduce heat to medium. Heat remaining 1 teaspoon oil in empty skillet until shimmering. Add garlic and gingers and cook, stirring constantly, until fragrant, about 15 seconds. Add bell pepper and shallots. Cook, stirring frequently, until vegetables are a little tender but also still crisp, about 2 minutes. Transfer to bowl with shrimp-egg mixture.

Return skillet to medium-high heat, add broth to skillet  and bring to simmer. Add noodles and cook, stirring frequently, until liquid is absorbed, about 2 minutes. Add noodles to bowl with shrimp-egg and vegetable mixture and toss to combine. Add bean sprouts, scallions and lime juice and toss to combine. Plate noodles and serve with lime wedges.

Monday, September 11, 2017

Oven-Grilled Tuna Steaks

This summer I did something I don't usually do, because of an utter lack of self control. I indulged in beer. Omigoodness I love beer. And not crap light beer but really good craft beer. By the beginning of August, I was ready to be done and start living cleaner. So the husband, who also loves the craft beers, and I have been eating healthier.

It's boring in a way — OK, in a lot of ways. But we have learned to appreciate some simple dishes that we never made at home. Like oven-grilled tuna steaks. Even our kids love these (who knew?), so this dinner has become a new go-to Chez George.

XOXO,
Amy


Oven-Grilled Tuna Steaks
3-4 half-pound tuna steaks
1 tablespoon lemon juice
2 tablespoons olive oil
Salt and pepper
Fresh herbs of your choosing

Preheat oven to 450 degrees. Spray baking sheet or inside of grill pan with non-stick spray.

Mix together lemon juice and olive oil with a fork. Brush the lemon juice and olive oil mixture over each side of each tuna steak. Salt and pepper each side. Sprinkle herbs (I used rosemary) to each side. Bake for four to six minutes per half inch of thickness, or until fish begins to flake when test with a fork but is still pink in the center. I have found sticking closer to the four-minute mark is best.

Serve with a steamed vegetable or salad for a really healthy dinner.


Monday, August 21, 2017

Poppyseed Egg Salad

A few weeks ago, with my nieces in town to hang out with my girls for what is known as Cousin Camp, we had a tea party with some other friends. I made PB&J and cream cheese and jam sandwiches in the shapes of hearts and flowers. But what about for the adults? I hadn't thought that far ahead. Fortunately, egg salad popped to mind, because all of the ingredients — including poppyseeds, which give this version a subtle nutty flavor and crunch — are always on hand.

My friend Ashley, who brought her girls to the tea party, and I were like "Omigosh, egg salad is sooooo good." There wasn't a whole lot of talking during the eating, actually.

Why don't I make egg salad more often? Well, the hubby is watching his cholesterol, and the kids won't eat it. But I'm here to tell you, my friends, that it's good to make dishes for just yourself (and a like-minded friend) sometimes. Besides, taste buds change, too. I now have one kid, Lucy, who absolutely loves this egg salad. I found out about Lucy's new love of egg salad when the leftovers that had my name (figuratively) all over them for a late post-cycle class lunch were half eaten when I got to them.

I hope you enjoy this simple, classic dish with a twist. I hope that sometimes you make something that only you like ... for now.

XOXO,
Amy


Poppyseed Egg Salad
12 hardboiled eggs
2 tablespoons yellow mustard
1/2 cup mayonnaise
1 teaspoon poppyseeds
Salt and pepper, to taste

Peel and cut up eggs; transfer to bowl. Add rest of ingredients and stir gently (so as not to make the eggs a mushy mess) until combined.

Question: Do you know how to boil eggs? That is, do you know how to boil eggs so that the yolks are perfectly cooked without any greenish hint of being overdone? And do you know how to boil eggs so that the shells come off easily, without taking out hunks of egg white?

No? Well, here is what to do. Place eggs in a pot and add water so that it there's at least an inch of water over the tops of the eggs. Add some salt to the water and set pot over high heat. Once the water comes to a rapid boil, allow water to continue its full-paced boil and the eggs to cook for another two minutes. Using a slotted spoon, remove eggs and transfer to a bowl of ice cubes and cold water. Peel eggs immediately after they are cooled, within about 10-15 minutes.

Oh, and here's Lucy enjoying an open-faced egg salad sandwich.

Monday, March 6, 2017

White Wine Mussels

Have you ever put off making a dish that you love, because you think it will be a big pain, and then you finally do, and it was super easy? For me that dish: mussels.

We love mussels. We being hubby Jeff, daughter #2 Penny and me. In fact, Penny, 8, ordered mussels for her Groundhog Day birthday dinner last month. Come Valentine's Day I decided to finally cook mussels.

People, mussels are like the quickest, easiest thing ever. I'm no wondering how often I can get away with make them. I'm going to change it up, using other ingredients like beer, curry and coconut milk.

The moral of the story is, don't put off cooking your favorite dishes. Get in the kitchen, and make it happen!

XOXO,
Amy

PS: How many mussels do you need to feed your crew? From my online research, I found that three pounds — along with some crusty bread — will generally serve as the main course for four people. You can stretch that further if serving mussels as an appetizer. Two pounds was plenty for dinner for me, Jeff and Penny. 


White Wine Mussels
2 tablespoons butter
4 garlic cloves, minced
1/4 teaspoon red pepper flakes
1 lemon, zested
1 shallot, finely chopped
2 cups white wine
Freshly ground black pepper to taste
2 pounds mussels, cleaned and debearded (You have to pull away beard-like hairs from where the shell is closed.)
Large handful of flat-leaf parsley, roughly chopped

Melt butter in a large stock pot over medium heat. Add garlic and let sizzle until fragrant, about 30 seconds. Add red pepper flakes, lemon zest and shallots, stirring for about 45 seconds.

Pour in the wine and season with black pepper. Bring broth to a boil, stir in mussels, and cover immediately. Shake pot and let boil for 1 minute.

Stir mussels, replace cover, and let boil for 2 more minutes. The shells will begin to open. Stir in parsley, cover pot and cook until all the shells are open, about 1 to 3 minutes. Do not overcook!

Serve with crusty bread, which is perfect for dipping in the yummy broth. BTW, don't try to eat any mussels that didn't open.


Monday, February 27, 2017

Slow Cooker 15-Bean Soup with Sausage and Spinach

For dinner in the winter, I'm satisfied with a warm bowl of beans. Growing up we'd often have beans and cornbread. Not fancy beans — just thrown in the crockpot with water or broth, a diced up onion,  that "ham" flavoring packet and maybe a leftover ham bone. And it was good. This is better, healthier even thanks to the spinach. In fact, I've made these beans twice in recent weeks and am officially declaring it my official, go-to, wintertime bean recipe.

The recipe is adapted from a favorite line of cookbooks: America's Test Kitchen's Healthy Slow Cooker Revolution. I made a few tweaks. For starters, I omitted the mushrooms (just sounds unappealing to me to cook mushrooms and beans together for 9 or so hours). I increased the amount of sausage from 8 ounces to 9-12 ounces (for easier math) as sausage typically comes in 12-ounce, 4-link packs. Likewise, I upped the spinach by an ounce, because the baby spinach I buy comes in a 5-ounce clamshell container. Lastly, the second time I made it, I used a 4-ounce container of chicken broth and the 2 cups of vegetable broth leftover in my fridge. Why open another container of chicken broth?

Anyhow, if you are craving an easy dinner that takes the edge off the winter chill, try this out. Tweak it; make it your own.

XOXO,
Amy

PS: A great thing to serve with this: my Family Cornbread.


Slow Cooker 15-Bean Soup with Sausage and Spinach
Adapted from Healthy Slow Cooker Revolution

9-12 ounces (3-4 links) hot or sweet Italian chicken sausage, sliced 1/2 inch thick
1 onion, chopped fine
6 garlic cloves, minced
1 tablespoon fresh thyme or 1 teaspoon dried
1/4 teaspoon red pepper flakes
6 cups chicken broth
2 cups water
8 ounce bag of 15-bean soup mix, flavoring packet(s) discarded
2 bay leaves
1/4 teaspoon salt (plus more to taste)
Black pepper to taste
5 ounces (5 cups) baby spinach

Microwave sausage, onion, garlic, thyme and pepper flakes in bowl until onion is softened (about 5 minutes), stirring halfway through. Transfer to slow cooker. Stir in broth, water, beans, bay leaves and 1/4 teaspoon salt. Add black pepper — to taste — now or later, if desired. Cover and cook on low until beans are tender — 9 to 11 hours on low or 6 to 8 hours on high.

Discard bay leaves. Stir in spinach and let sit until slightly wilted, about 5 minutes. Season with salt and pepper, if desired.

Monday, January 23, 2017

Shrimp and Quinoa "Paella"

I thought for sure my family would hate this dish. At dinnertime, Lucy, 10, wasn't having any of it. Penny, 7, who helped me make the entire thing liked the shrimp and quinoa parts. Jeff, age not disclosed, liked it all. That's a win, right?

It was light and tasty — just what we need after holiday binging. Looking for a new way to make quinoa? Give this a go!

XOXO,
Amy


Shrimp and Quinoa "Paella"
1/2 cup dry white wine
1 tablespoon saffron threads (or combine 1/2 teaspoon paprika and 1/4 teaspoon turmeric)
1 tablespoon olive oil
2 large tomatoes or smaller tomatoes, chopped roughly
1 small yellow onion, diced
1 red bell pepper, seeded and chopped
4 garlic cloves, minced
2 cups fresh sliced cremini mushrooms
1 cup uncooked quinoa
1 1/2 cups vegetable broth
1 teaspoon kosher salt
1/2 teaspoon ground black pepper
5 ounces baby spinach
8 ounces medium shrimp, peeled and cooked

Combine the wine and saffron and set aside until ready to use.

Heat oil in large skillet over medium heat. Add tomatoes, onions, peppers and garlic, and cook, stirring often, until vegetables have softened and cooked down, about 7 to 10 minutes.

Increase heat to medium high and add mushrooms. Cook, stirring occasionally, until mushrooms are softened, about 3 to 5 minutes.

Stir in wine and saffron. Bring all to a boil, stirring constantly, for 2 minutes. Add quinoa and stir to coat. Reduce heat to medium low and cook, stirring occasionally, until liquid is reduced by half — about 3 minutes.

Stir in broth, salt and pepper. Reduce heat to low, cover and cook until quinoa is tender — about 20 minutes.

Gently stir in spinach and top with shrimp. cover and cook until shrimp is heated through — about 3 to 4 minutes.

Monday, January 16, 2017

Chicken and Mushrooms in a White Wine Sauce

Last week, I wrote about this past New Year's Eve dinner theme: French. This post is part deux.

For NYE 2016 dinner we had French Onion Soup and Chicken and Mushrooms in a White Wine Sauce — the latter from The Little Paris Kitchen by Rachel Khoo.

I've cooked several of Khoo's dishes — Lemon and Lavender Chicken, Parisian Asparagus and Coq Au Vin on Skewers, to name a few. Each one has been accessible for us home cooks and delicious for all who enjoy simple French dishes. And the photography in this book is gorgeous. It's the prettiest cookbook I own. I'm such a fan that I've given it to several friends and family for holidays and weddings.

My uncle Frank, a recipient of LPK, says this is one of his favorites in the book. He sometimes makes the sauce to put on top of other dishes. Mais oui!

BTW, I didn't change up Khoo's recipe at all, except I forgot to slice the mushrooms (no big deal). Why mess with perfection?

XOXO,
Amy

PS: After writing this entire post, I got this feeling of déjà vu. Guess what? We rang in 2016 with a French theme and Little Paris Kitchen. Quelle surprise!


Sous chef Penny, 7, stirs the cream sauce.

Chicken and Mushrooms in a White Wine Sauce 
(a.k.a. Poulet aux champignons avec une sauce au vin blanc)
The Little Paris Kitchen by Rachel Khoo

For the sauce:
2 tablespoons butter
1/4 cup all-purpose flour
2 cups chicken stock (plus extra in case thinning is necessary)
1/2 cup dry white wine
4 tablespoons heavy cream
1 teaspoon lemon juice
Salt and pepper to taste

For rest of the dish:
2 tablespoons butter
1 pound chicken (or turkey), cut into chunks
8 ounces button mushrooms, sliced
Handful of finely chopped tarragon or parsley

Start by making the sauce. Melt the butter in a large pan over medium heat. Add the flour and beat hard until you have a smooth paste (roux). Continue to beat until the roux begins to have a golden color. Remove from the heat and gradually add in the stock, whisking constantly.

Put the pan back over medium heat and simmer on low for 10 minutes, whisking frequently to keep sauce from burning the bottom of the pan. If sauce becomes too thick, whisk in a little more stock.

Add the wine and continue simmering for 10 minutes. When time is up, remove from heat and whisk in the cream and lemon juice. Add salt and pepper to taste.

While the sauce is simmering, melt the butter in a large frying pan until sizzling, add the chicken and fry for a few minutes until golden. Add the mushrooms and cook for another 5 minutes or until chicken is cooked through.

To serve, mix the sauce with the chicken and mushrooms and sprinkle with some fresh tarragon or parsley. (I much prefer tarragon.)


Friday, January 6, 2017

Black Bean & Sweet Potato Burritos

After the insanity of the holidays, I'm struggling to get back to my routine. Back to the kitchen. Back to blogging. Back to doing laundry before I run out of clean socks...again.

When I'm struggling to get cooking, I always turn to the HDHH archives. It feels like a reading a journal. I remember when the investment dudes gave me the recipe for Baked Oatmeal, when I used to eat Peanut Butter & Stuff Sandwiches on my business trips to San Francisco, making Spring on Toast with Amy, when Therese introduced me to her Corn & Tomato Salad, my childhood babysitter who inspired Bacon Cheeseburger Rice, making Salmon with Dill Cream Sauce with Kelly and Jill, watching my mom bake Butterscotch Cashew Bars. These are good memories. And certainly inspiration enough to get hot dinner on the table.

It had been too long since I made Black Bean & Sweet Potato Burritos, a recipe I first tested for dinner co-op with Therese back in 2011. These vegetarian burritos were so stinking good, a perfect way to usher in the New Year and a return to culinary pursuits.

Do you guys have any cooking inspiration for 2017? We'd love to hear it!

Let's get cooking!
Erin


Black Bean & Sweet Potato Burritos
Adapted from An Occasion to Gather
Originally posted September 23, 2011
Serves: 4-6

1 very large (or two small) sweet potato(s), peeled and cut into small pieces*
2 tablespoons olive oil
1/2 large onion, peeled and diced
2 cloves garlic, peeled and minced
2-4 ounces diced green chiles (Depending on how spicy you like things!)
2 teaspoons cumin
2 teaspoons coriander
2 (15 ounce) cans black beans, drained and rinsed
4 ounces Monterey Jack cheese, shredded
2 tablespoons chopped fresh cilantro
8 flour tortillas
Salsa and sour cream, for serving

Preheat oven to 350 or 425 degrees. (See Baking Note below for details on baking temperature.)

Place sweet potato in a saucepan with enough water to cover and a hearty pinch of salt. Bring water to boil. Reduce heat to a simmer and allow sweet potatoes to cook, stirring occasionally, for 10 minutes or until   they're easily pierced with a fork. Drain sweet potatoes and set aside.

Meanwhile, heat olive oil in a large skillet over medium heat. Add onion, garlic, and chiles and saute, stirring often, for 7 minutes. Stir in cumin and coriander and cook for another minute, until the spices are fragrant. Remove onion mixture from heat and set aside.

Combine sweet potatoes and black beans and mash them together with a potato masher or whatever mashing implement you prefer. (I like my burrito filling to have some texture, so I didn't mash it too much. Just use your best judgement.) Stir in cooked onion mixture, cheese, and cilantro.

Evenly divide the filling between the tortillas. Roll burritos up tightly and place seam-side-down in a 9 x 13 baking dish.

Baking Note: I've experimented with a couple different ways to bake these burritos, so I'll give you options. If you like crisp burritos and/or you want to get dinner on the table fast, crank up the oven to 425. Brush a little melted butter on top of the prepped burritos in the pan and bake for 10-15 minutes, until burritos are heated through and the tops are golden brown and crisp. If you like your tortillas to remain soft and/or you have more time to kill before dinner, cover the pan with aluminum foil and bake for 30 minutes. Remove foil and bake for another 5 minutes if you'd like to crisp up the tops a little bit.

Serve with salsa and sour cream.


*If you have leftover cooked sweet potatoes, this is a great way to use them up! I made extra roasted sweet potatoes, and they were delicious in this recipe. And with leftovers, you're one step closer to dinner.

Monday, January 2, 2017

Butternut Squash Soup with Sausage and Kale

My friend Kristi is a fellow busy, hard-working mama who strives to always get a hot dinner on the table. And — like me — when there's no time or energy to cook, take-out, short-cuts and leftovers work, too. But we always try and we love to share recipes and compare cooking notes. Kristi recently texted me a recipe for a butternut squash soup from a blog called The Lemon Bowl.

I made Kristi's new fave soup with a few tweaks. She suggested a dash of sage and I decided to use a little more squash. I also couldn't find Italian turkey sausage, so I used regular. Anyhow, it tasted souper (see what I did there?!) good, especially on a cold winter day.

XOXO,
Amy


Butternut Squash Soup with Sausage and Kale
3 links of uncooked Italian sausage — spicy or sweet, turkey or regular — removed from casings
1 medium onion diced
2 cloves of garlic, minced
1 red pepper, seeded and diced
8 cups low sodium chicken broth
4 cups butternut squash peeled and cut into half-inch cubes
4 cups kale, roughly chopped
14 ounce can of cannelini beans, drained and rised
Dash of ground or fresh sage
Salt and pepper to taste
Fresh grated Parmesan cheese to garnish — optional

Spray inside of large pot with non-stick spray and heat pot over medium-high heat. Add sausage to pot. Brown sausage for 7-8 minutes, using spoon to break meat into bite-sized pieces. Don't be afraid of the sausage getting brown, because the more it carmelizes the tastier your soup.

Add garlic, onion and red pepper to pot and a pinch of salt and pepper. Cook until onions and peppers are tender, about 5-6 minutes.

When sausage is nicely browned and veggies are tender, add broth to the pot and use a wooden spoon to scrape up all of the brown bits from the bottom of the pan.

Raise heat to high and bring soup to a boil. Add in the squash and cook until softened, about 20 minutes.

Five minutes before serving, add kale and beans. Season with salt and pepper to taste. Serve with freshly grated Parmesan if you like, which I did.

Saturday, November 12, 2016

Saturday Shout-Out — Prep Freeze Cook

When life gets busy, I often joke that I need a personal assistant — or a wife.

Wouldn't it be nice to have someone do the laundry and cook a few meals when us busy moms get even busier?

I haven't been cooking much lately, but I have been able to put some yummy meals on the table thanks to a local shop called Prep Freeze Cook. This gem of a store lets you purchase pre-made, frozen meals that you can pop in the oven or the crockpot whenever you need them.

When my boys were little and I was working full-time in Cincinnati, I frequented a similar outlet called Dream Dinners.

The beauty of these meal preparation shops is that you can add your own special touch to each entree. And when you find a dish the whole family loves, you've got a new recipe to add to your rotation.

I love the chance to try out new meals that I might not normally make at home. It's a great way to get my brain working on new recipes to test in my own kitchen.

So I thought I'd share a few of the Prep Freeze Cook meals my family likes.

Do you frequent a meal assistant shop or use one of the many online offerings? I'd love to learn about some of your favorites, too.

Mangia! Mangia!
Andrea


Zuppa Toscana: This Italian soup features sausage and beans for a hearty, flavorful meal. Pair it with some crusty bread and dinner is served.


Taco Casserole: This is almost like a zesty, thick chili. We added shredded cheddar cheese and sliced green onions on top.


Chicken Chili: This white chili is so delicious. All we added was some fresh ground black pepper and cilantro.


Sweet & Sour Meatballs: These tangy meatballs were a big hit with my boys, one of whom choose to stuff them into a hot dog bun instead of eating them over rice.

Friday, September 23, 2016

Cranberry Pot Roast

Happy autumn, guys! It's always a bummer when summer comes to a close, but the cozy days of fall are some of my favorites. Sweater weather, apple picking, and comfort food? Yes, please!

Growing up, one of my favorite fall meals was Cranberry Pot Roast. My mom used cranberry juice in place of chicken broth. (Knowing my mom, she was out of broth one day and made an on-the-fly substitution. Way to get dinner on the table, Mom!) It's been years since I've had Cranberry Pot Roast, and when the crisp weather rolled in, I decided it was time to give it a whirl. Instead of cranberry juice, I used cranberry sauce. Just the canned stuff because...life, people. But if you have leftover homemade cranberry sauce, by all means, use that.

In addition to being delicious and make-ahead friendly, I love Cranberry Pot Roast because it's forgiving. After adding the veggies and popping the roast back in the oven for the final 45 minutes of cooking time, I decided to take the kids to the park. "Oh, we'll be back in time to turn off the oven. No prob!" So an hour later when we were flying down the slide, and I finally looked at my watch...whoops! We hustled back to rescue the roast, and this baby was no worse for wear. It was perfectly tender. Now this is the kind of meal that fits with my lifestyle.

Let's get cooking!
Erin


Cranberry Pot Roast
Adapted from Pot Roast with Bacon and inspired by my mom

2 tablespoons olive oil
3-4 pound beef bottom round roast
Salt and pepper
1 rib of celery, diced
1 onion, peeled and diced
1 1/2 pounds carrots, divided - dice 2 carrots, and cut the rest into 1" chunks
2 garlic cloves, peeled and minced
1 teaspoon sugar
1/4 teaspoon dried thyme
1 (14 ounce) can whole cranberry sauce (or use homemade)
1-2 cups low-sodium chicken broth
1 bay leaf
3 parsnips, peeled and cut into 1" chunks
8 ounces whole cremini mushrooms
Cooked egg noodles or mashed potatoes for serving
Chopped fresh parsley for garnish, optional

Preheat oven to 300 degrees.

In a large Dutch oven, heat oil over medium-high. Season beef generously with salt and pepper. Add beef to pan and cook, turning as needed, until all sides are browned, about 8-10 minutes total. (You'll know it's time to turn the beef when it's easy to flip. If it's sticking to the pot, it's not ready. Give it another minute to cook then try again.) If the browned bits on the bottom of the pan start to burn, turn the heat down to medium. When the roast is browned, remove to a plate and set aside.

Add diced carrot (set aside the carrots cut into 1" chunks until later), celery, and onion to the pot. Cook, stirring occasionally, until the vegetables are soft, about 8 minutes. Stir in garlic, sugar, and thyme until fragrant, about 30 seconds.

Stir in cranberry sauce, scraping up any browned bits on the bottom of the pan. Return meat to pan. Pour in enough chicken broth so the liquid reaches about halfway up the side of the roast. (For me, this was about 1.5 cups of broth.) Add bay leaf to the pan. Bring liquid to a boil. Cover, turn off the stove, and put the covered pot in the oven.

Allow the beef to cook for 3 hours, turning the meat over a few times while it cooks. Add the remaining carrots and parsnips to the pot, making sure they're submerged in liquid. Re-cover the pot, and cook for an additional 45 minutes to 1.25 hours (if you're at the park), until meat and vegetables are tender.

Remove meat and vegetables to the serving dish and cover with foil to keep warm. Skim any fat from the liquid remaining in the pot. (If you have one, you can use a fat separator to remove the fat and then return the liquid to the pot.) Bring the cooking liquid to a boil over medium-high heat and allow to simmer for 5 minutes. Season to taste with salt and pepper. Pour cooking liquid over meat and veggies and serve over buttered egg noodles. Garnish with parsley if you're feeling fancy.

Friday, September 16, 2016

Shepherd's Pie II (The Remix)

Several people (including Mo. Hey, Mo!) have told me that Shepherd's Pie II is their favorite recipe here on HDHH. This is the perfect simple, make-ahead meal to get through the insanity that is September. And true confession: I usually don't make my own mashed potatoes. As I mentioned in my original post, I hate making mashed potatoes. So I buy the pre-made ones. No shame here, people. Sometimes I need to make my life easier, ya feel me?

It was high time I took some new, better pics of Shepherd's Pie II, but you know what I discovered? It's dang hard to take a good pic of Shepherd's Pie! So I gave it my best shot. Better than the originals.


Shepherd's Pie II (The Remix)

Adapted from Real Simple
Serves: 8

2 tablespoons olive oil, divided
1 large onion, peeled and chopped
1 cup peeled and sliced carrots
Salt and pepper
1.5 pounds ground beef (I used ground sirloin.)
1/4 cup tomato paste
1.5 tablespoons Worcestershire sauce
1/4 cup flour
2 cups low-sodium chicken broth
1.5 cups frozen peas
1 cup corn kernels (optional, but delicious)
5 cups mashed potatoes*

Preheat oven to 350 degrees. In a 10" oven-safe skillet, heat 1 tablespoon oil over medium high. Add onion and carrots. Season to taste with salt and pepper. Cook, stirring frequently, for about 6 minutes, until vegetables are beginning to soften. Transfer to a separate bowl.

Heat remaining 1 tablespoon oil in the skillet. Add the beef and salt and pepper to taste. Cook, stirring often to break up the beef, about 8 minutes, until meat is no longer pink. Drain the grease from the skillet. Stir in tomato paste and Worcestershire sauce. Sprinkle in flour and cook, stirring, for one minute to cook off the raw taste of the flour.

Stir in broth, scraping the bottom of the pan to incorporate the flavor bits that have accumulated there into the sauce. Add peas, corn, and cooked onions and carrots. Bring to a simmer, then turn off the heat.

Spoon mashed potatoes on top of the meat and vegetable mixture in your skillet. Bake 40-45 minutes, until filling is bubbling and potatoes are lightly browned. Let cool for 5 minutes before serving.


* If you're a better person than me and decide to mash your own potatoes, Real Simple suggests the following:
3 pounds potatoes (I like to use Yukon Gold when I do mash my own.)
Salt and pepper
1 cup milk
4 tablespoons butter

Place the potatoes in a large pot and cover with cold water. Bring to a boil and add 1 teaspoon salt. Reduce heat and simmer for 15-18 minutes, until potatoes are tender when pierced with a knife. Drain and return potatoes to the warm pot. Add milk, butter, and salt and pepper to taste. Mash potatoes.

Friday, August 26, 2016

Crockpot Sweet Chili Chicken

Do you ever have a week when it feels like everything is hitting the fan?

Yeah. I'm having one of those weeks. Work is crazy. The kids are sick. The husband is stressed about a super duper important test he has to take for his job. And the house is in a total state of disarray. I've gotta get my act together. Or a cleaning lady.

With everything on my plate, I didn't have the mental capacity to get creative with dinner. So I stalked Pinterest for a simple meal with serious leftover potential. Thanks to Sweet Peas and Saffron for saving the day with this tasty slow cooker meal featuring the chicken breast that happened to be on sale this week. Boom. Crockpot Sweet Chili Chicken for the win.

A few minutes of work on Sunday afternoon, and we were eating hot dinner all week long. And this is a dump-and-stir kind of slow cooker meal, too. Easy, delicious, healthy—just what I needed on a crazy week. Now about that cleaning lady...

Let's get cooking!
Erin


Crockpot Sweet Chili Chicken
From Sweet Peas and Saffron

1 cup low-sodium chicken broth
1/2 cup sweet chili sauce
1/2 cup low-sodium soy sauce
2 1/2 pounds boneless, skinless chicken breasts (for me this was 3 huge breasts)
1/4 cup water
2 tablespoons cornstarch
Salt and pepper

For serving:
Cooked rice
Lime wedges (I think the lime really makes this meal special!)
Chopped fresh cilantro
Chopped peanuts

In a small bowl mix together chicken broth, chili sauce, and soy sauce. Place chicken in slow cooker. Pour chili sauce mixture over chicken and turn to coat. Cook for about 3 hours on low, until chicken reaches an internal temperature of 165 degrees and you can shred the chicken pretty easily with a fork.

Remove chicken to a plate and use two forks to shred chicken into bite-sized pieces. Place back in slow cooker to keep it warm while you prep the sauce.

Pour cooking liquid into a small saucepan. Whisk together 1/4 cup water and cornstarch, then whisk into cooking liquid. Bring to a boil, reduce heat to medium-low and simmer until sauce begins to thicken, about 4-5 minutes. Season to taste with salt and pepper. Pour sauce over chicken and stir to coat.

Serve chicken over cooked rice. Top it with a squeeze of lime and chopped cilantro and peanuts.


Monday, August 15, 2016

Slow Cooker Thai Curry Eggplant

A couple weeks ago, I posted this Facebook status update: "I made Thai curry eggplant for dinner. The whole family hates me."

Yeah, it was not a hit with the fam, but I liked it. Unlike the eggplant-hating husband and children, I crave a lighter meal now and then. And the leftovers made for some nice solo lunches and dinners for moi.

I just would cut the eggplant in smaller pieces next time — America's Test Kitchen Health Slow Cooker Revolution advised 1-inch pieces — so they cook down a bit more and are more bite-sized. I'd recommend half-inch hunks.


Several of my eggplant-loving friends responded to my Facebook status asking that I post the recipe. Friends, this one's for you.

XOXO,
Amy


Slow Cooker Thai Curry Eggplant
Adapted from America's Test Kitchen Healthy Slow Cooker Revolution

2 pounds eggplant, cut inot half-inch pieces
4 shallots, minced
3 tablespoons Thai green curry paste
1 tablespoon honey
4 cups chicken broth
2 tablespoons fish sauce — and more for seasoning, if desired
2 tablespoons instant tapioca
1/4 teaspoon salt —and extra salt (and pepper) to taste
1 pound snow peas, strings removed and cut in half
1 red bell pepper, stemmed, seeded, ad cut into 2-inch-long matchsticks
1 (13.5-ounce) can light coconut milk
1/4 cup chopped fresh cilantro
1 tablespoon lime juice — and more for seasoning, if desired
Jasmine rice for serving

Adjust oven rack (if necessary) to be 6 inches from the broiler element and heat broiler. Line rimmed baking sheet with aluminum foil and spray with oil spray.

Toss eggplant, shallots, green curry paste and honey in large bowl. Spread eggplant mixture evenly on cookie sheet and broil until softened and beginning to brown — about 12 minutes — rotating the baking sheet halfway through.

Transfer eggplant mixture to slow cooker. Add in broth, fish sauce, tapioca and 1/4 teaspoon salt. Cover and cook until fragrant and eggplant is softened -- about 4 hours.

Microwave snow peas, bell pepper and a tablespoon of water in a covered bowl, stirring occasionally, until tender but yet a little crisp. This will take 4 to 6 minutes. Drain vegetables and stir into curry.

Microwave coconut milk until hot — about 2 minutes. Stir into curry and let sit until heated through, about 5 minutes. Stir in cilantro and lime juice. Season as desired with salt, pepper, and extra fish sauce and lime juice. Serve over jasmine rice.

Friday, July 29, 2016

Quinoa Tabbouleh Salad

A few weeks back the husband took the kids to his folks' house for the weekend (thanks, honey!), and I hosted a little reunion for my college girlfriends here in Seattle.

We talked until too late at night and then slept in. We were tourists at Pike Place Market and took in the sights of Seattle on a sunny summer day. We went to the beach and did some shopping. We missed our kids and our husbands, but at the same time we reveled in our girls-only time. And we ate. Oh, man, did we eat.

One of the meals we cooked included Quinoa Tabbouleh Salad. Maybe it was the company or the fact that I didn't spend the entire dinner chopping food into small pieces for the baby, but I couldn't stop thinking about this salad.

With a hearty helping of parsley and lemon, this salad reminded me of tabbouleh. But instead of bulgur wheat, I used quinoa for a gluten-free, protein-packed dish. The colorful veggies make it refreshing and healthy.

Whether it's for a girls' weekend, a barbecue, or just dinner with the family, Quinoa Tabbouleh Salad is perfect for your summer menu!

Let's get cooking!
Erin

P.S. If you have dietary restrictions, this recipe is low FODMAP in addition to being gluten free!


Gluten-Free Quinoa Tabbouleh Salad

2 cups water or broth
1 cup quinoa
Salt and pepper
Juice of 1 1/2 - 2 lemons*, divided
1 bunch parsley, chopped (about 1 cup)
1 English cucumber, quartered and sliced 1/4" thick
1 bell pepper, chopped into 1/2" pieces
11 ounces grape tomatoes, halved
1 tablespoon extra virgin olive oil

Combine water or broth and quinoa in a medium saucepan and bring to a boil. (If you're using water, I recommend adding a hearty pinch of salt to help season the quinoa while it cooks.) Reduce heat to low, cover, and simmer for 15 minutes, stirring halfway through. Allow the quinoa to sit, covered, for 5 minutes then fluff with a fork. Pour juice of half a lemon over warm quinoa and season with salt and pepper to taste. Set cooked quinoa aside to cool while you prep the veggies.

Combine parsley, cucumber, bell pepper, and tomatoes in a large bowl. Stir in juice of 1 lemon and olive oil. Stir in cooked quinoa. Season to taste with salt and pepper. If you want a little more zip, add a bit more lemon juice. Serve at room temperature or store in the fridge until you're ready to serve.

*Sometimes after the salad sits in the fridge for a while, it dries out a little bit. If this happens, stir in juice from another 1/2 a lemon and a drizzle of olive oil.

Wednesday, July 20, 2016

Farmer's Market Vegetable Saute

Each week I pick up a basket overflowing with fresh vegetables from a stand at our farmer's market.  The veggies taste so much fresher than what I usually buy at the grocery store that we often eat them raw.

When I cook them, I like to keep it simple, to allow the flavor of the veggies to shine through.

A simple saute is a pretty way to accomplish this. This dish is a perfect side to grilled meats. Make it a main dish with a sprinkle of cheese and a crusty loaf of bread.

Mangia! Mangia!
Andrea


Farmer's Market Vegetable Saute
Inspired by the Garden Spot Vegetable Farm in Princeville, IL

2 tablespoons olive oil
1 medium onion, halved and then thinly sliced (you can substitute 1 or 2 shallots or 2-3 leeks)
2 cloves of garlic, minced
3 to 4 ears of corn, kernels removed
1 pound green beans, ends removed and cut into 2-inch pieces
2 or 3 small red peppers, thinly sliced
5 or 6 small red potatoes
3 tablespoons fresh herbs (such as cilantro or Italian parsley)
Salt and pepper to taste

Microwave potatoes until soft, about 5 or 6 minutes. Let cool, then cut into quarters.

Using a sharp knife, cut corn kernels from the cob, set aside. See my easy trick for completing this task here.

Heat oil in a large skillet over medium high heat. Add onion and stir until onion starts to become translucent. Lower heat to medium-low and continue to cook until onion caramelizes and turns golden brown. Add garlic and cook until fragrant.

Add corn, green beans and peppers and cook, stirring frequently, until vegetables just begin to soften. Add potatoes and 2 tablespoons herbs and salt and pepper. Cook another 2 or 3 minutes.

Remove from heat. Place vegetables in serving bowl and sprinkle with remaining herbs and salt and pepper to taste.


Wednesday, June 29, 2016

Beat-the-Heat July 4th menu

A couple weeks ago a friend messaged me for July 4 menu ideas that were easy to make, didn't need the oven and would work well for feeding a crowd.

That got us thinking. Amy, Erin and I put our heads together and came up with some suggestions.

These recipes should satisfy your guests, earn you some rave reviews and keep your house cool so you can beat the heat and spend more time celebrating summer and our nation's independence. Happy July 4th to you and yours!

Mangia! Mangia!
Andrea

Main Dishes:

Brats! They're so Midwest. You can boil them in beer ahead of time and grill them last minute.


Turkey Feta Spinach Burgers. Change up the usual burger fare with these super-tasty gems.


Slow Cooker Pulled Pork – 2 ways.If you have time to apply a rub and let your pork sit in the fridge overnight, tryNorth Carolina Pulled Pork in the slow cooker. If you want an even easier but just as tasty version, use a bottle of your favorite barbecue sauce and get cooking with this recipe!
Side Dishes:

Greek Quinoa Salad stays fresh in the fridge. It's a very complimentary side for grilled meat or a stand-in main dish for when your cousin's vegetarian girlfriend shows up unexpectedly.


Summer Salad with Berry Vinaigrette. Erin figured out a way to bottle summer with this recipe! 
Dessert & a Cocktail: 

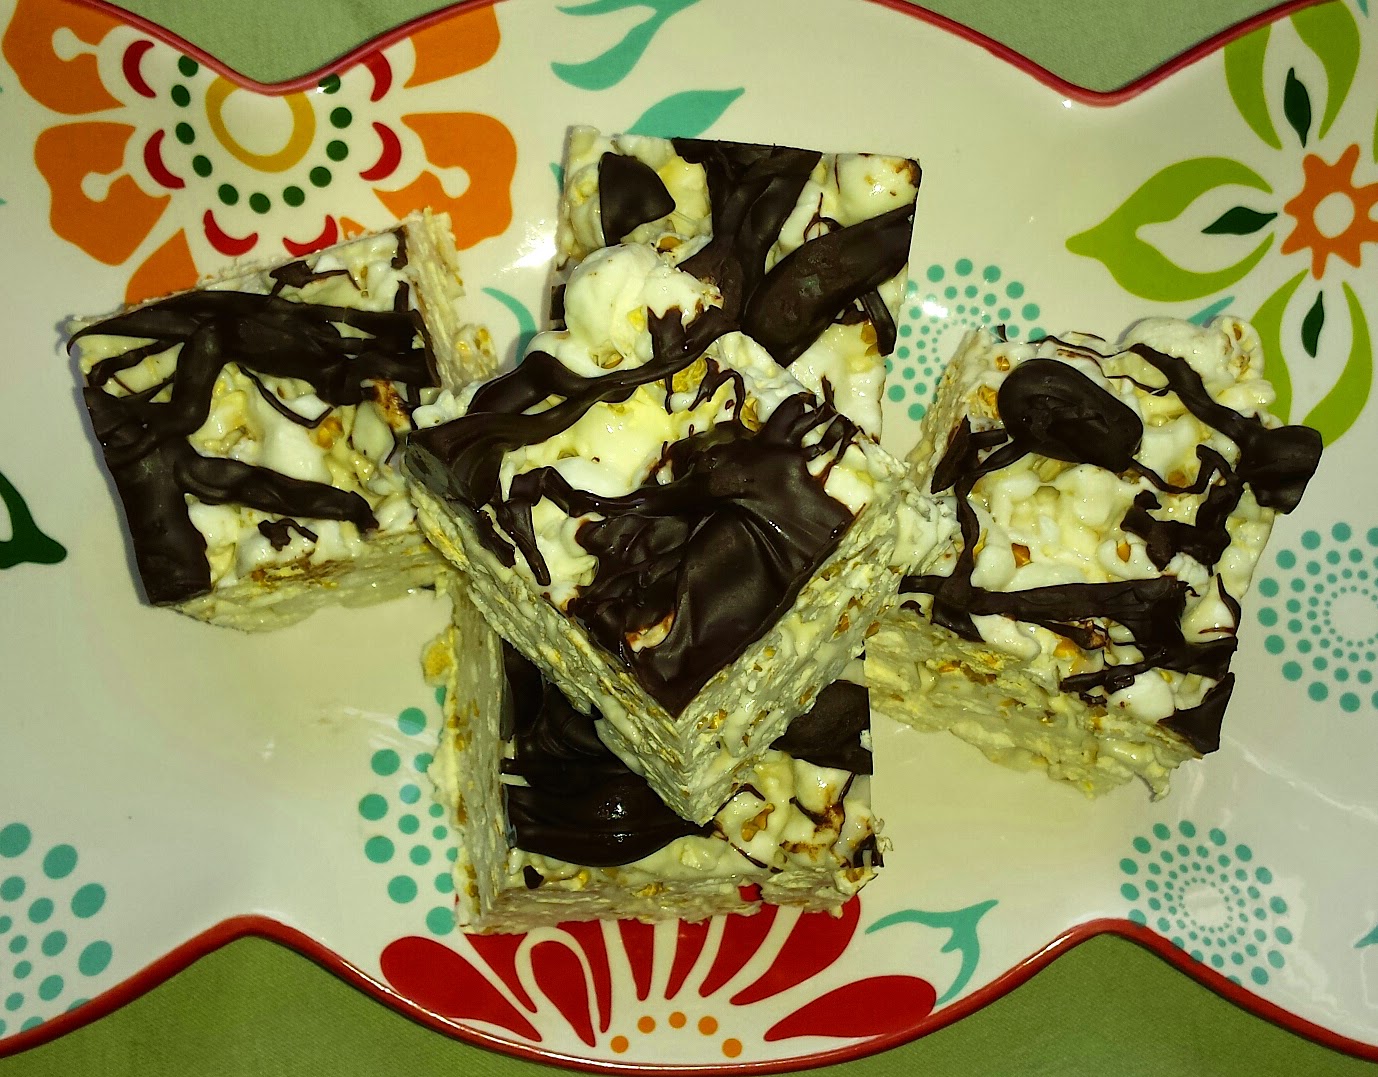
Popcorn Marshmallow Bars. Get patriotic and add red, white and blue M&Ms to these treats.
Watermelon Raspberry Rum Punch. Grown-ups need a treat, too. This cocktail is refreshing, slightly sweet and oh so yummy.


Wednesday, June 1, 2016

Oven Fried Chicken

Summer and fried chicken seem to go hand-in-hand, but I've never really made it before. So when Max and Sam started asking for fried chicken that didn't come in a bucket or a box, I figured why not? I can compete with Popeyes, right?

My mom used to make a corn flake fried chicken in the summers that I remember taking to picnics. I'll have to ask her for the recipe and a demo when she visits this summer!

Until then, I'll tide my boys over with this version, inspired by two different recipes from Farm Journal's Best-Ever Recipes. This main dish is perfect for lunch or dinner.

Next time, I want to try soaking the chicken in buttermilk overnight before frying it up in a Dutch oven. Stay tuned.

Mangia! Mangia!
Andrea


Oven Fried Chicken
3 to 4 pounds bone-in chicken pieces, or one whole chicken, cut up
1/2 cup milk
1/2 cup Italian seasoned bread crumbs
2 tablespoons Parmesan cheese
2 tablespoons fresh parsley, finely chopped
1/2 teaspoon dried basil
1/2 teaspoon dried oregano
1/2 teaspoon garlic powder
1/4 teaspoon salt
1/4 teaspoon ground black pepper
2 tablespoons melted butter

Preheat oven to 375 degrees. Spray bottom of a roasting pan with cooking spray and set aside.

Pat chicken pieces dry with paper towel.

Pour milk into small bowl.

In a medium bowl, combine bread crumbs, Parmesan cheese, parsley, spices, salt and pepper.

Working with one piece of chicken at a time, dip chicken into milk, then coat with bread crumb mixture. Place chicken in roasting pan with the skin side up. Repeat until all chicken pieces are coated in bread crumbs.

Cook for 30 minutes, then drizzle with melted butter. Cook for another 20 minutes until golden brown.

Serve warm or cold. Delicious either way!