We try to eat seafood once a week at my house, and while it doesn't always happen, we most often turn to shrimp because it cooks up so quickly.
I made this dinner from a recent Williams Sonoma mailer. Since I knew my boys would not even try a lemon cream sauce, I used zucchini noodles instead of pasta. The husband and I are trying to cut back on the carbs. (My boys ate the shrimp with pasta and jarred tomato sauce.)
The end result was very tasty -- but you do need to eat this right away, as it will get a bit soggy as the zucchini sits.
Mangia! Mangia!
Andrea
Garlic Shrimp & Lemon Spiral Zucchini
Inspired by Williams Sonoma
2 pounds shrimp, peeled and deveined
Salt and pepper
5 garlic cloves, minced
2 tablespoons olive oil
3 medium zucchini, spiraled, or thinly sliced with a vegetable peeler or mandolin
1 bell pepper julienned
8 tablespoons unsalted butter
3 shallots, minced
1/3 cup, plus 2 tablespoons white wine
Zest and juice of 1 large lemon, plus more to taste
Pinch red pepper flakes
1/2 cup heavy cream
Fresh basil leaves, sliced, for garnish
Heat oven to 400 degrees.
Toss shrimp, salt, pepper, garlic and olive oil in a bowl. Refrigerate while you make the sauce and cook the zucchini.
Use a spiralizer, mandolin or a vegetable peeler to turn your zucchini into noodles. Set aside, along with sliced pepper.
Melt 4 tablespoons butter in a large skillet. Add shallots and saute about 5 minutes. Add wine, lemon zest and juice, remaining butter and red pepper flakes. Bring to a simmer and add cream. Reduce heat to low and cook until fragrant, about 5 more minutes. Keep warm.
Place shrimp on a baking sheet and cook in oven until pink, between 5 to 10 minutes. Remove from oven and set aside.
Meanwhile, cook zucchini noodles and pepper strips in boiling water for 2 minutes. Remove to colander and drain well. Gently squeeze excess water from zucchini.
Add zucchini and peppers to lemon cream sauce, gently toss to coat. Top with shrimp and basil. Season with more lemon juice, salt and pepper to taste.
Showing posts with label garlic. Show all posts
Wednesday, March 8, 2017
Garlic Shrimp & Lemon Spiral Zucchini
Labels:
dinner,
garlic,
lemon,
shrimp,
spiralizer,
Williams Sonoma,
zucchini
Wednesday, April 20, 2016
Pasta & Fresh Tomato Sauce
Last week was busy. We had extra drama performances, a spring concert, baseball practices (and games) and the school play. My mother-in-law was in town, too, for a chance to cheer on her grandsons.
Despite all of this activity, I managed to cook dinner — twice. This is one of the meals I made.
In the time it takes for water to boil and pasta to cook, you can make a fresh and light tomato sauce instead of opening a jar. This recipe uses the same method as my recipe for Halibut with Tomato, Orange and Olives.
Cooking the tomatoes yourself is an easy way to dish up a healthy topping for pasta. A little lemon juice brightens up all those fresh flavors.
Mangia! Mangia!
Andrea
Pasta & Fresh Tomato Sauce
3/4 pound pasta (any shape; my son Sam picked out rigatoni)
3 tablespoons olive oil, divided
1/2 large onion, finely chopped
1 tablespoon minced garlic
3 pints cherry or grape tomatoes (I like a mixture of red and yellow ones)
1/4 to 1/2 cup fresh squeezed lemon juice
1/4 cup fresh Italian parsley, chopped
Salt and pepper
Grated Parmesan cheese for topping
Fill a large pot with water and 1 tablespoon oil and set over high heat until it boils.
Meanwhile, heat the oil in a large skillet over medium high heat. Add onion and garlic and saute for 5 to 7 minutes, until onion just starts to get light brown. Add tomatoes and let cook for a few minutes.
Add pasta to boiling water and cook per package directions. Place in serving bowl after draining.
Continue to cook tomatoes, stirring occasionally. They will begin to burst. You can also gently press down on the tomatoes to release their juices. Cook until all tomatoes have burst and sauce thickens, about 15 to 20 minutes total.
Add lemon juice, parsley salt and pepper to taste and stir to combine. Pour tomato sauce over pasta and gently mix to coat all of the pasta. Sprinkle with grated parmesan cheese or your favorite Italian cheese.
I served my pasta as a side dish with grilled baked halibut and asparagus. It makes a terrific main dish, too, along with a nice green salad.
Despite all of this activity, I managed to cook dinner — twice. This is one of the meals I made.
In the time it takes for water to boil and pasta to cook, you can make a fresh and light tomato sauce instead of opening a jar. This recipe uses the same method as my recipe for Halibut with Tomato, Orange and Olives.
Cooking the tomatoes yourself is an easy way to dish up a healthy topping for pasta. A little lemon juice brightens up all those fresh flavors.
Mangia! Mangia!
Andrea
Pasta & Fresh Tomato Sauce
3/4 pound pasta (any shape; my son Sam picked out rigatoni)
3 tablespoons olive oil, divided
1/2 large onion, finely chopped
1 tablespoon minced garlic
3 pints cherry or grape tomatoes (I like a mixture of red and yellow ones)
1/4 to 1/2 cup fresh squeezed lemon juice
1/4 cup fresh Italian parsley, chopped
Salt and pepper
Grated Parmesan cheese for topping
Fill a large pot with water and 1 tablespoon oil and set over high heat until it boils.
Meanwhile, heat the oil in a large skillet over medium high heat. Add onion and garlic and saute for 5 to 7 minutes, until onion just starts to get light brown. Add tomatoes and let cook for a few minutes.
Add pasta to boiling water and cook per package directions. Place in serving bowl after draining.
Continue to cook tomatoes, stirring occasionally. They will begin to burst. You can also gently press down on the tomatoes to release their juices. Cook until all tomatoes have burst and sauce thickens, about 15 to 20 minutes total.
Add lemon juice, parsley salt and pepper to taste and stir to combine. Pour tomato sauce over pasta and gently mix to coat all of the pasta. Sprinkle with grated parmesan cheese or your favorite Italian cheese.
I served my pasta as a side dish with grilled baked halibut and asparagus. It makes a terrific main dish, too, along with a nice green salad.
Labels:
cherry tomato,
dinner,
garlic,
grape tomato,
meal,
onion,
pasta,
tomato,
tomato sauce
Wednesday, February 17, 2016
Baba Ghannouj
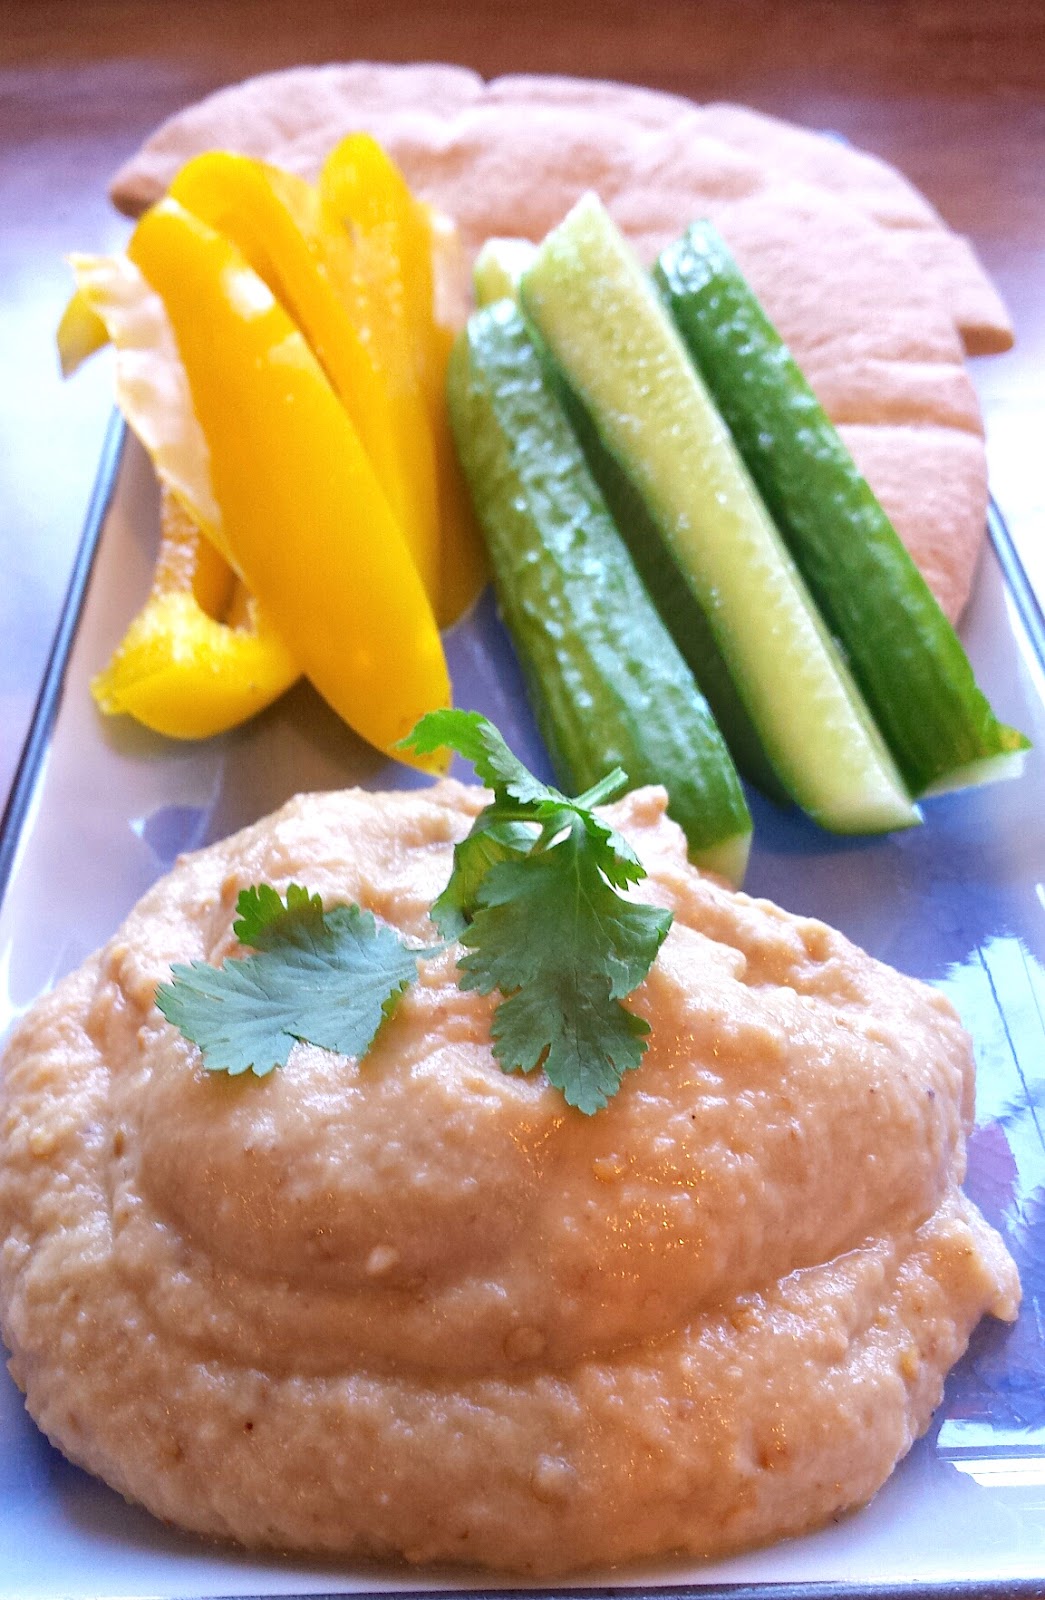
I'm a huge fan of eggplant (see my recipe for Grilled Eggplant Salad) and Baba Ghannouj (or Baba Ghanoush or Baba Ganoush) is such a versatile way to eat it!
This appetizer of eggplant, garlic and lemon juice is one of my favorite things to eat. It goes so well with vegetables and all kinds of bread and makes a great sandwich spread.
For the past few months, I've been trying to replicate the smoky, eggplant-forward taste of the Baba Ghannouj found at a favorite Cincinnati restaurant. Andy's Mediterranean Grille does it so well that my son Sam can't stop eating what he likes to call Baba Gagoose.
After trying recipes from many sources, I think the secret is in using just the right amount of tahini (a paste made from ground sesame seeds.) Too much and your eggplant tastes like hummus. But when you hit on the perfect number of spoonfuls, the resulting texture and slightly nutty flavor can't be beat.
That said, this is one of those dishes that I'm sure will vary with each person, so be sure to adjust the ingredients to suit your own tastes.
Mangia! Mangia!
Andrea
Baba Ghannouj
1 large eggplant
3 tablespoons olive oil, divided
Juice of 1 large lemon, between 1/4 cup and 1/2 cup
1 to 2 cloves of garlic, minced
1 to 2 tablespoons tahini
Salt and pepper to taste
Chopped fresh parsley, optional
Preheat oven to 425 degrees. Wash eggplant. Pierce the eggplant all over with a fork. Slice in half lengthwise. Brush cut sides of eggplant with 1 tablespoon olive oil. Place eggplant on a baking sheet, cut sides down.
Cook eggplant until it is deflated and soft, between 30 and 45 minutes. Remove from oven and let cool. Remove eggplant pulp from the skin and place in food processor or blender. Add 1/4 cup lemon juice, 1 clove garlic and 1 tablespoon tahini. Process until smooth. Add salt and pepper, and blend or stir to combine.
Taste the Baba Ghannouj. Add more garlic, tahini, salt and pepper and parsley (if using) to suit your preferences.
Place spread in a bowl and drizzle with olive oil. Note: Some recipes call for adding the olive oil directly into the spread. Try it – you might like it that way!
Garnish with parsley or cilantro.
Serve with vegetables and breads or use on sandwiches (such as a combo of provolone cheese, cucumbers and peppers.)
This appetizer of eggplant, garlic and lemon juice is one of my favorite things to eat. It goes so well with vegetables and all kinds of bread and makes a great sandwich spread.
For the past few months, I've been trying to replicate the smoky, eggplant-forward taste of the Baba Ghannouj found at a favorite Cincinnati restaurant. Andy's Mediterranean Grille does it so well that my son Sam can't stop eating what he likes to call Baba Gagoose.
After trying recipes from many sources, I think the secret is in using just the right amount of tahini (a paste made from ground sesame seeds.) Too much and your eggplant tastes like hummus. But when you hit on the perfect number of spoonfuls, the resulting texture and slightly nutty flavor can't be beat.
That said, this is one of those dishes that I'm sure will vary with each person, so be sure to adjust the ingredients to suit your own tastes.
Mangia! Mangia!
Andrea
Baba Ghannouj
1 large eggplant
3 tablespoons olive oil, divided
Juice of 1 large lemon, between 1/4 cup and 1/2 cup
1 to 2 cloves of garlic, minced
1 to 2 tablespoons tahini
Salt and pepper to taste
Chopped fresh parsley, optional
Preheat oven to 425 degrees. Wash eggplant. Pierce the eggplant all over with a fork. Slice in half lengthwise. Brush cut sides of eggplant with 1 tablespoon olive oil. Place eggplant on a baking sheet, cut sides down.
Cook eggplant until it is deflated and soft, between 30 and 45 minutes. Remove from oven and let cool. Remove eggplant pulp from the skin and place in food processor or blender. Add 1/4 cup lemon juice, 1 clove garlic and 1 tablespoon tahini. Process until smooth. Add salt and pepper, and blend or stir to combine.
Taste the Baba Ghannouj. Add more garlic, tahini, salt and pepper and parsley (if using) to suit your preferences.
Place spread in a bowl and drizzle with olive oil. Note: Some recipes call for adding the olive oil directly into the spread. Try it – you might like it that way!
Garnish with parsley or cilantro.
Serve with vegetables and breads or use on sandwiches (such as a combo of provolone cheese, cucumbers and peppers.)
Labels:
Andy's Mediterranean Grille,
appetizer,
Baba Ganoush,
Baba Ghannouj,
Baba Ghanoush,
dip,
eggplant,
garlic,
lemon juice,
spread,
tahini
Wednesday, September 23, 2015
Grilled Cabbage with Thai Dressing
If you need a speedy way to spice up your menu, this grilled cabbage will do the trick.
I don't usually cook cabbage, but my husband and oldest son love it. When I get in a rut, they remind me that I haven't made cabbage in awhile.
In fact, I had not whipped up this side dish in more than a year. Thank goodness for those Facebook flashbacks to remind us of what we were doing so many months ago. This little gem popped up on my feed. Thank goodness.
Everyone in our house gobbled this up, and my boys even had seconds —which hardly ever happens with a vegetable. We enjoyed the cabbage with a roasted chicken. It makes the perfect lunch all by itself the next day.
The folks over at The Kitchn get all the credit here, and their notes about grilling the cabbage ahead of time are perfect. These cabbage steaks hold up beautifully in the fridge. Just warm them up in the microwave and you are good to go.
I recommend doubling the dressing, because it tastes so good you'll want some leftover for the next time you have salad.
Mangia! Mangia!
Andrea
Grilled Cabbage with Thai Dressing
Inspired by this recipe from The Kitchn.
For the dressing:
1/4 cup fresh lime juice (bottled is OK, too)
1/4 cup extra virgin olive oil
1 teaspoon fish sauce
1 to 2 teaspoons minced garlic
1/3 cup fresh cilantro (Leaves and thin stems. Remove thicker, tougher stems)
1/2 teaspoon salt
1/2 teaspoon black pepper
1/2 teaspoon sugar
Place all ingredients in a blender and mix until smooth. Give it a taste. You might want add a bit more lime juice or fish sauce, depending on your taste. The dressing will have an orangey-green hue.
For the cabbage:
1 head green cabbage
Vegetable oil
Preheat your gas grill to medium-high. If you are using a charcoal grill, you'll want low flames. You can also use a grill pan and cook up the cabbage on the stovetop.
Slice cabbage into wedges that are about 1 inch thick. You should get at least eight and you might end up with more, depending on how large the cabbage is. Brush both sides of each cabbage slice with oil.
Grill cabbage for about 6 minutes or until the edges are charred. Flip over and cook for another 5 to 6 minutes, again grilling until the outer leaves acquire some black char.
Remove from grill, top with dressing, garnish with slices of lime and serve warm.
To warm up leftover cabbage (or if you did your grilling in advance,) place cabbage slices on a microwave safe plate, cover with plastic wrap or wax paper and heat for about 45 seconds a slice.
Labels:
black pepper,
cabbage,
cilantro,
dressing,
fish sauce,
garlic,
grill,
grilled,
lime,
side dish,
Thai,
vegetable
Wednesday, July 15, 2015
Packet Potatoes
It's finally starting to feel like summer here in Illinois: hot and humid. That means the last thing I want to do for dinner is turn on the oven. Thank goodness for my grill.
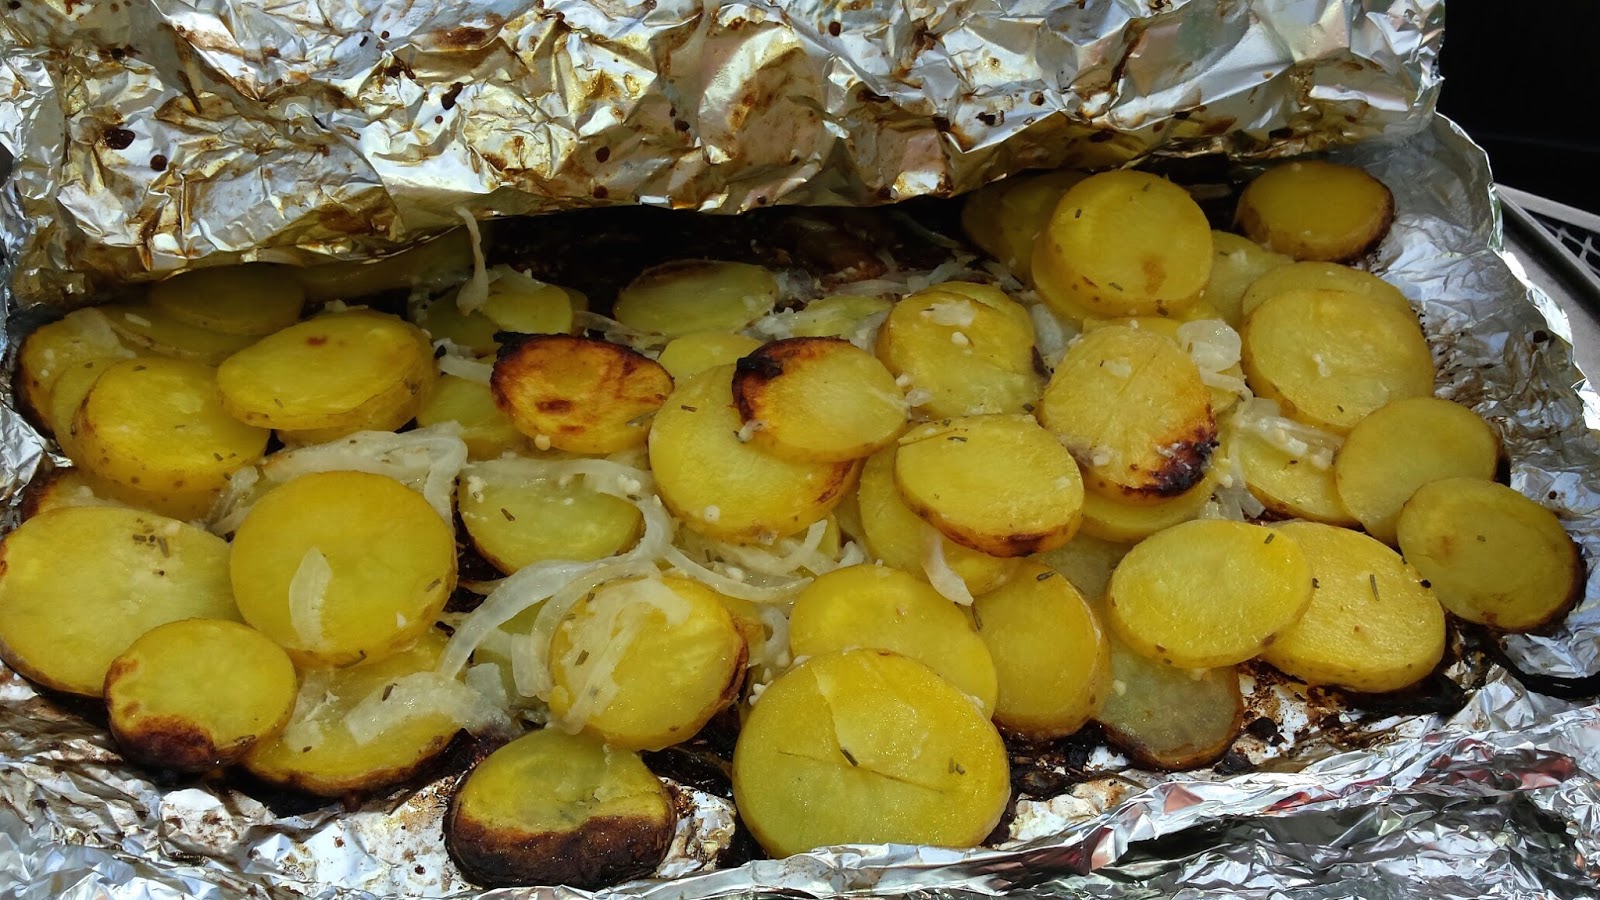
These potatoes come out tender and mellow with just a little bit of crispness around the edges. The combination of garlic and rosemary is a savory favorite of mine and milk adds sweetness that tastes so good with the onions.
This is an ideal side for a main dish like grilled chicken or London broil. The leftovers hold up well and can be turned into breakfast after a quick toss in a skillet with some chopped red or green bell peppers to freshen them up. Serve alongside some fried or scrambled eggs.
Mangia! Mangia!
Andrea
Packet Potatoes
Inspired by Guy Fieri
3 pounds potatoes (Yukon or Russet or Idaho), thinly sliced into rounds
1 small to medium yellow onion, thinly sliced
3/4 cup milk (2% or whole)
1 tablespoon minced garlic
3 tablespoons unsalted butter, diced
3 tablespoons grated Parmesan cheese
1 teaspoon dried or fresh rosemary leaves, crushed or chopped
Heat grill to medium.
Mix all ingredients in large bowl.
Take a 20-inch sheet of aluminum foil and fold it in half. Place half of the potato mixture on foil and fold up edges about a 1/2 inch. Repeat for the remaining potatoes.
Top with another piece of foil and crimp around all edges, wrapping bottom foil up.
Place foil packets on heated grill and cook for 15 to 20 minutes.
Wearing oven mitts, use a large flat spatula to remove foil packets from grill and place on a cookie sheet. Let sit for 5 minutes.
Remove top piece of foil and serve — straight from the packet or after you transfer potatoes to a serving dish for a nicer presentation.
These potatoes come out tender and mellow with just a little bit of crispness around the edges. The combination of garlic and rosemary is a savory favorite of mine and milk adds sweetness that tastes so good with the onions.
This is an ideal side for a main dish like grilled chicken or London broil. The leftovers hold up well and can be turned into breakfast after a quick toss in a skillet with some chopped red or green bell peppers to freshen them up. Serve alongside some fried or scrambled eggs.
Mangia! Mangia!
Andrea
Packet Potatoes
Inspired by Guy Fieri
3 pounds potatoes (Yukon or Russet or Idaho), thinly sliced into rounds
1 small to medium yellow onion, thinly sliced
3/4 cup milk (2% or whole)
1 tablespoon minced garlic
3 tablespoons unsalted butter, diced
3 tablespoons grated Parmesan cheese
1 teaspoon dried or fresh rosemary leaves, crushed or chopped
Heat grill to medium.
Mix all ingredients in large bowl.
Take a 20-inch sheet of aluminum foil and fold it in half. Place half of the potato mixture on foil and fold up edges about a 1/2 inch. Repeat for the remaining potatoes.
Top with another piece of foil and crimp around all edges, wrapping bottom foil up.
Place foil packets on heated grill and cook for 15 to 20 minutes.
Wearing oven mitts, use a large flat spatula to remove foil packets from grill and place on a cookie sheet. Let sit for 5 minutes.
Remove top piece of foil and serve — straight from the packet or after you transfer potatoes to a serving dish for a nicer presentation.
Labels:
breakfast,
butter,
foil packet,
garlic,
grill,
milk,
onion,
Parmesan cheese,
potatoes,
rosemary,
Russet,
side dish,
Yukon
Wednesday, July 1, 2015
Turkey Feta Spinach Burgers with Pepperoncini Sauce
These are my all-time favorite burgers because of the way the briny feta cheese, earthy spinach and mellow onions combine with the zing from the sauce. It's a pleasure party for the palate.
If you're looking for a different take on July 4 fare, give these a try.
Mixing the feta and spinach with the turkey keeps the burgers super moist and flavorful. The creamy and spicy pepperoncini sauce delivers a refreshingly cool topper for this casual dinner.
I used to only cook these on the stovetop with my grill pan, but I've been toying with variations to keep the burgers from falling apart on my outdoor grill. Thanks to some collaboration with my nutritionist sister-in-law Karen S., this recipe ensures success with either cooking method!
Mangia! Mangia!
Andrea
Turkey Feta Spinach Burgers with Pepperoncini Sauce
Inspired by chef Sara Moulton
For the burgers
2 tablespoons olive oil, divided
1/2 cup chopped white or yellow onion
5 oz baby spinach
Salt and pepper to taste
3 ounces feta cheese
2 tablespoons chopped fresh oregano
1 pound lean ground turkey
1 egg
1/4 cup or more of old fashioned oats, optional
For the sauce:
1/4 cup nonfat plain Greek yogurt
1/4 cup low fat mayo
2 tablespoons seeded and chopped pepperoncini peppers (from a jar)
1 tablespoon pepperoncini liquid from the jar
1 or 2 teaspoons lemon juice
1 teaspoon minced garlic
Salt and pepper to taste
Heat oil in a large skillet over medium-high heat. Add onion and cook until it begins to brown, about 5 or 6 minutes. Add spinach and stir until wilted. Season with salt and pepper. Transfer to a colander and let spinach and onion drain off excess liquid.
As spinach cools, you can mix up the creamy pepperoncini burger topper. In a small bowl, combine all ingredients for the sauce. Stir well and set aside.
Now you are ready to form your burgers. Mix together ground turkey, egg, spinach and onion, feta cheese, oregano, salt and pepper. If mixture seems too moist and loose, add oats to help add form. Shape into patties. You'll get four large or six to eight slider-sized burgers. Use whatever size makes sense for your family.
Spray burgers with cooking spray and grill over medium heat for about six minutes on each side.
If using buns, spread some pepperoncini sauce on the bottom buns and add the burgers. Spoon more sauce over the burgers and top with bun. Or go bun-less and just use the sauce.
If you're looking for a different take on July 4 fare, give these a try.
Mixing the feta and spinach with the turkey keeps the burgers super moist and flavorful. The creamy and spicy pepperoncini sauce delivers a refreshingly cool topper for this casual dinner.
I used to only cook these on the stovetop with my grill pan, but I've been toying with variations to keep the burgers from falling apart on my outdoor grill. Thanks to some collaboration with my nutritionist sister-in-law Karen S., this recipe ensures success with either cooking method!
Mangia! Mangia!
Andrea
Turkey Feta Spinach Burgers with Pepperoncini Sauce
Inspired by chef Sara Moulton
For the burgers
2 tablespoons olive oil, divided
1/2 cup chopped white or yellow onion
5 oz baby spinach
Salt and pepper to taste
3 ounces feta cheese
2 tablespoons chopped fresh oregano
1 pound lean ground turkey
1 egg
1/4 cup or more of old fashioned oats, optional
For the sauce:
1/4 cup nonfat plain Greek yogurt
1/4 cup low fat mayo
2 tablespoons seeded and chopped pepperoncini peppers (from a jar)
1 tablespoon pepperoncini liquid from the jar
1 or 2 teaspoons lemon juice
1 teaspoon minced garlic
Salt and pepper to taste
Heat oil in a large skillet over medium-high heat. Add onion and cook until it begins to brown, about 5 or 6 minutes. Add spinach and stir until wilted. Season with salt and pepper. Transfer to a colander and let spinach and onion drain off excess liquid.
As spinach cools, you can mix up the creamy pepperoncini burger topper. In a small bowl, combine all ingredients for the sauce. Stir well and set aside.
Now you are ready to form your burgers. Mix together ground turkey, egg, spinach and onion, feta cheese, oregano, salt and pepper. If mixture seems too moist and loose, add oats to help add form. Shape into patties. You'll get four large or six to eight slider-sized burgers. Use whatever size makes sense for your family.
Spray burgers with cooking spray and grill over medium heat for about six minutes on each side.
If using buns, spread some pepperoncini sauce on the bottom buns and add the burgers. Spoon more sauce over the burgers and top with bun. Or go bun-less and just use the sauce.
Labels:
buns,
burger,
dinner,
egg,
feta cheese,
garlic,
Greek yogurt,
grill,
ground turkey,
lemon juice,
mayo,
old fashioned oats,
onion,
oregano,
pepperoncini,
sauce,
spinach,
turkey
Monday, June 29, 2015
Teriyaki Chicken with Ginger Veggie Couscous
Take-out meals definitely serve their purpose, but making your own versions at home is more fun, healthier and budget-conscious, too.
I always have chicken in the freezer and a box or two of couscous on hand, so this was easy to whip up. A bag of matchstick carrots in the crisper drawer is the perfect add to the couscous, along with green onions and broccoli. As for the ginger, here's my tip: Instead of buying a piece of ginger root and using a micro-zester or a grater, I buy a tube of minced ginger. It lasts longer in the fridge than the root and speeds things up quite a bit.
You can use this teriyaki sauce as a marinade for grilled chicken or you can pour it over the chicken and bake it in the oven. Either way the flavor is restaurant-worthy.
Mangia! Mangia!
Andrea
Teriyaki Chicken
1 cup soy sauce
1/2 cup cider vinegar
2 cloves garlic, minced
1 teaspoon minced or grated ginger
1/2 teaspoon black pepper
1/4 cup brown sugar
2 tablespoons cornstarch
2 tablespoons cold water
3 to 4 pounds chicken pieces (skinless breasts or skinless thighs)
If oven baking, preheat oven to 425 degrees. If grilling, preheat your grill to medium about 10 minutes before you plan to cook the chicken.
In a saucepan, combine soy sauce, cider vinegar, garlic, ginger, pepper, brown sugar, cornstarch and cold water. Simmer over low heat until sauce thickens and begins to bubble. Remove pot from heat and set aside.
Place chicken in a 13 x 9 inch pan. Pour teriyaki sauce over chicken, turning the chicken pieces to coat both sides.
If baking, place in oven for 30 minutes or until chicken is no longer pink. Remove chicken from baking pan and place on serving platter. Top with remaining teriyaki sauce from baking dish.
If grilling, cover pan and put in refrigerator to let chicken marinate for 30 minutes. Preheat your grill. Remove chicken from marinade and grill on medium for 5 to 8 minutes per side, brushing with the extra marinade as you turn the chicken pieces. Cook until chicken is no longer pink inside.
Ginger Veggie Couscous
1 box wheat or plain couscous
1 tablespoon olive oil
1 and 1/2 teaspoons minced ginger
1 to 2 teaspoons minced garlic
1/2 cup sliced green onions
1/2 cup carrots, finely chopped
1 cup broccoli florets, chopped
1 to 1 and 1/2 teaspoon sesame oil
2 tablespoons soy sauce
Prepare couscous according to package directions, except omit oil or butter.
Heat oil in a 12-inch skillet over medium heat. Add ginger, garlic, onions, carrots and broccoli. Cook, stirring frequently, for about 5 minutes or until vegetables are tender. Remove from heat.
Add couscous to skillet and stir to combine. Add sesame oil and soy sauce, and gently mix to combine the sauces.
To serve, plate chicken (slicing breast meat is a nice touch) with veggie couscous and enjoy!
I always have chicken in the freezer and a box or two of couscous on hand, so this was easy to whip up. A bag of matchstick carrots in the crisper drawer is the perfect add to the couscous, along with green onions and broccoli. As for the ginger, here's my tip: Instead of buying a piece of ginger root and using a micro-zester or a grater, I buy a tube of minced ginger. It lasts longer in the fridge than the root and speeds things up quite a bit.
You can use this teriyaki sauce as a marinade for grilled chicken or you can pour it over the chicken and bake it in the oven. Either way the flavor is restaurant-worthy.
Mangia! Mangia!
Andrea
Teriyaki Chicken
1 cup soy sauce
1/2 cup cider vinegar
2 cloves garlic, minced
1 teaspoon minced or grated ginger
1/2 teaspoon black pepper
1/4 cup brown sugar
2 tablespoons cornstarch
2 tablespoons cold water
3 to 4 pounds chicken pieces (skinless breasts or skinless thighs)
If oven baking, preheat oven to 425 degrees. If grilling, preheat your grill to medium about 10 minutes before you plan to cook the chicken.
In a saucepan, combine soy sauce, cider vinegar, garlic, ginger, pepper, brown sugar, cornstarch and cold water. Simmer over low heat until sauce thickens and begins to bubble. Remove pot from heat and set aside.
Place chicken in a 13 x 9 inch pan. Pour teriyaki sauce over chicken, turning the chicken pieces to coat both sides.
If baking, place in oven for 30 minutes or until chicken is no longer pink. Remove chicken from baking pan and place on serving platter. Top with remaining teriyaki sauce from baking dish.
If grilling, cover pan and put in refrigerator to let chicken marinate for 30 minutes. Preheat your grill. Remove chicken from marinade and grill on medium for 5 to 8 minutes per side, brushing with the extra marinade as you turn the chicken pieces. Cook until chicken is no longer pink inside.
Ginger Veggie Couscous
1 box wheat or plain couscous
1 tablespoon olive oil
1 and 1/2 teaspoons minced ginger
1 to 2 teaspoons minced garlic
1/2 cup sliced green onions
1/2 cup carrots, finely chopped
1 cup broccoli florets, chopped
1 to 1 and 1/2 teaspoon sesame oil
2 tablespoons soy sauce
Prepare couscous according to package directions, except omit oil or butter.
Heat oil in a 12-inch skillet over medium heat. Add ginger, garlic, onions, carrots and broccoli. Cook, stirring frequently, for about 5 minutes or until vegetables are tender. Remove from heat.
Add couscous to skillet and stir to combine. Add sesame oil and soy sauce, and gently mix to combine the sauces.
To serve, plate chicken (slicing breast meat is a nice touch) with veggie couscous and enjoy!
Labels:
broccoli,
brown sugar,
carrots,
chicken,
cider vinegar,
couscous,
garlic,
ginger,
ginger root,
green onions,
minced garlic,
minced ginger,
sesame oil,
soy sauce,
take-out,
teriyaki
Wednesday, April 29, 2015
Baby Bok Choy & Mushrooms with Oyster Sauce
I could eat this dish Every. Single. Day.
It's all about the simple sauce, which tastes delicious with the crunchy bok choy and earthy shiitake mushrooms. The combination is so fresh and healthy. We even got Max to eat his first mushroom in six years (!!) — all thanks to this recipe.
This vegetable blend makes a great side dish. The oyster sauce is also divine with broccoli, bell peppers, snow peas and whatever else you have on hand. Serve it along side cashew chicken or Asian glazed pork tenderloin. Or make it a complete meal by adding stir-fried strips of chicken or beef or sautéed shrimp.
Mangia! Mangia!
Andrea
Baby Bok Choy & Mushrooms with Oyster Sauce
Adapted from Allrecipes.com
4 tablespoons oyster sauce
2 tablespoons low-sodium soy sauce
1 tablespoon brown sugar
2 teaspoons cornstarch
1/2 cup water
8 heads baby bok choy, trimmed but leaving heads intact
1 cup water (for microwave steaming)
3 tablespoons peanut or vegetable oil
1 bunch green onions, thinly sliced
1 to 2 tablespoons minced garlic
10 ounces sliced shiitake mushrooms (or substitute your favorite fungi)
In a small bowl, whisk together oyster sauce, soy sauce and brown sugar until sugar dissolves. Mix cornstarch and water, making sure cornstarch dissolves. Combine water and oyster sauce mixtures, stirring until smooth. Set aside.
Steam bok choy in microwave or blanche on stove top. Place bok choy in microwave safe bowl or dish with 1 cup water. Cover with vented lid and cook on high about 4 or 5 minutes until tender and bright green. Alternatively, bring pot of water to boil. Add bok choy and cook for 2 to 3 minutes, until shiny and green. With either method, drain and set aside on a serving platter.
Heat oil in large pan. Add onions and garlic until fragrant, about 30 seconds. Add mushrooms and cook until tender, stirring often. This should take about 20 minutes. Add oyster sauce mixture and mix to coat mushrooms and heat through. Pour mushroom sauce over bok choy. Serve with white rice.
It's all about the simple sauce, which tastes delicious with the crunchy bok choy and earthy shiitake mushrooms. The combination is so fresh and healthy. We even got Max to eat his first mushroom in six years (!!) — all thanks to this recipe.
This vegetable blend makes a great side dish. The oyster sauce is also divine with broccoli, bell peppers, snow peas and whatever else you have on hand. Serve it along side cashew chicken or Asian glazed pork tenderloin. Or make it a complete meal by adding stir-fried strips of chicken or beef or sautéed shrimp.
Mangia! Mangia!
Andrea
Baby Bok Choy & Mushrooms with Oyster Sauce
Adapted from Allrecipes.com
4 tablespoons oyster sauce
2 tablespoons low-sodium soy sauce
1 tablespoon brown sugar
2 teaspoons cornstarch
1/2 cup water
8 heads baby bok choy, trimmed but leaving heads intact
1 cup water (for microwave steaming)
3 tablespoons peanut or vegetable oil
1 bunch green onions, thinly sliced
1 to 2 tablespoons minced garlic
10 ounces sliced shiitake mushrooms (or substitute your favorite fungi)
In a small bowl, whisk together oyster sauce, soy sauce and brown sugar until sugar dissolves. Mix cornstarch and water, making sure cornstarch dissolves. Combine water and oyster sauce mixtures, stirring until smooth. Set aside.
Steam bok choy in microwave or blanche on stove top. Place bok choy in microwave safe bowl or dish with 1 cup water. Cover with vented lid and cook on high about 4 or 5 minutes until tender and bright green. Alternatively, bring pot of water to boil. Add bok choy and cook for 2 to 3 minutes, until shiny and green. With either method, drain and set aside on a serving platter.
Heat oil in large pan. Add onions and garlic until fragrant, about 30 seconds. Add mushrooms and cook until tender, stirring often. This should take about 20 minutes. Add oyster sauce mixture and mix to coat mushrooms and heat through. Pour mushroom sauce over bok choy. Serve with white rice.
Labels:
beef,
bell peppers,
bok choy,
broccoli,
brown sugar,
chicken,
garlic,
green onions,
mushrooms,
onion,
oyster sauce,
shiitake mushrooms,
shrimp,
side dish,
snow peas,
soy sauce
Wednesday, April 15, 2015
Sunday Gravy (Tortora family tomato sauce)
Confession time. I rarely make my own tomato sauce – or 'gravy' as us East Coast Italians call it – because it takes time to develop the deep, rich flavor that is its signature.
When I was a kid, my grandmothers made gravy nearly every Sunday, to go with the 'macaroni' we were having at that week's family gathering. When Amy asked for the Tortora tomato sauce recipe, I finally put it down on paper. In the process, I discovered many family variations: My brother adds grated carrot for sweetness. My Dad pours in some red wine. My mom tosses in a pinch of thyme and maybe a dash of sugar. My Grammy Marie always spiced it up with lots of red pepper.
The one component no one ever changes is what makes this gravy special. The tomato sauce simmers for hours with browned Italian sausage links and homemade meatballs. For special occasions such as Christmas, browned beef short ribs and brachiole (thin slices of beef rolled with parmesan cheese, parsley and basil, and tied with kitchen twine) are added.
Prefer chicken? Do what my Grandma Lucy sometimes did: Brown some chicken breasts and thighs and add them to the sauce instead of meatballs and sausage.
Vegetarian? Simply skip the meat.
If you happen to overdue it on one of the spices, as I may or may not have done recently with the red pepper flakes, fear not! Just toss in another can of tomatoes (crushed, diced or sauce) to dilute the strong flavor. You will be rewarded with extra gravy to use for making lasagna or another meal.
Finally, a warning: This recipe makes A LOT of tomato sauce. I use a 22 quart pot. This ensures plenty of room for the meatballs and sausage. If you don't have a pot this large, cut the recipe in half.
My recommendation? Buy or borrow a giant pot, invite your friends and family to dinner and make room in your freezer.
Mangia! Mangia!
Andrea
Sunday Gravy
1 or 2 tablespoons olive oil to cover the bottom of a large pot
About 2 cups diced yellow or white onion
3 to 5 minced garlic gloves
1 tablespoon dried oregano
1 tablespoon dried basil
1 tablespoon dried parsley
1/2 to 1 teaspoon red pepper flakes
1 to 2 teaspoons garlic powder
1 teaspoon salt
1 teaspoon pepper
2 (6 ounce) cans of tomato paste
3 (28 ounce) cans of crushed tomatoes
2 (14.5 ounce) cans of diced tomatoes
1 (14.5 ounce) can of unseasoned tomato sauce
1 (8 ounce) can of unseasoned tomato sauce
1 cup dry red wine, optional
12 or more large cooked meatballs, optional
1 or 2 pounds of browned or baked Italian sausage links, optional
Warm oil in bottom of pot. Add onion and garlic and cook until onion is translucent. Add in spices and salt and pepper and cook until golden, about 1 to 2 minutes. Add tomato paste and stir, cooking until mixture is caramelized. Taking the time to brown the aromatics gives the gravy a richer flavor.
Stir in all cans of tomatoes and tomato sauce. (Note: You can vary the types of tomatoes you use. For example, if you like a chunkier sauce, substitute diced tomatoes for the canned tomato sauce.) Add red wine, if using.
Bring gravy to a boil, stirring occasionally. Lower heat and let simmer for about 20 minutes, stirring a few times. Add meatballs, sausage, etc., and continue to simmer on lowest setting for at least 1 hour but preferably more (you can simmer it all day,) stirring occasionally to prevent sauce from burning in the bottom of the pot.
I recommend tasting the gravy here and there. It's OK to add in more spices as the sauce simmers to achieve the flavor you prefer.
Serve hot with your favorite pasta.
When I was a kid, my grandmothers made gravy nearly every Sunday, to go with the 'macaroni' we were having at that week's family gathering. When Amy asked for the Tortora tomato sauce recipe, I finally put it down on paper. In the process, I discovered many family variations: My brother adds grated carrot for sweetness. My Dad pours in some red wine. My mom tosses in a pinch of thyme and maybe a dash of sugar. My Grammy Marie always spiced it up with lots of red pepper.
The one component no one ever changes is what makes this gravy special. The tomato sauce simmers for hours with browned Italian sausage links and homemade meatballs. For special occasions such as Christmas, browned beef short ribs and brachiole (thin slices of beef rolled with parmesan cheese, parsley and basil, and tied with kitchen twine) are added.
Prefer chicken? Do what my Grandma Lucy sometimes did: Brown some chicken breasts and thighs and add them to the sauce instead of meatballs and sausage.
Vegetarian? Simply skip the meat.
If you happen to overdue it on one of the spices, as I may or may not have done recently with the red pepper flakes, fear not! Just toss in another can of tomatoes (crushed, diced or sauce) to dilute the strong flavor. You will be rewarded with extra gravy to use for making lasagna or another meal.
Finally, a warning: This recipe makes A LOT of tomato sauce. I use a 22 quart pot. This ensures plenty of room for the meatballs and sausage. If you don't have a pot this large, cut the recipe in half.
My recommendation? Buy or borrow a giant pot, invite your friends and family to dinner and make room in your freezer.
Mangia! Mangia!
Andrea
Sunday Gravy
1 or 2 tablespoons olive oil to cover the bottom of a large pot
About 2 cups diced yellow or white onion
3 to 5 minced garlic gloves
1 tablespoon dried oregano
1 tablespoon dried basil
1 tablespoon dried parsley
1/2 to 1 teaspoon red pepper flakes
1 to 2 teaspoons garlic powder
1 teaspoon salt
1 teaspoon pepper
2 (6 ounce) cans of tomato paste
3 (28 ounce) cans of crushed tomatoes
2 (14.5 ounce) cans of diced tomatoes
1 (14.5 ounce) can of unseasoned tomato sauce
1 (8 ounce) can of unseasoned tomato sauce
1 cup dry red wine, optional
12 or more large cooked meatballs, optional
1 or 2 pounds of browned or baked Italian sausage links, optional
Warm oil in bottom of pot. Add onion and garlic and cook until onion is translucent. Add in spices and salt and pepper and cook until golden, about 1 to 2 minutes. Add tomato paste and stir, cooking until mixture is caramelized. Taking the time to brown the aromatics gives the gravy a richer flavor.
Stir in all cans of tomatoes and tomato sauce. (Note: You can vary the types of tomatoes you use. For example, if you like a chunkier sauce, substitute diced tomatoes for the canned tomato sauce.) Add red wine, if using.
Bring gravy to a boil, stirring occasionally. Lower heat and let simmer for about 20 minutes, stirring a few times. Add meatballs, sausage, etc., and continue to simmer on lowest setting for at least 1 hour but preferably more (you can simmer it all day,) stirring occasionally to prevent sauce from burning in the bottom of the pot.
I recommend tasting the gravy here and there. It's OK to add in more spices as the sauce simmers to achieve the flavor you prefer.
Serve hot with your favorite pasta.
Labels:
basil,
brachiole,
chicken,
crushed tomatoes,
diced tomatoes,
garlic,
Italian sausage,
meatballs,
onion,
oregano,
parsley,
red pepper flakes,
red wine,
short ribs,
Sunday gravy,
tomato paste,
tomato sauce,
vegetarian
Wednesday, March 18, 2015
Turkey, Black Bean & Sweet Potato Chili
The warmer days of middle March mean my boys play outside as long as they can. As the nights remain cool, it's a good time for a spicy-sweet chili that fills their bellies without being too heavy.
This turkey, black bean and sweet potato combo is nourishing and the slightly honeyed taste of the potatoes hints of full-on spring.
This dinner is close to my heart because I first started making it when we moved from Cincinnati to Peoria. We spent three months in a cozy, turn-of-the-century cottage. Our temporary home offered a tighter space that fostered just the right amount of family closeness we needed during our transition to a new city.
Since then I've tweaked this recipe from its original – a skillet potpie with a cornbread topping. I never could get the cornbread to be anything buy mushy. Now I serve it on the side. And my boys eat more of the chili. Points for Mom!
Whenever I make this meal, I think of the start of our Peoria adventure (four years ago now!) and it warms my soul. I hope it makes your family feel all warm inside, too.
Mangia! Mangia!
Andrea
Turkey, Black Bean & Sweet Potato Chili
Adapted from GoodHousekeeping.com.
Serves 6.
1 pound sweet potatoes, peeled and diced
1/4 cup water
1 jumbo onion (about 1 pound) finely chopped
1 tablespoon vegetable oil
2 garlic cloves finely chopped or 1 tablespoon jarred minced garlic
1 pound lean ground turkey
1/4 teaspoon salt
3/4 teaspoon black pepper, divided
1 or 2 tablespoons canned chopped roasted green chilis or pickled jalapeño peppers, if you prefer more kick
1 tablespoon chili powder
1 teaspoon ground cumin
2 cans (14.5 ounce) no salt added, fire roasted or plain diced tomatoes, mostly drained
1 can (15 ounce) no salt added black beans, rinsed and drained
1/2 teaspoon black pepper
Optional:
Chopped fresh cilantro for garnish
Shredded cheddar or Monterey Jack cheese for topping
Place sweet potatoes and water in a microwave safe bowl. Cover with plastic wrap and vent. Microwave on high for 5 minutes or until tender.
Using a deep 12-inch skillet or Dutch oven, heat oil over a medium-high flame. Add onion and cook, stirring frequently, until lightly browned, about 5 minutes. (Don't worry – while this looks like a ton of onions, they melt down and add a subtle flavor to the chili.)
Add garlic and cook for 1 or 2 minutes. Add turkey, salt and 1/4 teaspoon black pepper. Cook for 5 minutes, breaking up turkey into small pieces.
When turkey is lightly browned, add roasted chili or jalapeño peppers, chili powder, cumin and the sweet potatoes with their liquid. Cook for 1 or 2 minutes while stirring.
Add tomatoes, beans and black pepper and heat until bubbling. Reduce heat and simmer for about 20 minutes.
Dish up chili into bowls. Top with cilantro and cheese.
This turkey, black bean and sweet potato combo is nourishing and the slightly honeyed taste of the potatoes hints of full-on spring.
This dinner is close to my heart because I first started making it when we moved from Cincinnati to Peoria. We spent three months in a cozy, turn-of-the-century cottage. Our temporary home offered a tighter space that fostered just the right amount of family closeness we needed during our transition to a new city.
Since then I've tweaked this recipe from its original – a skillet potpie with a cornbread topping. I never could get the cornbread to be anything buy mushy. Now I serve it on the side. And my boys eat more of the chili. Points for Mom!
Whenever I make this meal, I think of the start of our Peoria adventure (four years ago now!) and it warms my soul. I hope it makes your family feel all warm inside, too.
Mangia! Mangia!
Andrea
Turkey, Black Bean & Sweet Potato Chili
Adapted from GoodHousekeeping.com.
Serves 6.
1 pound sweet potatoes, peeled and diced
1/4 cup water
1 jumbo onion (about 1 pound) finely chopped
1 tablespoon vegetable oil
2 garlic cloves finely chopped or 1 tablespoon jarred minced garlic
1 pound lean ground turkey
1/4 teaspoon salt
3/4 teaspoon black pepper, divided
1 or 2 tablespoons canned chopped roasted green chilis or pickled jalapeño peppers, if you prefer more kick
1 tablespoon chili powder
1 teaspoon ground cumin
2 cans (14.5 ounce) no salt added, fire roasted or plain diced tomatoes, mostly drained
1 can (15 ounce) no salt added black beans, rinsed and drained
1/2 teaspoon black pepper
Optional:
Chopped fresh cilantro for garnish
Shredded cheddar or Monterey Jack cheese for topping
Place sweet potatoes and water in a microwave safe bowl. Cover with plastic wrap and vent. Microwave on high for 5 minutes or until tender.
Using a deep 12-inch skillet or Dutch oven, heat oil over a medium-high flame. Add onion and cook, stirring frequently, until lightly browned, about 5 minutes. (Don't worry – while this looks like a ton of onions, they melt down and add a subtle flavor to the chili.)
Add garlic and cook for 1 or 2 minutes. Add turkey, salt and 1/4 teaspoon black pepper. Cook for 5 minutes, breaking up turkey into small pieces.
When turkey is lightly browned, add roasted chili or jalapeño peppers, chili powder, cumin and the sweet potatoes with their liquid. Cook for 1 or 2 minutes while stirring.
Add tomatoes, beans and black pepper and heat until bubbling. Reduce heat and simmer for about 20 minutes.
Dish up chili into bowls. Top with cilantro and cheese.
Subscribe to:
Posts (Atom)