Thursday, April 30, 2015

Mint Julep

Happy Derby Week, y'all! It's that time of year when I always miss my Old Kentucky Home. It's also that time of year when I wish I liked the mint julep, the traditional drink that honors the fastest two minutes in sports. This former Kentuckian likes mint, likes bourbon. But the combo has always been...meh. The hubby, who I met and married in Lexington, KY, has always agreed. Until now and I will get to that.

As Kentucky journalists, Jeff and I worked a few Derby Days and at the end would "reward" ourselves with a sickly sweet julep at Churchill Downs. Flash forward 15ish years and I finally decided to make the julep myself.

Y'all I love this julep. Maybe that's because I added in a few basil leaves. Maybe it's just because I made one expressly for me and hubby rather than consuming one made en masse at Churchill. I am sharing this with you just in time for you to hit the liquor store and make your own juleps to sip during Saturday's big race. Hurry -- those ponies aren't going to wait on you!

XOXO,
Amy

PS: Jeff said "this is the best mint julep I have ever had."
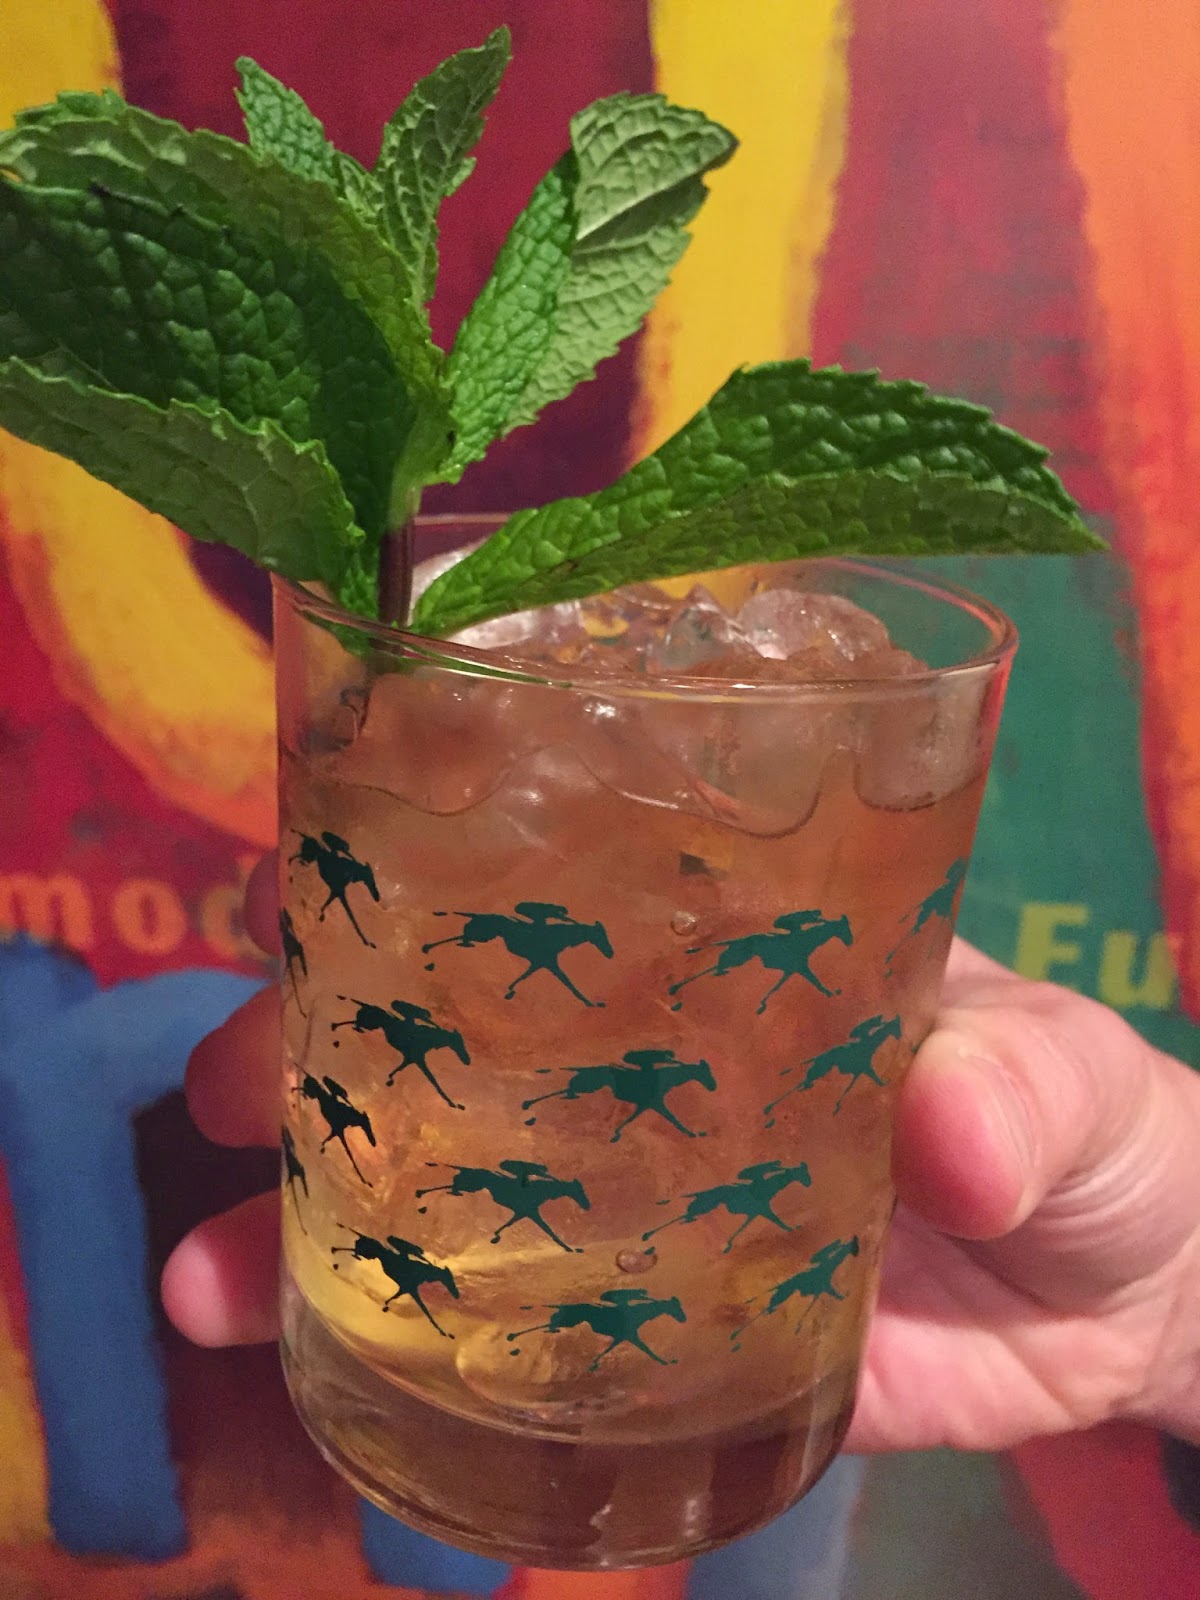


Mint Julep
Adapted from thebar.com
Makes 12 cocktails

15 ounces bourbon
30 mint leaves, plus extra mint for garnish
6 (or more) basil leaves
1 cup sugar
1 cup water
Ice

Wash mint and basil leaves, pat dry and place in a small bowl.

Cover leaves with 3 ounces of bourbon and let soak for 15 minutes.

Remove mint and basil leaves from bourbon and place in cotton cloth. Wring leaves over the bowl with the bourbon. Dip the cloth back into the bourbon and repeat a couple times. Really bruise the leaves. This is your mint extract.

For a mintier extract, put the bruised leaves into the bourbon; otherwise, leave as is. Set extract aside.

Now make your simple syrup. Bring one cup of water to a boil and stir in one cup of sugar. As soon as sugar dissolves, remove from heat and let sit -- covered -- for one hour.

Combine mint extract and simple syrup in a glass jar or container. Seal the jar and refrigerate overnight. BTW, if you kept the mint leaves in your mint extract, you will want to strain them when combining with the simple syrup or before mixing your julep.

Fill rocks glasses with ice and one ounce of bourbon. Add marinated julep mixture to taste -- more if you want a sweeter julep and less if you don't. Garnish with sprig of mint. Enjoy!


Wednesday, April 29, 2015

Baby Bok Choy & Mushrooms with Oyster Sauce

I could eat this dish Every. Single. Day.

It's all about the simple sauce, which tastes delicious with the crunchy bok choy and earthy shiitake mushrooms. The combination is so fresh and healthy. We even got Max to eat his first mushroom in six years (!!) — all thanks to this recipe.

This vegetable blend makes a great side dish. The oyster sauce is also divine with broccoli, bell peppers, snow peas and whatever else you have on hand. Serve it along side cashew chicken or Asian glazed pork tenderloin. Or make it a complete meal by adding stir-fried strips of chicken or beef or sautéed shrimp.

Mangia! Mangia!
Andrea


Baby Bok Choy & Mushrooms with Oyster Sauce
Adapted from Allrecipes.com

4 tablespoons oyster sauce
2 tablespoons low-sodium soy sauce
1 tablespoon brown sugar
2 teaspoons cornstarch
1/2 cup water
8 heads baby bok choy, trimmed but leaving heads intact
1 cup water (for microwave steaming)
3 tablespoons peanut or vegetable oil
1 bunch green onions, thinly sliced
1 to 2 tablespoons minced garlic
10 ounces sliced shiitake mushrooms (or substitute your favorite fungi)

In a small bowl, whisk together oyster sauce, soy sauce and brown sugar until sugar dissolves. Mix cornstarch and water, making sure cornstarch dissolves. Combine water and oyster sauce mixtures, stirring until smooth. Set aside.

Steam bok choy in microwave or blanche on stove top. Place bok choy in microwave safe bowl or dish with 1 cup water. Cover with vented lid and cook on high about 4 or 5 minutes until tender and bright green. Alternatively, bring pot of water to boil. Add bok choy and cook for 2 to 3 minutes, until shiny and green. With either method, drain and set aside on a serving platter.

Heat oil in large pan. Add onions and garlic until fragrant, about 30 seconds. Add mushrooms and cook until tender, stirring often. This should take about 20 minutes. Add oyster sauce mixture and mix to coat mushrooms and heat through. Pour mushroom sauce over bok choy. Serve with white rice.


Monday, April 27, 2015

Ham and Cheese Oven Omelette

My mom cracks me up. She doesn't mean to, but she does. For example, ham nibbies. What is a ham nibbie, you ask? Well, let me tell you.

My mom found a particularly good price on ham and purchased an extravagant amount. You can't have too much ham, right? Wrong. After eating ham for several days in a row, there was still quite a bit of meat in the pan. So, my clever mom diced up the remaining leftovers and popped it in the freezer.

Fast forward a few weeks, and I ask Mom what's for dinner. "Ham nibbies."

"Uh, mom, what are ham nibbies?"

She pulls the diced leftover ham out of the freezer and holds it aloft. "Ham nibbies!" she exclaims proudly.

While I wouldn't recommend serving your family a plate piled high with plain old ham nibbies for dinner, they are perfect for making a Ham and Cheese Oven Omelette.

Let's get cooking!
Erin


Ham and Cheese Oven Omelette
Adapted from Williams Sonoma and inspired by leftover Apricot Mustard Glazed Ham
Serves: 6

8 eggs
1 cup milk
1/4 teaspoon salt
Pinch of ground nutmeg
1 1/2 cups diced (or thinly sliced) ham
1 cup shredded smoked Gouda or cheddar cheese
1 1/2 cups French bread or baguette cubes (1/2" cubes)
1 tablespoon olive oil
Salt and pepper

Preheat oven to 350 degrees. Grease an 8" square baking dish and set aside.

In a large bowl, whisk eggs until thoroughly blended. Whisk in milk, salt, and nutmeg. Stir in ham and cheese. Pour egg mixture into the prepared baking dish. (If you're preparing the omelette ahead of time, at this point you can cover it with plastic wrap and pop it in the oven until you're ready to bake it.)

In a separate bowl, toss bread cubes with olive oil and salt and pepper to taste. Sprinkle bread over the egg mixture. Bake for about 40 minutes, until the eggs are set and golden brown around the edges. Serve hot.


P.S. Looking for a side dish? This rich Ham and Cheese Oven Omelette pairs perfectly with a refreshing salad like this one with oranges and fennel.

Friday, April 24, 2015

Baked Steel Cut Oatmeal

There are too many descriptors for Baked Steel Cut Oatmeal. Allow me to note just a few: delicious, healthy, hearty, fruity, nutty, filling, sweet, chewy, easy... I could go on, but I've got dishes to wash TV to watch.

When I saw a recipe for Baked Steel Cut Oatmeal, I knew I had to try it. I've mentioned my love of oatmeal once or twice on this blog. Or maybe three times. My pantry is a Tetris tower of instant oats, old-fashioned oats, and steel cut oats just waiting for their turn to shine on the breakfast table.

This recipe couldn't be simpler to make with ingredients you probably have in your pantry and freezer. It takes a while to bake, so stir it together before you hop in the shower and put on your false eyelashes or whatever it is that you do in the morning. And then enjoy the mind-blowing aroma of oats and brown sugar as your oven does the heavy lifting.

Let's get cooking.
Erin


Baked Steel Cut Oatmeal
Adapted from The Kitchen and this Baked Oatmeal
Serves 4-6

1 cup steel cut oats
1/2 teaspoon salt
2 cups milk
2 tablespoons butter, melted
1 egg
1/2 cup brown sugar
1/2 teaspoon cinnamon
1 cup frozen peaches*
1 cup frozen raspberries*

Preheat oven to 350 degrees. Grease an 8" x 8" baking dish and set aside.

Combine oats and salt. In a separate bowl, whisk together milk, butter, egg, brown sugar, and cinnamon. Stir into the oats. Gently fold in peaches and raspberries. Pour into prepared baking dish and cover with aluminum foil.

Bake for 30 minutes. Remove the foil and continue to bake until the oats are tender and most of the liquid has been absorbed, about 50 additional minutes. Serve warm.

*Feel free to replace peaches and raspberries with your favorite fruit. I bet mixed berries or even chopped apple would be divine. If you come up with another delicious combination, please let me know.

Wednesday, April 22, 2015

Cajun Turkey Jambalaya

Tired of leftovers? Here's a great way to disguise last night's turkey or chicken in an entirely new dish. This quickly-prepped dinner is a delicious way to use what's left from a big holiday bird or the weekend's whole roasted chicken. In fact, I ordered an extra large smoked turkey from my butcher this Easter — just so I could stir this up later on.

Why do I love this recipe so much? It's a one-pot meal. It's easily varied. It has bacon in it! And it works equally well with freshly cooked, leftover or smoked turkey or chicken.

But I have to be honest with you. The real reason this is one of my go-to suppers is that the turkey and rice dish is a real crowd pleaser at my house. The jambalaya delivers enough kick to satisfy my husband and oldest son Max, who prefer spicy foods. Yet the heat is mild enough for me and Sam to enjoy, too.

A California Chopped Salad or green salad topped with Apple-Herb Vinaigrette would be a perfect way to round out this meal.

Mangia! Mangia!
Andrea


Cajun Turkey Jambalaya
Adapted from About.com Southern Food

4 ounces bacon, chopped
1 1/2 cups chopped onion
1 cup chopped celery
3/4 cup chopped green bell pepper (red, yellow or orange bell peppers work here, too)
3 garlic cloves, minced
3 cups leftover or cooked fresh turkey or chicken (white or dark meat or both), cut in cubes
4 cups chicken stock or broth
1 cup chopped cilantro (or parsley or both), divided
1 teaspoon salt
1/2 teaspoon black pepper
1/2 teaspoon dried marjoram
1/2 teaspoon cayenne pepper
2 bay leaves
1 1/2 cups raw rice
1/2 cup sliced green onions

Preheat oven to 350 degrees.

Using a Dutch oven or large ovenproof pot with lid, cook bacon over medium heat until crisp. Remove bacon and set aside.

Add the onion, celery, bell pepper, garlic and turkey to the bacon drippings and saute for 20 minutes, stirring often.

Add the chicken stock or broth, 1/2 cup of the cilantro, salt, black pepper, marjoram, cayenne and bay leaves. Stir together and bring to a boil.


Add the rice and stir to combine. Cover and place pot in center of oven. Bake until liquid is absorbed and rice is tender, about 45 minutes.

Spoon servings onto plates or into bowls. Top with green onions, bacon and remaining cilantro.


Monday, April 20, 2015

Strawberry Shortcake

My daughters and I have an Easter tradition. Lucy and Penny can pick any dessert and I will make it. They chose crème brûlée last year -- giving me the excuse to buy a kitchen torch and ramekins -- and raspberry tart the year before that and cheesecake the year before that.

This year, I asked them to pretty please pick something quick and easy and that didn't require crazy equipment or hard-to-find ingredients as we'd be spending the holiday at my parents' house. At one point, one of them mentioned strawberry shortcake. Perfect!

I've made this strawberry shortcake since then, whipping it up for a casual dinner party Chez George. And I am pretty sure I will be making it a few more times between now and the end of summer. 

This version reminds me of the strawberry shortcake my mom used to make, using Bisquick for the cake. At some point, I want to mix in a few basil leaves with the strawberries. My favorite Charlotte restaurant serves this amazing strawberry cake with basil gelato. Mmmmm...I'm going to be thinking about that cake for a while now.

Anyhow, I hope you enjoy this delish classic.

XOXO,
Amy


Strawberry Shortcake
Adapted from AllRecipes.com
Yields 1 8-inch round cake

2-3 pounds fresh strawberries
1/3 cup white sugar
2 1/4 cups all-purpose flour
4 teaspoons baking powder
2 tablespoons white sugar
1/4 teaspoon salt
1/3 cup butter, softened
1 egg
2/3 cup milk
1 cup whipped heavy cream, sweetened to your liking

Place a metal bowl in the freezer. You will use this bowl at the end to make your whipped cream.

Trim and slice strawberries and toss them with 1/3 cup of white sugar. Set aside.

Preheat oven to 425 degrees. Grease an 8-inch round cake pan.

In a medium bowl, combine the flour, baking powder, 2 tablespoons white sugar and the salt. Slice the softened butter into the dry mixture and use a pastry cutter until the mixture is crumbly. (Note: My mom and I don't have pastry cutters, so I used a potato masher, which worked just fine.)

Press batter into the prepared pan. Bake at 425 degrees for 15 to 20 minutes or until golden brown. Let cool partially until you are ready to serve.

Prepare the whipped cream. Pour the cream into the chilled bowl, add about 2 tablespoons sugar. Set mixer to medium and whip cream for a minute or two before upping the speed. Mix until soft peaks form and it looks like the consistency of what come out of the Reddi-Wip can. (Note: Erin uses powdered sugar and vanilla extract. She also has instructions for ensuring you don't end up making butter. Click here.)

Cut cake into wedges and plate. Top with strawberries and some of their juices and the whipped cream. You can also garnish with fresh mint or basil.

Friday, April 17, 2015

Parmesan Spaghetti Squash

I can't pass up a giant vegetable. When I was perusing the stack of squash at the grocery store, all the other orbs paled in comparison to this glorious gourd. So I popped it into my car-shaped grocery cart, and my son steered us through the rest of our shopping trip. (He's the designated cart driver.)

It wasn't until the clerk rang us up at check-out that I discovered my squash was five pounds. FIVE POUNDS. All the recipes I read for preparing spaghetti squash called for a two pound squash. Whoops. Guess I got a little greedy there.

If your spaghetti squash isn't quite as ginormous as mine, you might not need to bake it for quite as long. But I wouldn't cut down the amount of Parmesan cheese. You can never have too much cheese.

Let's get cooking!
Erin


Parmesan Spaghetti Squash

1 large spaghetti squash
Salt and pepper
1 tablespoon butter
1/4 teaspoon dried basil
1/4 cup shredded Parmesan cheese, plus more for serving

Preheat oven to 350 degrees. Meanwhile, microwave squash for about five minutes. This will soften the squash and make it easier to cut in half. Allow the squash to cool for a minute so you don't burn your fingers, then slice it in half lengthwise. Scoop out and discard the seeds.

Season cut sides of squash with salt and pepper and place cut-side down on a large rimmed baking sheet. Bake until the flesh is tender, about 45 minutes if your squash is a five-pound behemoth. It will probably take closer to 30 minutes for a smaller squash. Use a fork to shred the squash into strands and place in a bowl.

If your squash has released lots of liquid into the bowl, try to drain some of it off. Stir in butter, basil, Parmesan cheese, and salt and pepper to taste. Serve with extra Parmesan sprinkled over the top.


P.S. Want more squash? Try making acorn squash in the microwave. Yep. The microwave, people. Too easy for words.

Wednesday, April 15, 2015

Sunday Gravy (Tortora family tomato sauce)

Confession time. I rarely make my own tomato sauce – or 'gravy' as us East Coast Italians call it – because it takes time to develop the deep, rich flavor that is its signature.

When I was a kid, my grandmothers made gravy nearly every Sunday, to go with the 'macaroni' we were having at that week's family gathering. When Amy asked for the Tortora tomato sauce recipe, I finally put it down on paper. In the process, I discovered many family variations: My brother adds grated carrot for sweetness. My Dad pours in some red wine. My mom tosses in a pinch of thyme and maybe a dash of sugar. My Grammy Marie always spiced it up with lots of red pepper.

The one component no one ever changes is what makes this gravy special. The tomato sauce simmers for hours with browned Italian sausage links and homemade meatballs. For special occasions such as Christmas, browned beef short ribs and brachiole (thin slices of beef rolled with parmesan cheese, parsley and basil, and tied with kitchen twine) are added.

Prefer chicken? Do what my Grandma Lucy sometimes did: Brown some chicken breasts and thighs and add them to the sauce instead of meatballs and sausage.

Vegetarian? Simply skip the meat.

If you happen to overdue it on one of the spices, as I may or may not have done recently with the red pepper flakes, fear not! Just toss in another can of tomatoes (crushed, diced or sauce) to dilute the strong flavor. You will be rewarded with extra gravy to use for making lasagna or another meal.

Finally, a warning: This recipe makes A LOT of tomato sauce. I use a 22 quart pot. This ensures plenty of room for the meatballs and sausage. If you don't have a pot this large, cut the recipe in half.

My recommendation? Buy or borrow a giant pot, invite your friends and family to dinner and make room in your freezer.

Mangia! Mangia!
Andrea


Sunday Gravy

1 or 2 tablespoons olive oil to cover the bottom of a large pot
About 2 cups diced yellow or white onion
3 to 5 minced garlic gloves
1 tablespoon dried oregano
1 tablespoon dried basil
1 tablespoon dried parsley
1/2 to 1 teaspoon red pepper flakes
1 to 2 teaspoons garlic powder
1 teaspoon salt
1 teaspoon pepper
2 (6 ounce) cans of tomato paste
3 (28 ounce) cans of crushed tomatoes
2 (14.5 ounce) cans of diced tomatoes
1 (14.5 ounce) can of unseasoned tomato sauce
1 (8 ounce) can of unseasoned tomato sauce
1 cup dry red wine, optional
12 or more large cooked meatballs, optional
1 or 2 pounds of browned or baked Italian sausage links, optional

Warm oil in bottom of pot. Add onion and garlic and cook until onion is translucent. Add in spices and salt and pepper and cook until golden, about 1 to 2 minutes. Add tomato paste and stir, cooking until mixture is caramelized. Taking the time to brown the aromatics gives the gravy a richer flavor.

Stir in all cans of tomatoes and tomato sauce. (Note: You can vary the types of tomatoes you use. For example, if you like a chunkier sauce, substitute diced tomatoes for the canned tomato sauce.) Add red wine, if using.

Bring gravy to a boil, stirring occasionally. Lower heat and let simmer for about 20 minutes, stirring a few times. Add meatballs, sausage, etc., and continue to simmer on lowest setting for at least 1 hour but preferably more (you can simmer it all day,) stirring occasionally to prevent sauce from burning in the bottom of the pot.

I recommend tasting the gravy here and there. It's OK to add in more spices as the sauce simmers to achieve the flavor you prefer.

Serve hot with your favorite pasta.


Monday, April 13, 2015

No Sugar Banana Bread

I recently had dates on hand for a cookie recipe that I never made. I lost track of the recipe, so I thought I'd experiment with my sister-in-law's tried-and-true banana bread. Note that I decided to try this while the kids were out at the park with their dad, so they wouldn't see me chopping dates and skipping the white sugar. Genius, I know.

I was afraid the bread wouldn't be sweet enough with  just the dates, so I did add in a little honey. I also decided to use butter instead of Crisco, because that seems healthier. I used up some whole wheat flour. I tossed in some chocolate chips as a little treat since we we're being good by using dates. I would have added chopped walnuts, but I didn't have any on hand. I had pecans in the pantry, but Penny -- who had returned from the park, never the wiser about the dates -- vetoed the pecans.

Guess what? Lucy and Penny gobbled up this bread and begged for seconds. Lucy commented on liking the texture better. This bread is indeed more moist than the original we'd been making for years. (Ssssh, don't tell Aunt Jennie.) Penny commented on the chocolate chips, which was not at all surprising. Thing is this bread would be super yummy -- and truly no sugar -- without the chips and that's how I plan to make it next time.


XOXO,
Amy


No Sugar Banana Bread
2 cups flour (I used up the remaining 1 1/2 cup white whole wheat flour I had; the rest was all purpose flour)
1 teaspoon baking soda
1/2 teaspoon salt
1 teaspoon cinnamon
1 cup packed dates, pitted and chopped
1/2 cup butter, melted
Honey, just shy of 1/4 cup
2 eggs
1 cup mashed bananas (about 2 or 3)
1 tablespoon lemon juice
1 cup (or less) chocolate chips (optional)
1 cup chopped walnuts (optional)


Preheat oven to 350.

Stir together the first four dry ingredients and set aside.

In large bowl, mix dates and melted butter on medium to medium high speed. Add the honey, eggs, bananas and lemon juice--mix until combined and the dates are no longer lumpy. Sift in dry ingredients, little by little.

Pour mixture into greased loaf pan. Bake at 350 for 60-65 minutes or until a toothpick inserted into the middle comes out clean. Cool on wire rack for 10 minutes before removing from pan.

Friday, April 10, 2015

Grilled Mozzarella and Fig Jam Panini

I've told you time and time again about my love for peanut butter and jelly, but I have a confession to make...

I'm having a lunch affair. I'm cheating on PB&J with Grilled Mozzarella and Fig Jam Sandwiches. I'd say I'm ashamed of myself, but something this delicious can't be denied. Make one today, and you'll see what I mean. You'll have a new lunchtime love, too.

Let's get cooking!
Erin


Grilled Mozzarella and Fig Jam Panini
Makes one sandwich

1 small baguette, sliced lengthwise (or your favorite bread or roll)
2 teaspoons fig jam
2 ounces (approximately) fresh mozzarella, thinly sliced

Heat panini grill. Spread a thin layer of fig jam on cut sides of baguette. If your mozzarella seems too wet, blot it dry with a paper towel so it doesn't make your bread soggy. Arrange mozzarella on the bottom half of the baguette, then close up the sandwich with the top half. Place in the panini grill and cook until the cheese is melted and the bread is crisp, about five minutes.


P.S. Don't have a panini press? No problem. Simply wrap your sandwich in aluminum foil and bake at 425 degrees for 12-15 minutes. Crispy, melty perfection.

P.P.S. Missing the meat? Add some prosciutto to take this sandwich to a new level.

Wednesday, April 8, 2015

Buttermilk Spoonbread

What to do with half a carton of buttermilk? Make spoonbread!

I stumbled on this easy and light recipe a few summers ago while looking for culinary inspiration beyond banana bread to use up the buttermilk sitting in my fridge. The result is a tangy and souffle-like concoction that makes a great side dish to any grilled meat. It's also a tasty vegetarian entree when accompanied by a salad or some green vegetables.

This spoonbread is in my favorites file because my son Sam asked for it again more than once.

Mangia! Mangia!
Andrea


Buttermilk Spoonbread
Adapted from Relish.com

Butter to coat casserole dish
1 1/2 cups buttermilk
1/2 cup stone-ground yellow or white cornmeal
2 tablespoons butter
3/4 teaspoon salt
3 eggs, separated
3 green onions, thinly sliced
1/2 cup shredded cheese such as cheddar or colby, optional

Preheat over to 375 degrees. Butter the sides and bottom of a 1 1/2 quart (4 cup) casserole dish.

Warm buttermilk in a saucepan over medium heat. Add cornmeal and stir frequently, until thickened and smooth. This should take about 3 minutes. Stir in butter and salt. Remove from heat and let cool.

While buttermilk mixture cools, beat the egg whites until soft peaks form.


Whisk egg yolks into the cornmeal mixture. Stir in green onions and the cheese, if using. Gently fold in the egg whites, a little at a time, into the cornmeal mixture. Be careful not to mix or you will deflate the egg whites.

Pour batter into prepared casserole dish. Bake for 25 to 30 minutes. The spoonbread should be puffed and golden brown on top and set in the center. Note: The top may split, which is totally OK! Serve warm.


Monday, April 6, 2015

Roasted (Kitchen Sink) Brussels Sprouts

One major coup of my marriage: I got my husband to eat--and like--Brussels sprouts. Now if I could just get him to like mushrooms.

I have followed recipes for Brussels sprouts. They often call for honey or maple syrup and maybe bacon. Mmm, bacon. Now, I just kinda use whatever I have on hand--hence "kitchen sink." Sriracha is nice for balancing out the sweetness.

Anyhow, I recently roasted what I call "kitchen sink" Brussels sprouts and the younger daughter ate two (victory!) and the hubby ate many more. The point is to be adventuresome, use what is on hand, and make sure to cook them long enough that they aren't hard (hubby hates that).

XOXO,
Amy

Roasted (Kitchen Sink) Brussels Sprouts
12-16 ounces Brussels sprouts, trimmed
1 shallot, diced
2 cloves garlic, minced
Honey -- generous squirt (No honey? Use maple syrup. What's really good is maple syrup and bacon or ham)
Sriracha -- to your liking
Salt
Ground black pepper

Preheat oven to 425. Combine all of the ingredients in a bowl. Spread onto a cookie sheet that has been sprayed with Pam. Bake at 425 for 20 minutes.

Friday, April 3, 2015

Are you ready for Easter?

Easter weekend has arrived! In celebration, I'm rounding up some of my favorite springtime recipes, perfect for your Easter gathering.

Let's get cooking!
Erin


Rhubarb Muffins: Rhubarb is the ruby announcement that Spring has arrived, and it absolutely shines in these lightened-up muffins.


Stuffed French Toast: Tangy cream cheese, sweet jam, and warm cinnamon make this an immediate brunch classic.


Apricot Mustard Glazed Ham: For me, Easter dinner isn't complete without ham. The apricot mustard glaze on this beauty is unbelievably simple and delicious. I made it just last week, and it's one of my all-time favorite meals.


Lamb Kabobs: If you live in a climate where it's warm enough to grill, these Mediterranean kabobs are for you.


Mom's Cheesy Potatoes: These potatoes are an essential accompaniment to ham. Salty, creamy, and crunchy, they will steal the show.


Crispy Parmesan Asparagus "Fries": Asparagus is the quintessential spring vegetable, and it's perfect for your Easter dinner table. Since these are "fries," you might even be able to convince your pickiest eater to try them.

Thursday, April 2, 2015

Lemon Buttermilk Cake

When Amy invited me for dinner and shared her plan to make Spring on Toast, I knew I needed to come up with a dessert that was equally seasonal. Well this Lemon Buttermilk Cake is a little ray of springtime sunshine.

Rich, dense, and moist, this not-too-sweet cake shines with the perfect amount of tang and zip from buttermilk and lemon. While the cake is lovely on its own, it begs to be smothered in berries and freshly whipped cream.

The husband and I have whipped cream in a can in our fridge at all times, but this cake calls for something special. Grab a carton of whipping cream at the grocery store and do it up right. If you haven't made your own whipped cream yet, don't be afraid! It's not difficult; you just need to keep an eye on it to make sure it doesn't turn into butter. (So don't turn on your mixer and go start a load of laundry.) And the ridiculously delicious flavor is absolutely worth the five minutes of effort.

When you're getting ready for your next Spring gathering (Easter, perhaps?), let this Lemon Buttermilk Cake be the star of your menu.

Let's get cooking!
Erin


Lemon Buttermilk Cake
Adapted from Real Simple and this Lemon Pound Cake

2 cups flour, plus extra for the pan
2 teaspoons baking powder
1/4 teaspoon salt
1/2 cup (1 stick) butter, melted
1 1/2 cups sugar
3/4 cup buttermilk
2 eggs
1 tablespoon grated lemon zest
1/4 cup lemon juice (from about 1 large lemon)
1 teaspoon vanilla extract
Lightly sweetened berries, for serving
Whipped Cream, for serving (recipe below)

Preheat oven to 350 degrees. Grease a 9" x 5" loaf pan and dust with flour, tapping out excess. Set pan aside.

In a large bowl, whisk together flour, baking powder, and salt. Set aside.

In a separate bowl, whisk together melted butter, sugar, buttermilk, eggs, lemon zest, lemon juice, and vanilla. Add wet ingredients into the dry ingredients and whisk everything together.

Pour batter into prepared loaf pan. Bake in preheated oven until a toothpick inserted into the center comes out clean, about 1 hour. Cool in the pan for ten minutes, then transfer to a rack to cool completely.

Serve with lightly sweetened berries and whipped cream.


Whipped Cream

1 cup heavy whipping cream
2 tablespoons powdered sugar
1 teaspoon vanilla extract

Put the bowl of your electric mixer and the whisk attachment in the freezer for about 10 minutes. (This will help your cream whip up more easily.) Add whipping cream, powdered sugar, and vanilla to the cold bowl. Turn the mixer to medium speed until the cream starts to get a bit bubbly, about 1 minute. Crank up the speed to high and whip until soft peaks form, about 1-3 minutes longer.

Heads-up: Be careful not to whip the cream too much or it will actually turn into butter. And, yes, I did learn this the hard way.

Wednesday, April 1, 2015

Chicken Stock & Chicken Tortellini Soup

I'm all for the convenience of packaged chicken broth, but I do enjoy the sense of accomplishment that comes with cooking from scratch – especially when the process naturally follows a meal I'm already making.

The next time you roast a chicken leave a little meat on the frame and make yourself some chicken stock. It's almost as easy as boiling water – seriously!

You can flavor the broth with whatever herbs and vegetables you have on hand. Experiment until you find a combination you like best. When you're done, you'll have enough chicken stock to make a fragrant Chicken & Tortellini soup (recipe below), plus more to pop into the freezer for later – about 10 cups in all.

P.S. What's the difference between broth and stock, you ask? Traditionally, stock is made from bones. The collagen in the bones breaks down into a gelatin that adds body and a thicker texture to the liquid. Broth is made from meat and seasonings. Since I use both meat and bones to make this soup base, I'm using the terms broth and stock interchangeably.

Mangia! Mangia!
Andrea


Chicken Stock

1 frame from a 4 to 5 pound chicken
1 large white onion, peeled and cut in quarters
1 shallots, peeled and cut in half
3 peeled carrots
3 celery stalks
2 o 3 crushed or minced garlic cloves
1 lemon, halved
Fresh herbs sprigs, tied into a bouquet with kitchen twine: thyme, rosemary, oregano, parsley or whatever you have on hand
Salt and pepper to taste

Place chicken frame in a 6-quart pot. Add vegetables, herbs and salt and pepper. Fill pot with water to cover chicken frame. Cover pot with lid. Bring to a boil and maintain a rolling boil for about 30 minutes. Lower heat to simmer and cook for 4 hours or longer, keeping pot partially covered.


Let broth cool. Skim any fat from top. Remove chicken frame, vegetables and herbs from pot and discard. Place a colander on top of a large pot or bowl and pour stock through strainer. (You could also use cheesecloth in this step.)

You can use your broth right away or place broth into a covered pot or container and refrigerate overnight. The next day, skim off any fat on the surface. Now you have a delicious base for soup.

Chicken & Tortellini Soup

9 ounces cheese tortellini
4 cups chicken stock
2 cups cooked chicken, shredded or cubed
Salt and pepper to taste
Optional: 4 ounces spinach, Swiss chard or baby kale
Grated or shaved parmesan cheese for garnish

Cook tortellini according to package directions. While tortellini cooks, heat broth on stove top in medium to large pot. Add tortellini and chicken to hot stock and heat through. If using greens, stir them into soup just until wilted.

Ladle servings into bowls and top with parmesan.